Upcylced Filament Spool Lamp - ESP32, Alexa, MQTT, Hue & Sound Reactivity
How to build your own Filament Spool Smart Lamp
Over time I have collected a few empty spools which for some reason always seemed to good to just let the local council recycle them. Now it’s time to make something with them.
A filament spool lamp is not a new idea, but I wanted to add some additional features using the ESP32 tucked away inside the base which allows for some cool sound synced shiny shows or MQTT, Hue and Alexa integrations.
Naturally, this can be controlled from any device via wifi using WLEDs web interface or several free apps found on the app stores. Though sometimes it’s easier and quicker to physically adjust a lamp so I’ve integrated a discrete dimmer control right into the top of the project which allows you to easily adjust the brightness or switch the lamp off whilst a hidden button on the underside lets you change between your preferred lighting patterns with a simple click, whilst a longer hold switches over to sound sensitive party performance mode.
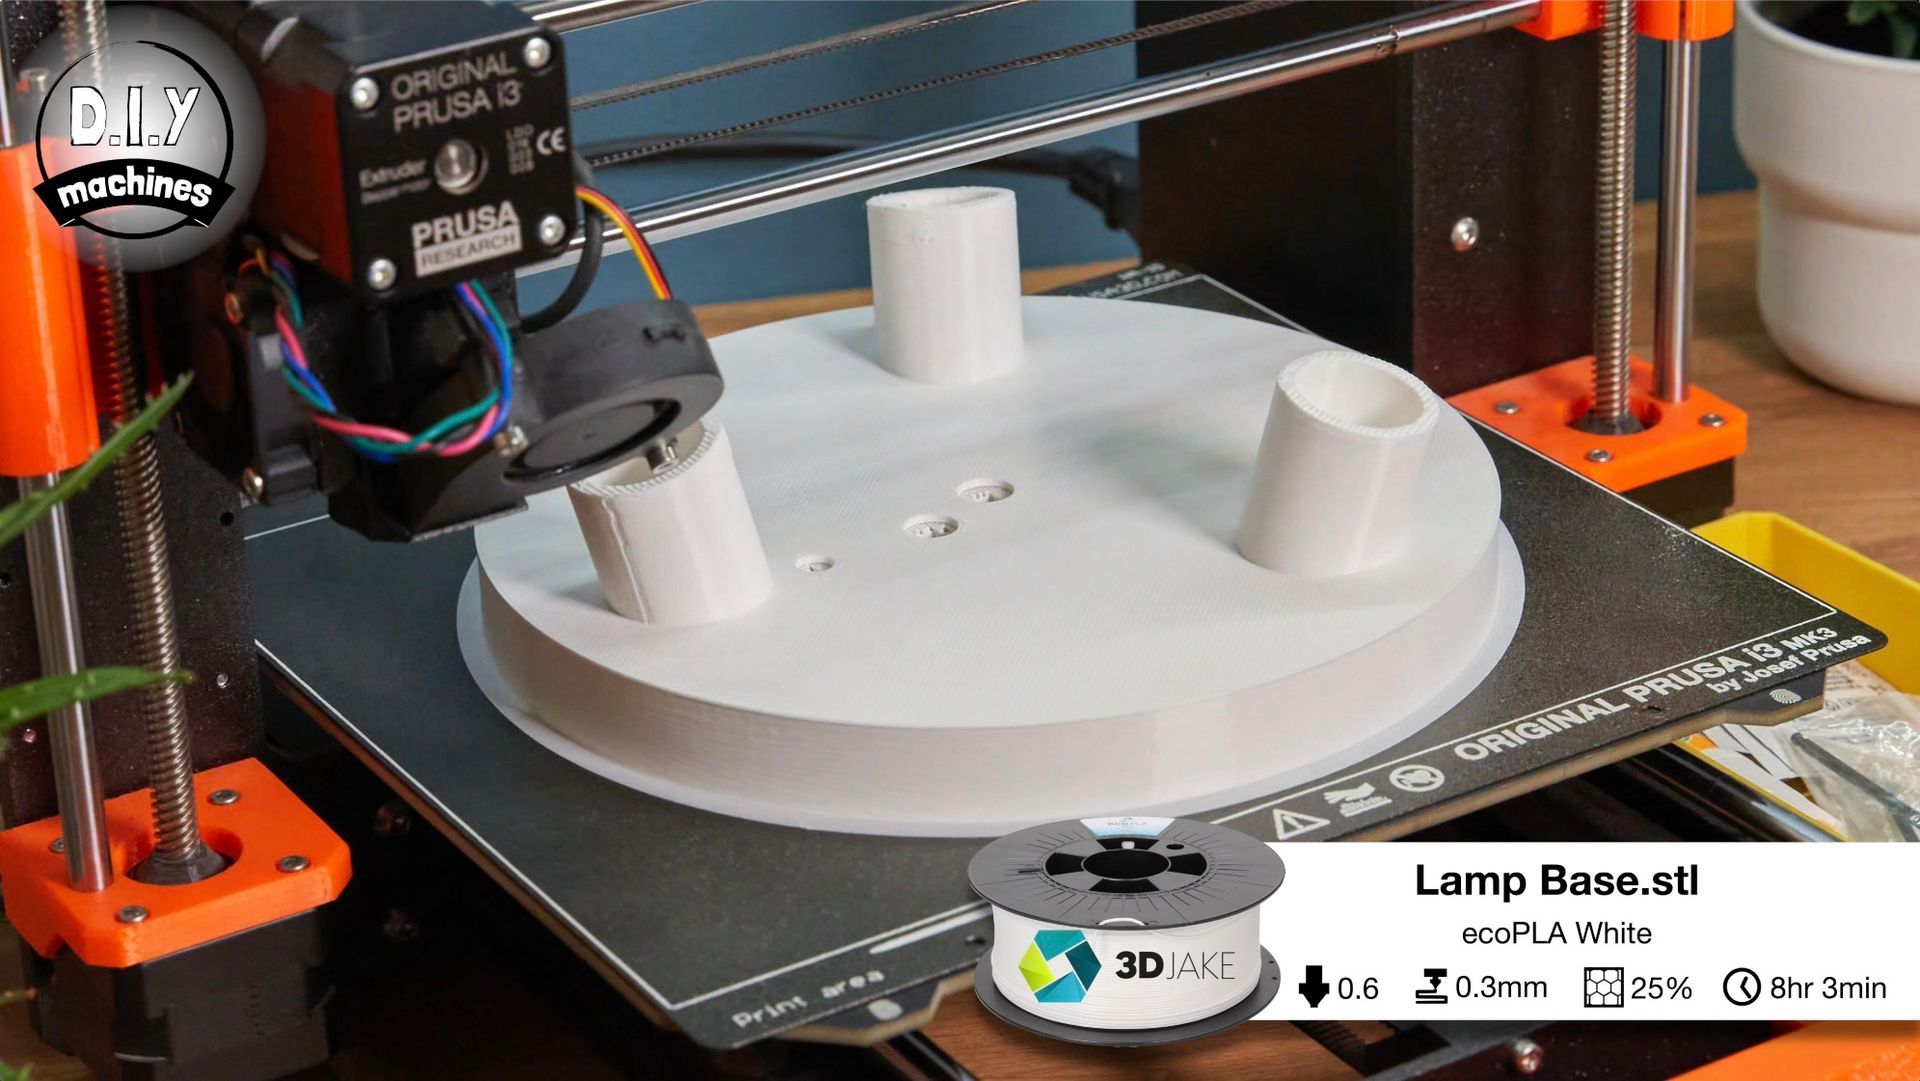
I used broom handles for legs which makes this very affordable, and everything else is 3D printed.
I’ll also show you three ways of dealing with the power cable, leave it free hanging, 3D print some wire clips or recessed inside one of the legs.
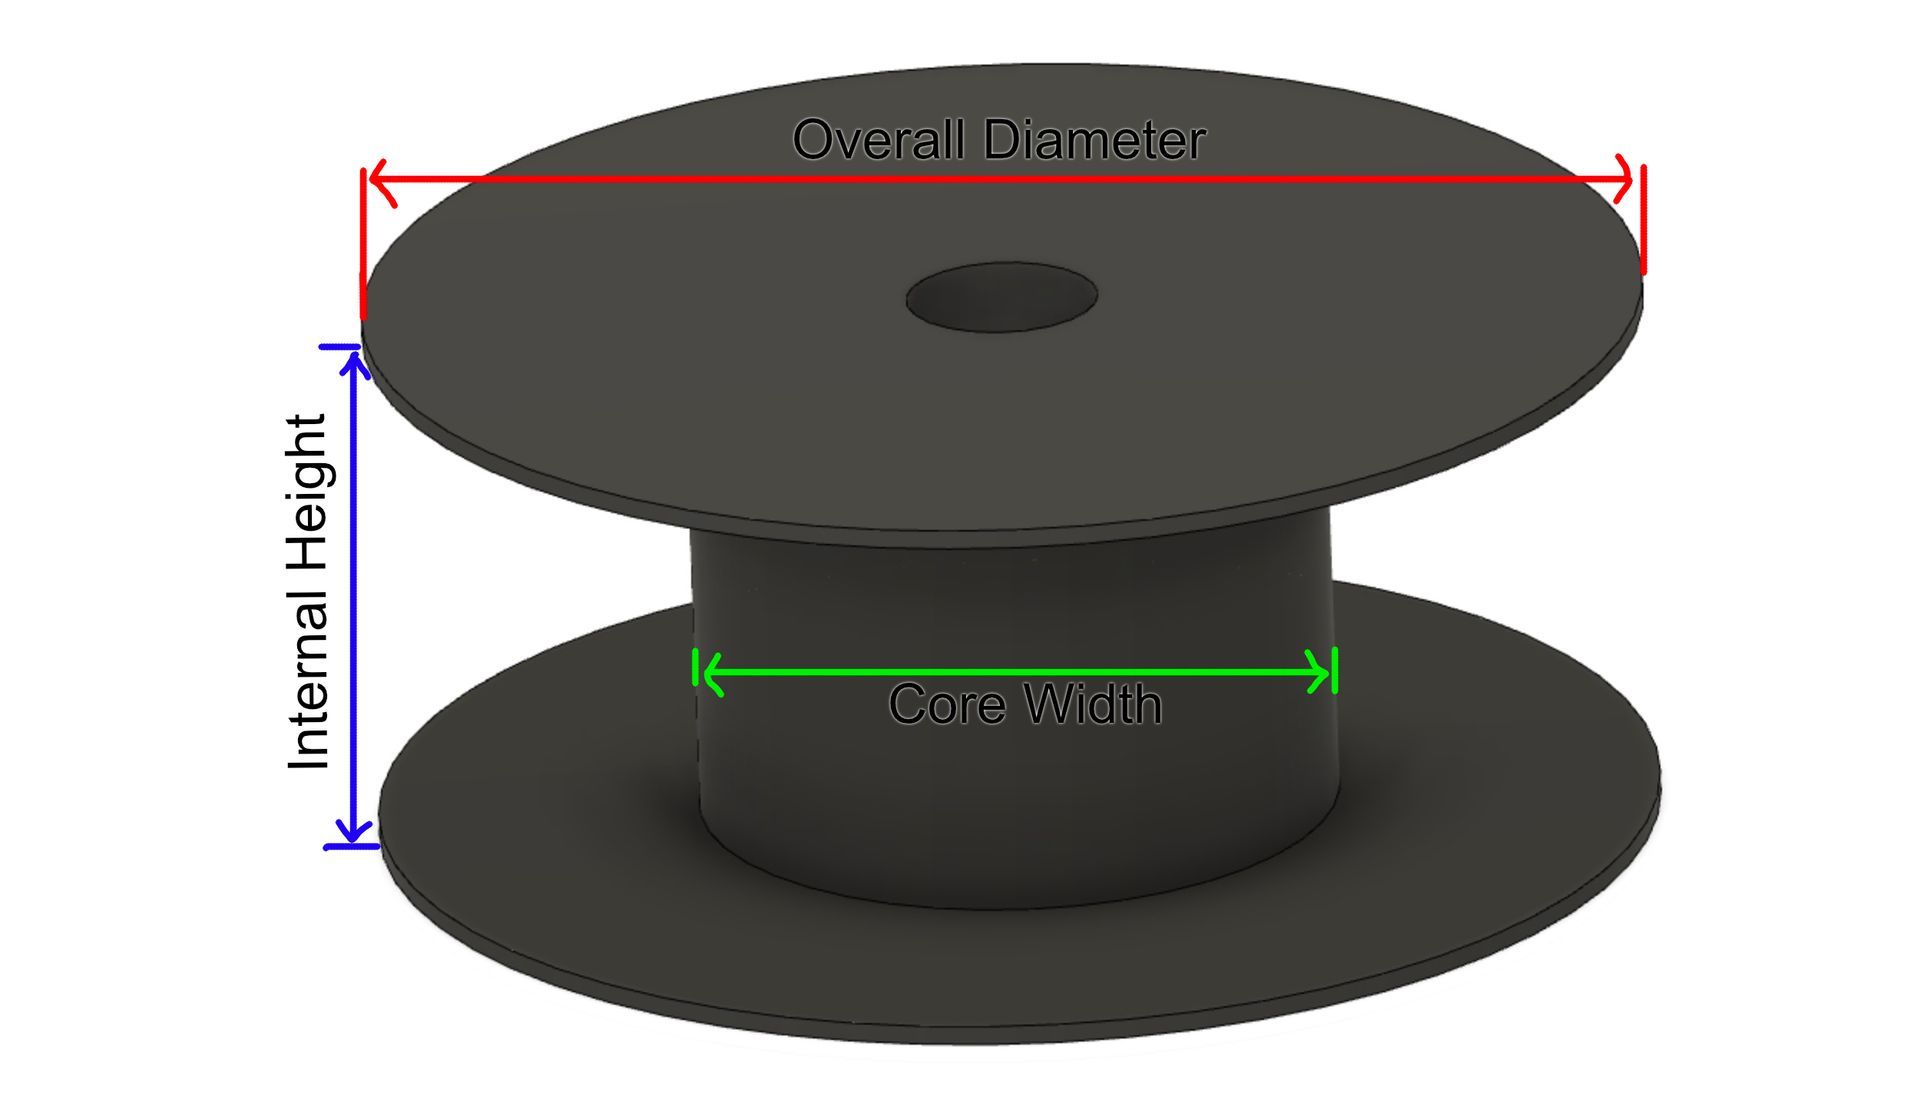
Now you may be thinking correctly that filament spools come in all shapes and sizes. So to accommodate this I have designed and freely published a parametric model which you can download (linked below) - you then simply enter these values into a table and the model will adjust and produce the parts you need to print for your own lamp.
Full details for adjusting this model in the free version of Fusion 360 are available further down the page. 🙂


Downloads:
3D models for printing: https://www.printables.com/@DIYMachines/models
WLED Code for project (use Chrome web browser for the best experience): https://install.wled.me/
Customisable Fusion 360 Project File & Pre configured WLED file:
List of items used in this project and where to find them / BOM:
Kit of electronic parts: https://www.etsy.com/listing/1444900974
- ESP32 Dev Board (x1): https://geni.us/ESP32
- INMP44 Microphone (x1): https://geni.us/INMP441
- WS2811 12v LEDs: https://geni.us/WS2811-60
- DC to DC Buck converter (Mini 360 - x1): https://geni.us/Mini360
- Potentiometer 5k (x1): https://geni.us/Potentiometers
- 1k Resistor (x1): https://geni.us/Ufa2s
- Tactile Button 12mm high (x1): https://geni.us/12mmTallTactile
- Logic Level Shifter (74AHCT125): https://geni.us/74AHCT125-LLS
- Barrel connector suitable for at least 5amps https://geni.us/HighAmpDCBarrel
- Wooden Rods / Broom Handles: https://geni.us/WoodenBroomHandle
- 3D Printer Filament: https://www.3djake.uk
12v Power Supply (allow 0.7amps at least for every 10 LEDs):
- (6 amp+): https://geni.us/12VPowerSupply6A
- (2 amp): https://geni.us/12VPowerSupply2A
or optionally
- PermaProto Board: https://geni.us/HalfPermaProto
- Wago Connectors for power lines: https://geni.us/Wago2
You can order a kit of the electronics, screws and pcb on my international Etsy store: Spool Lamp Kit
Nuts, bolts and screws needed:
- M3 x 8mm (x3) (for a attaching PCB)
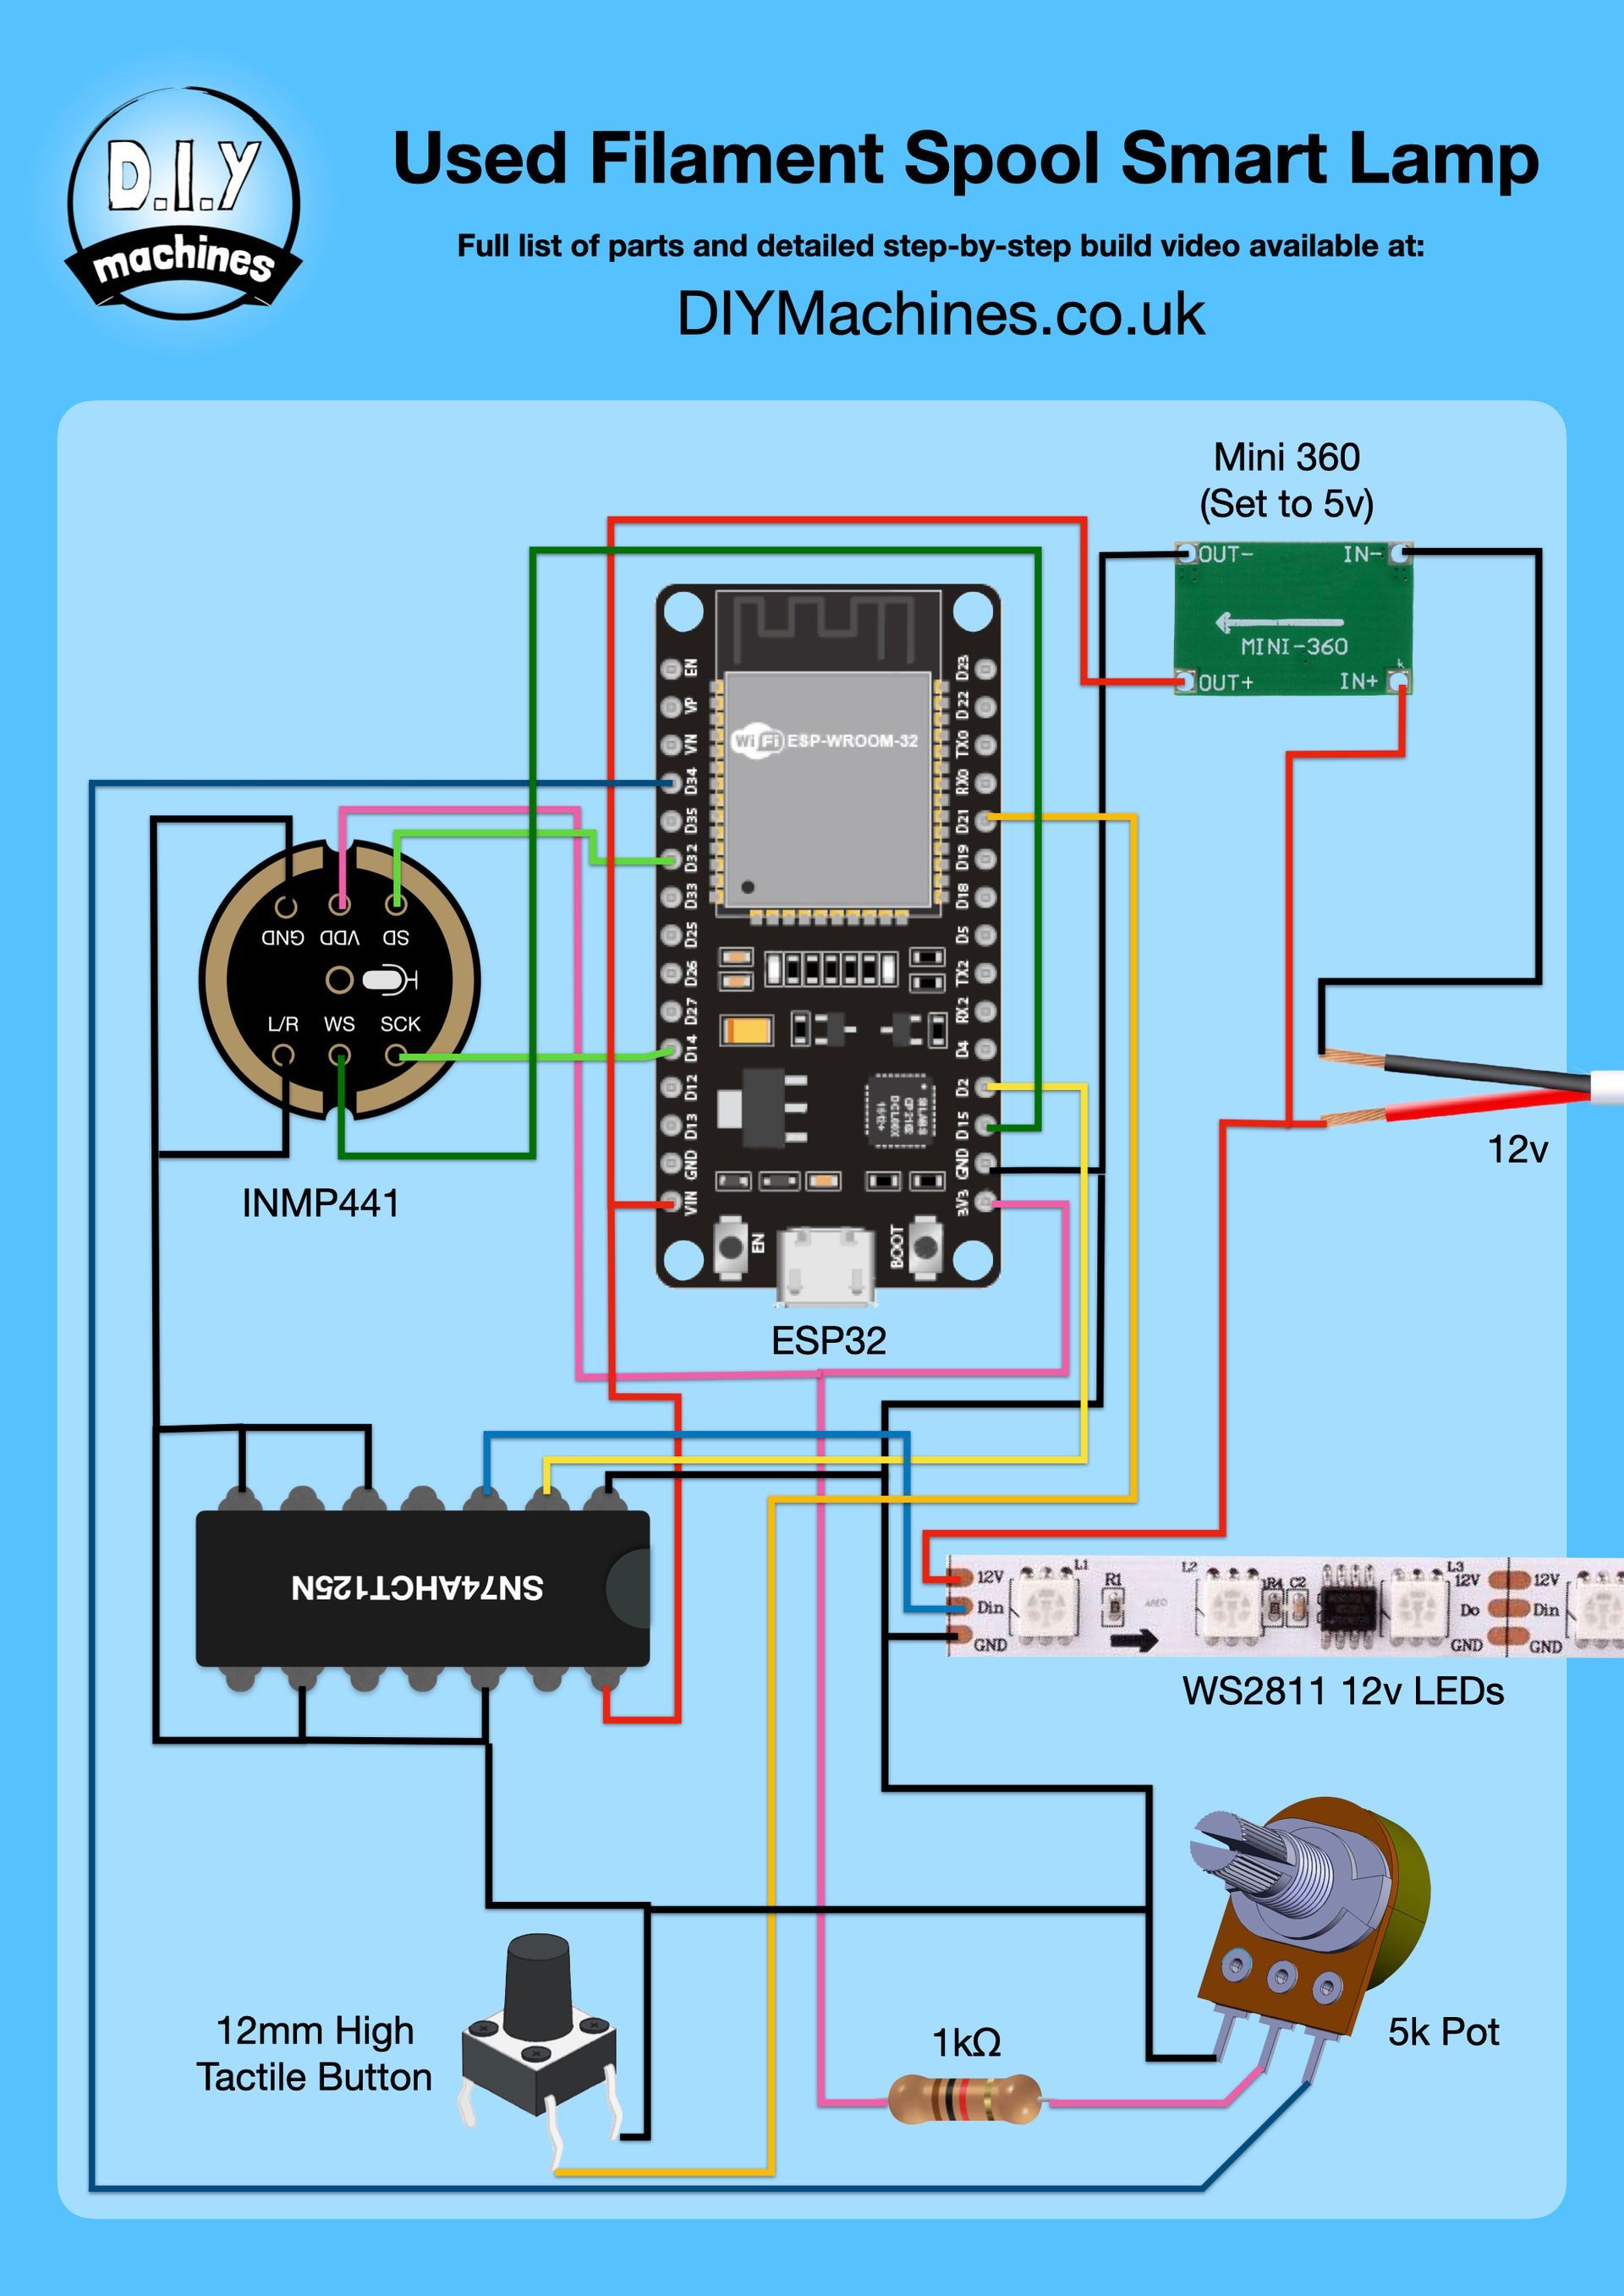
Wiring Diagram:
Modifying the Fusion 360 File to suite your Filament Spool Size
You will need. copy of Fusion 360 to be able to edit the model for this project. If you already have it, great. If not, you can download a free version for personal use here: https://www.autodesk.co.uk/products/fusion-360/personal
After you have access to Fusion 360 sorted we can go ahead and download the project file for the lamp using the link here:
Once you have downloaded the project file we will need to upload it to Fusion. This is simply a case of choosing 'File' -> 'Upload' from the main menu
Locate the project file you dowloaded and choose a location in Fusion 360 to save the upload. When the upload process has completed we can go ahead and open the file to begin some super simple editing.
At the top of the menu bar is a button which opens a table for editing parameters - it looks like an italic 'fx'. Pressing this will reveal the table of parametric values.
In this table you can update the value under the column titled 'Expression'. As you update the values you will see the model updating itself to reflect the changes. (All values can be updated but I would not adjust 'AngleOfLegs' or 'DistanceLegsFromEdgeOfBase' unless you are confident in updating features and sketches in the timeline of the model as these are most likely to 'break' the design intent of the model.)
For reference these are the values which can be measured from the spool you are utilising:
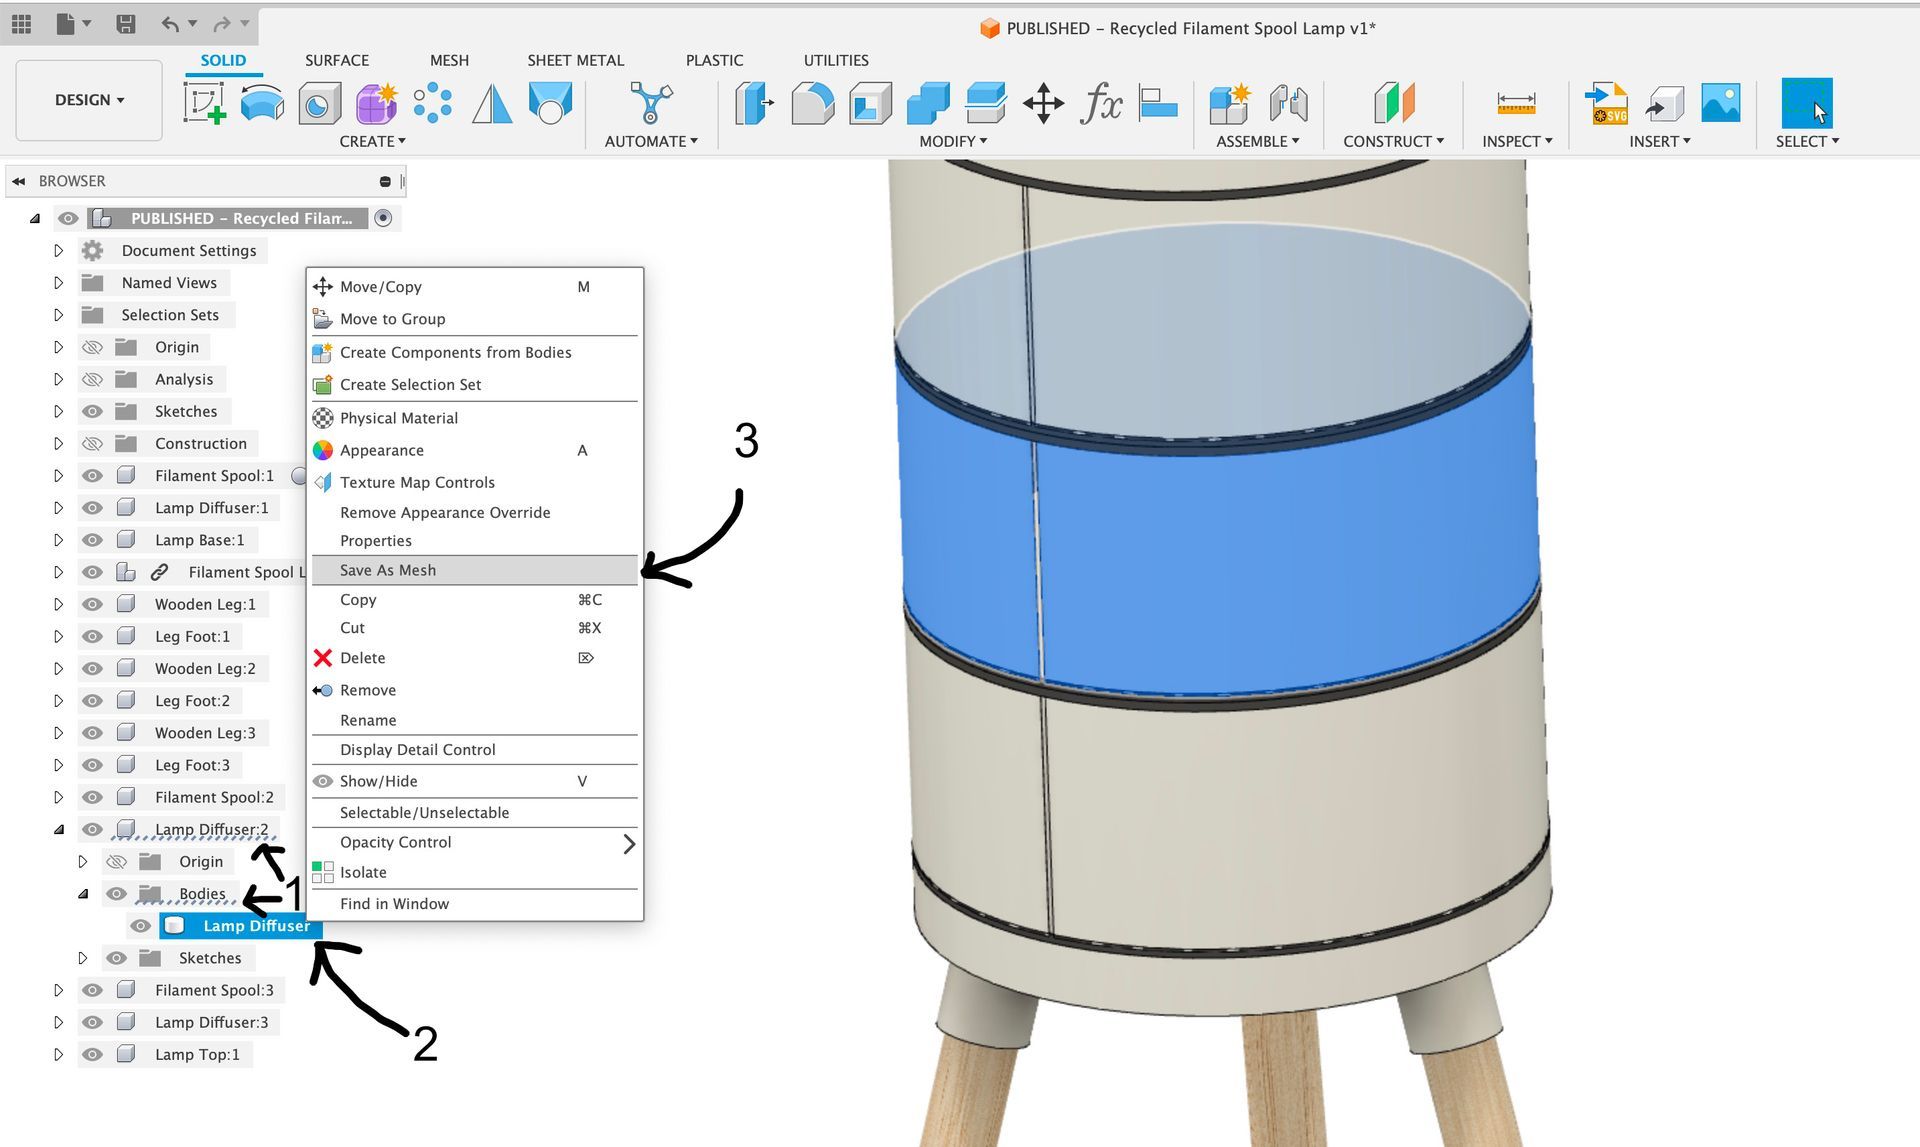
After you have finished updating the dimension in the table you can export individual parts from the model as STL's and then take these to your slicer of choice to prepare for 3D printing. The easiest way to do this is to click on the part / body you wish to export. Then in the hierarchy on the side you will see a squiggle (1) showing you where the part you have selected reads, expand the tree until you find the part nested inside the 'Bodies' folder'. You can then right click the part (2) in the hierarchy and choose to 'Save as Mesh' (3).
As a reminder, the only part that requires support to be enjambed is the 'Lamp Base' (the part which the legs connect to and in which the electronic circuits reside).
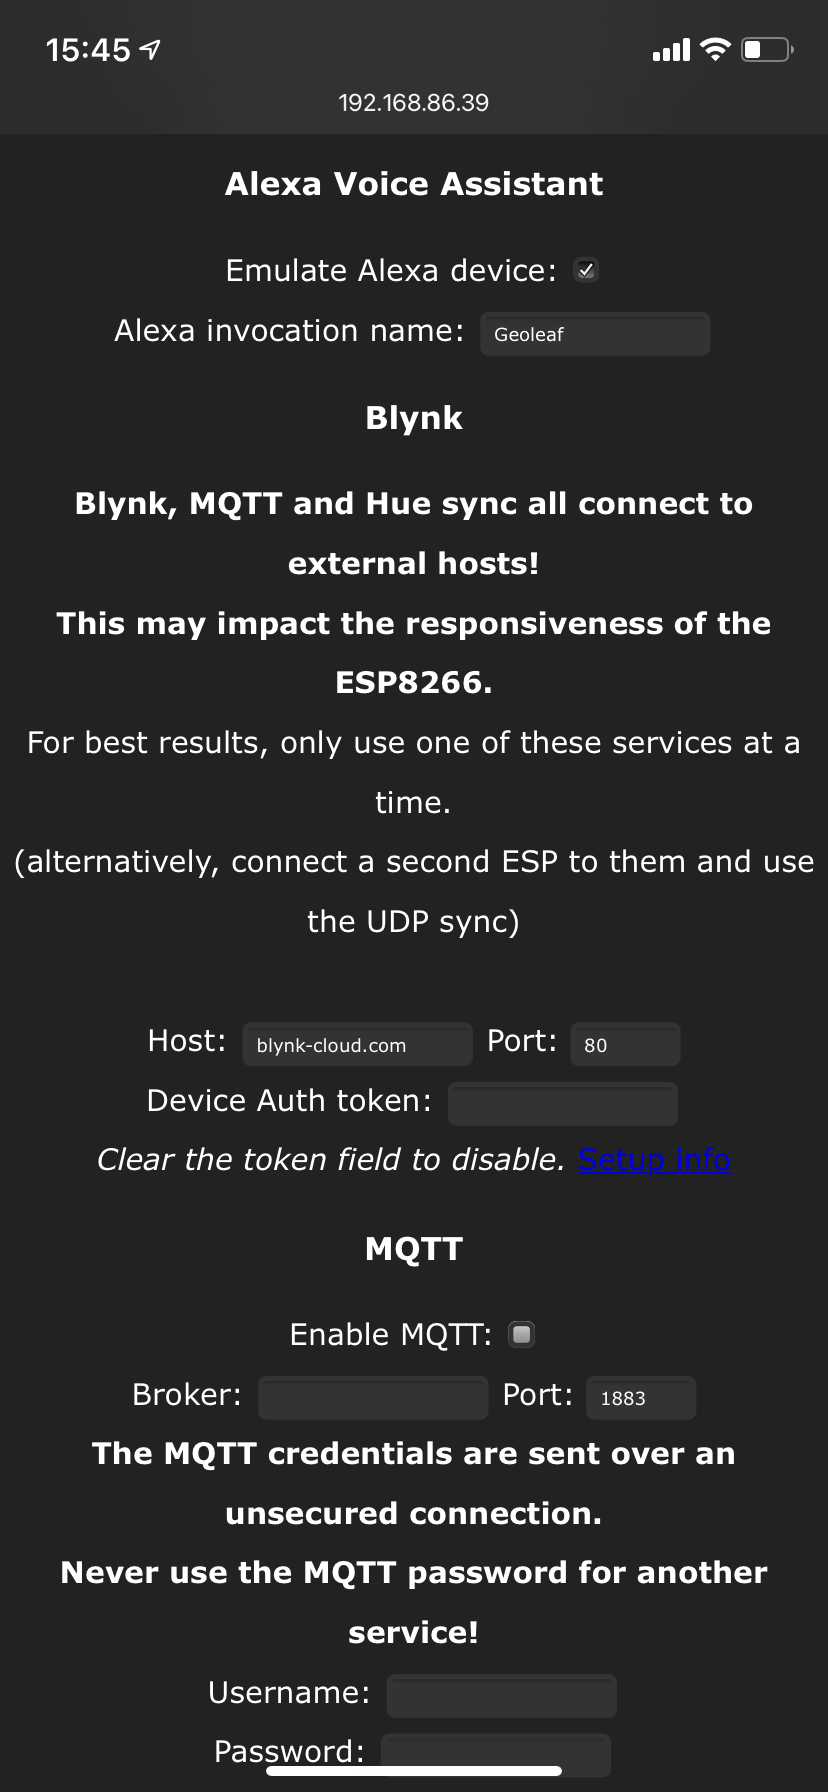
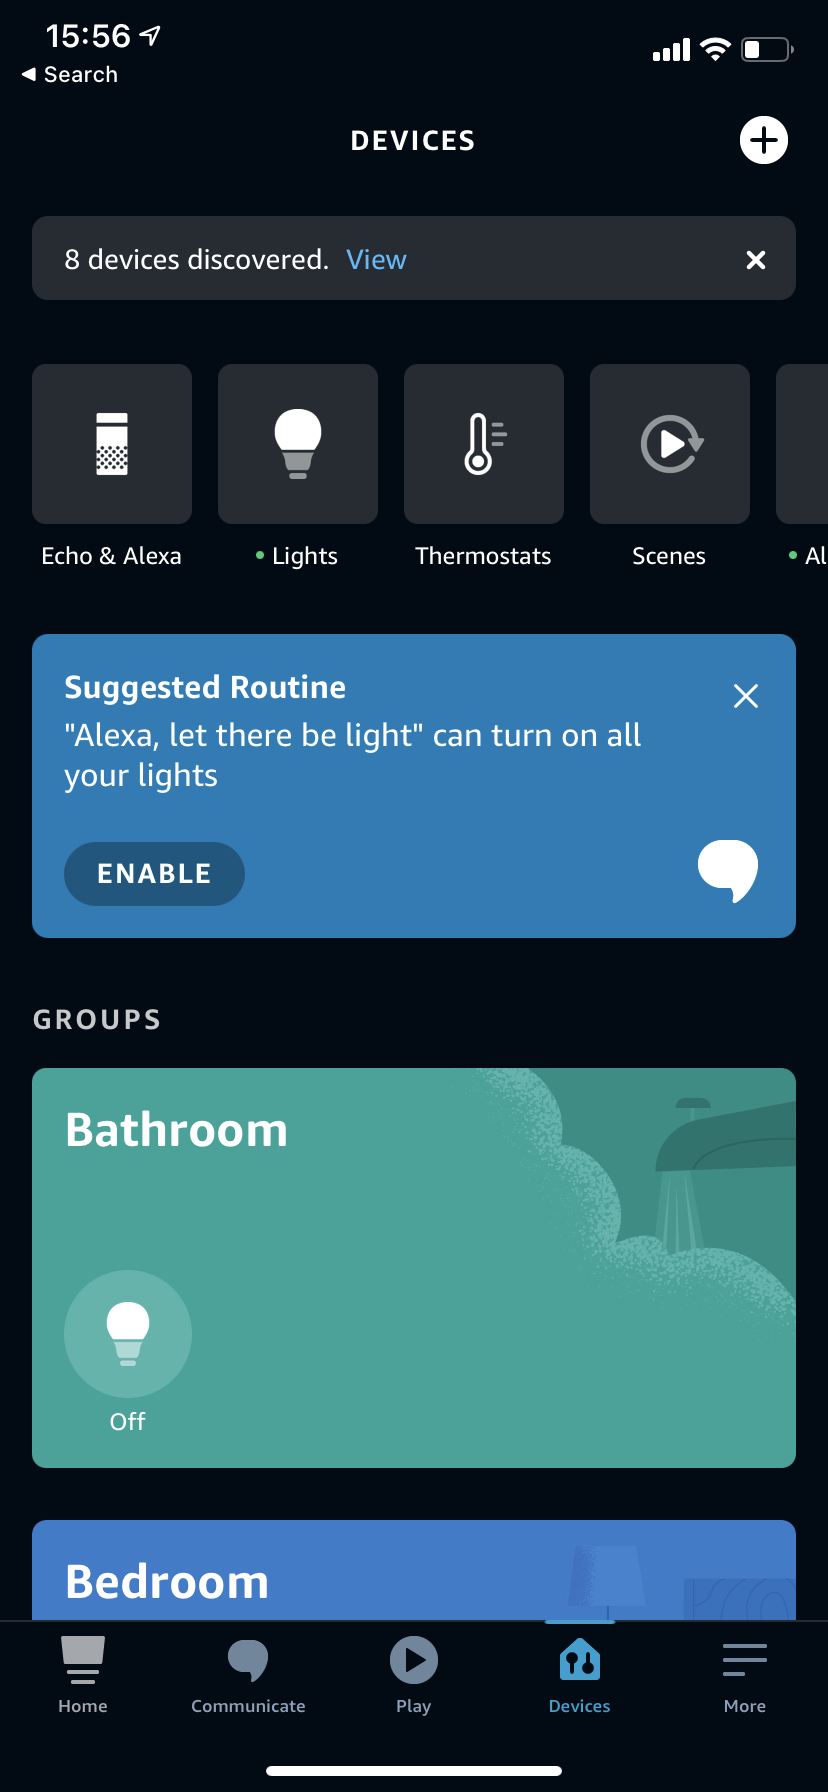
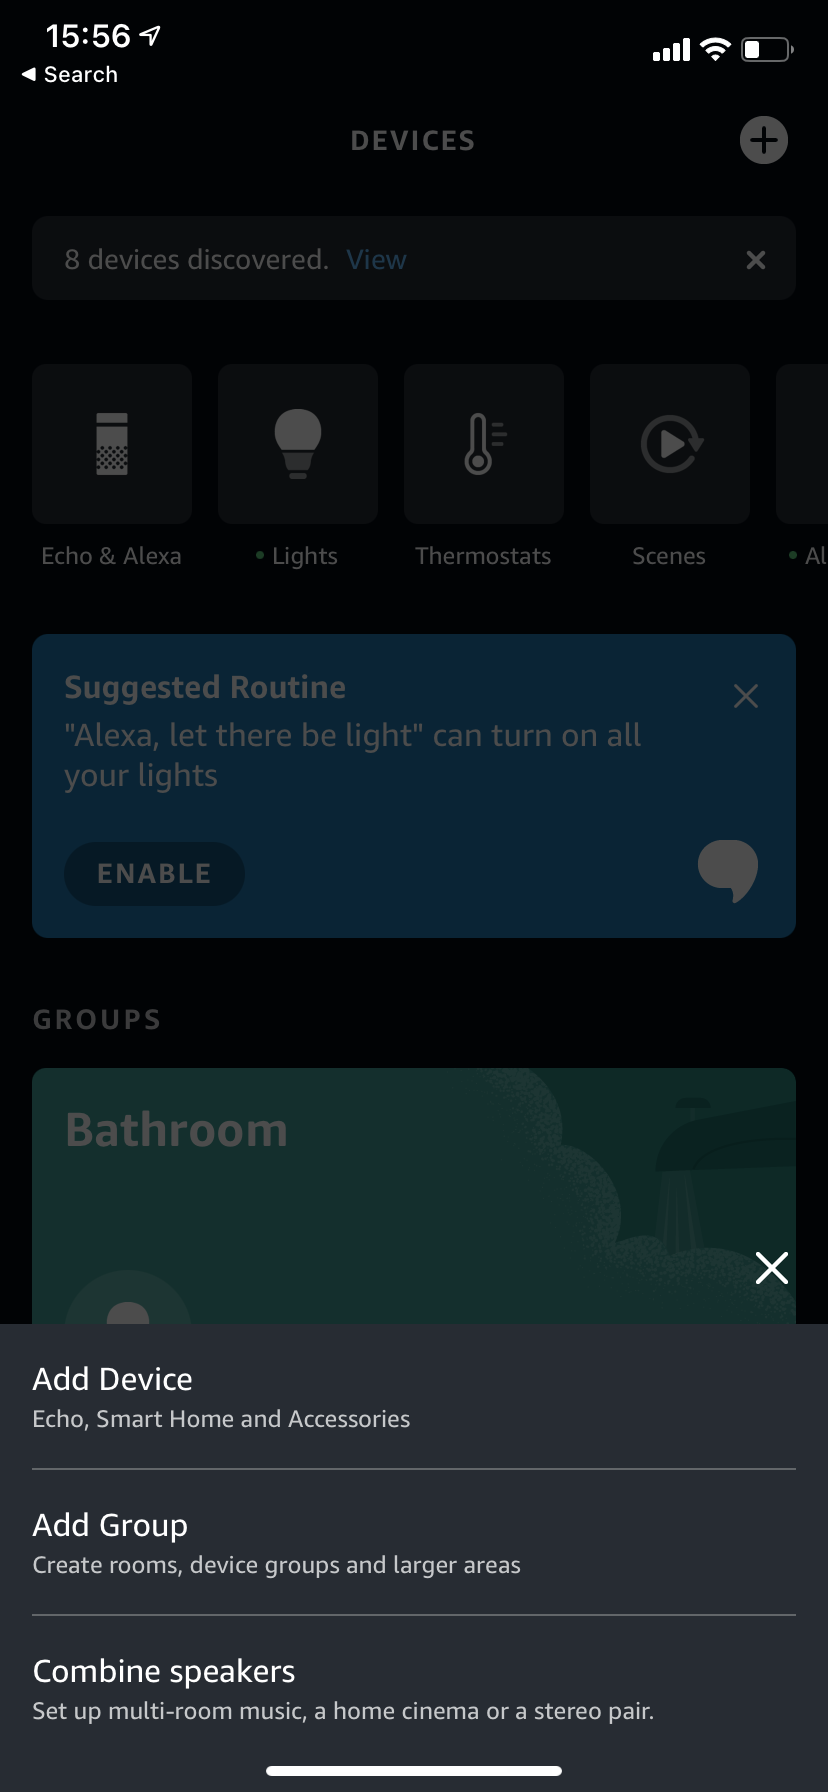
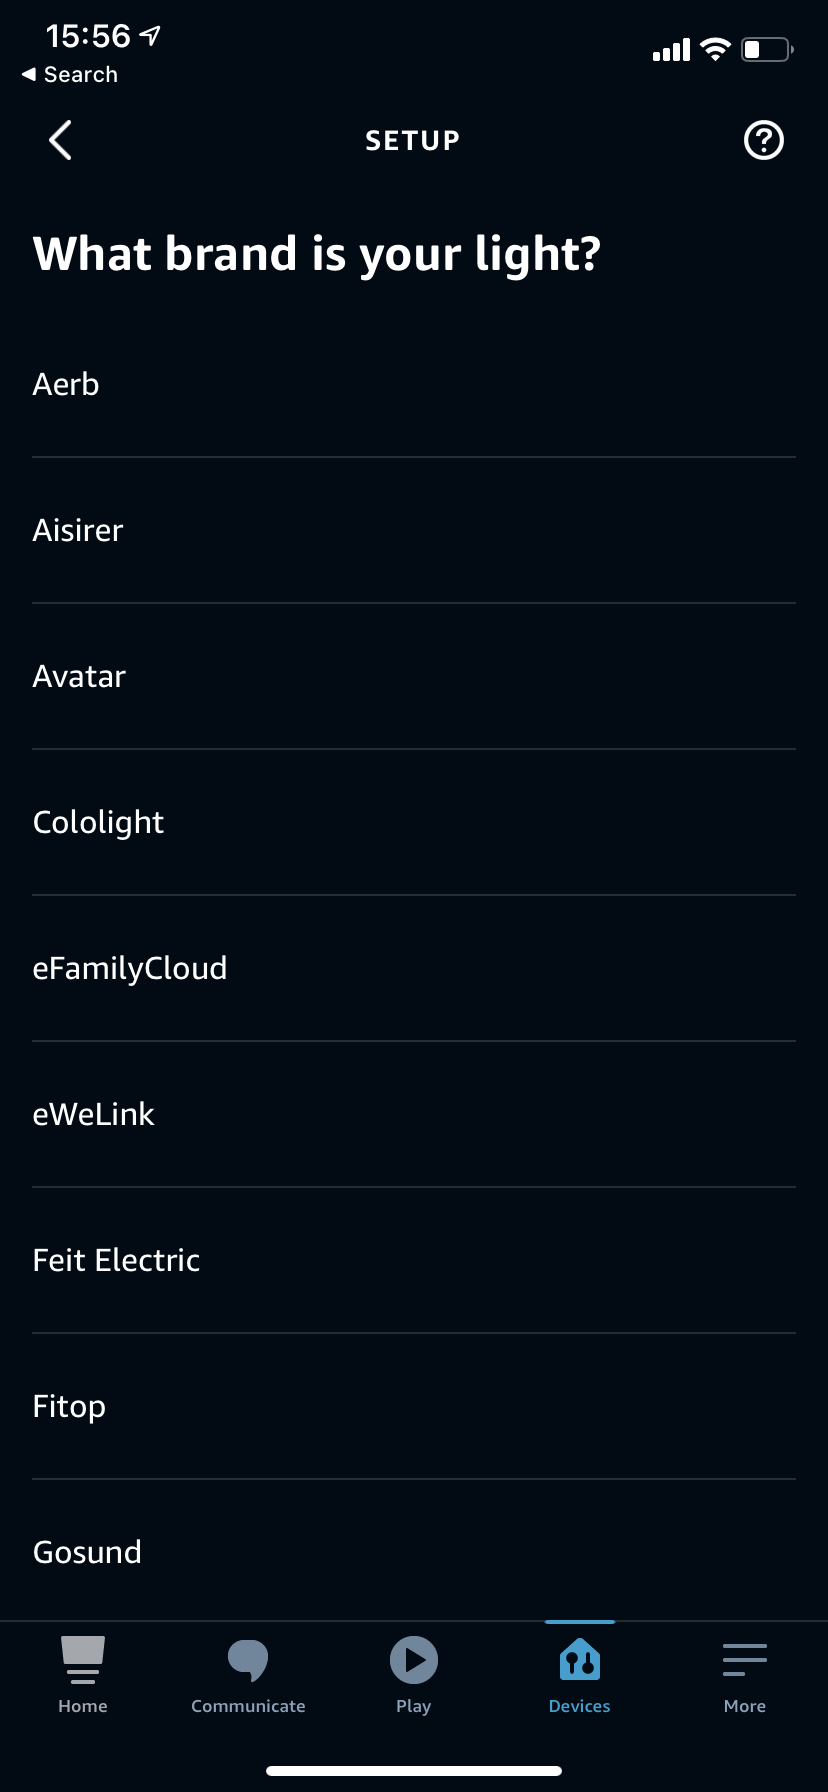
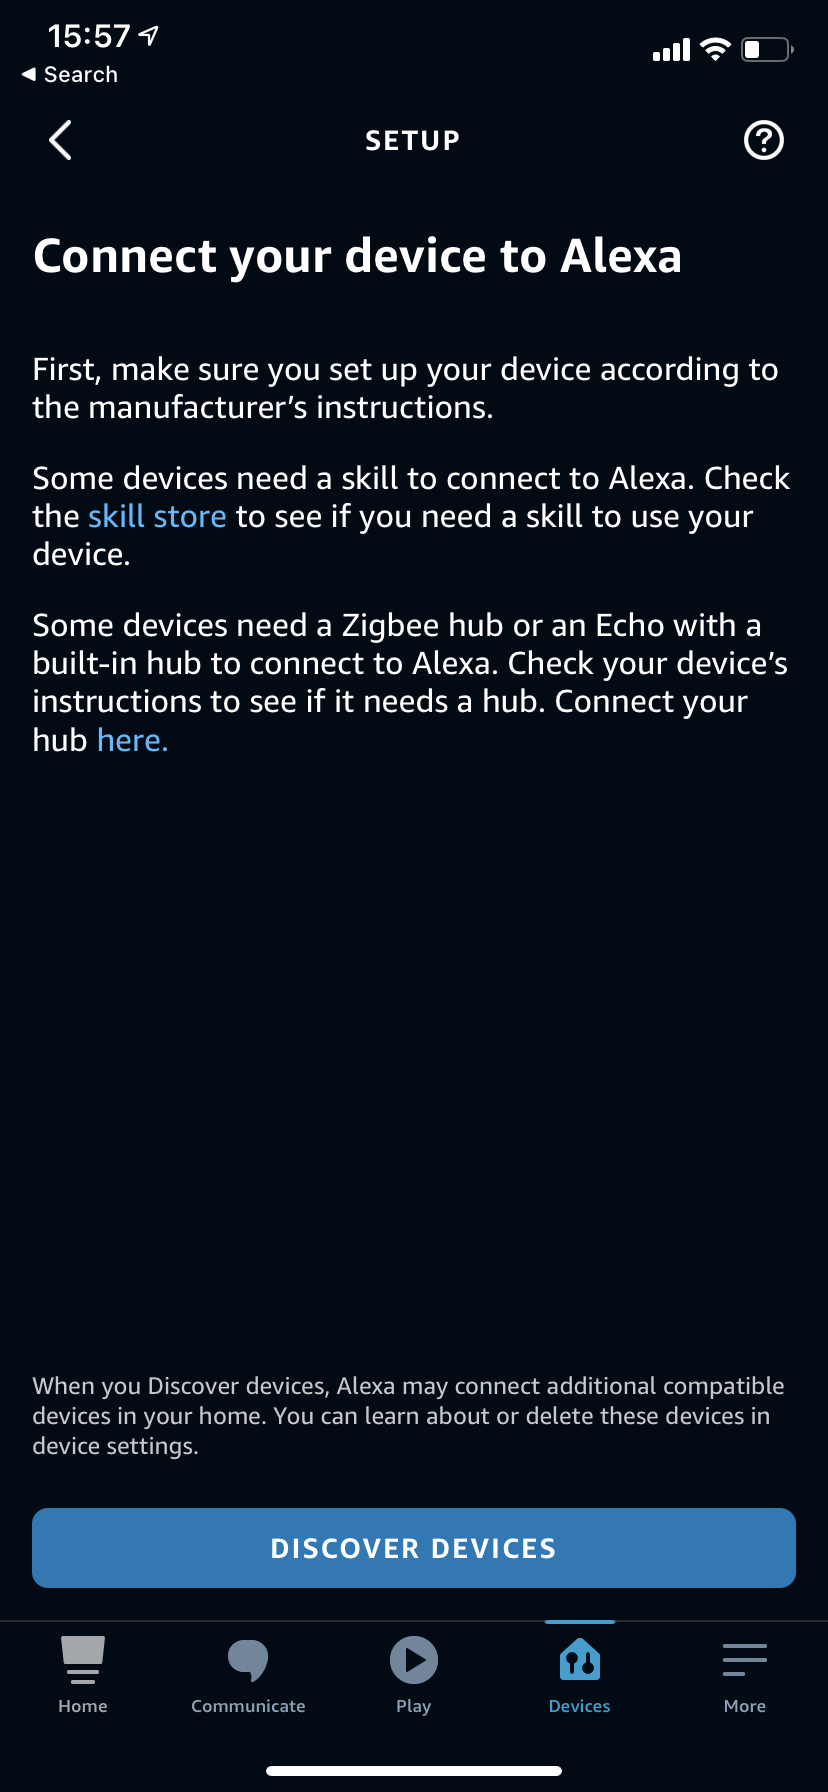
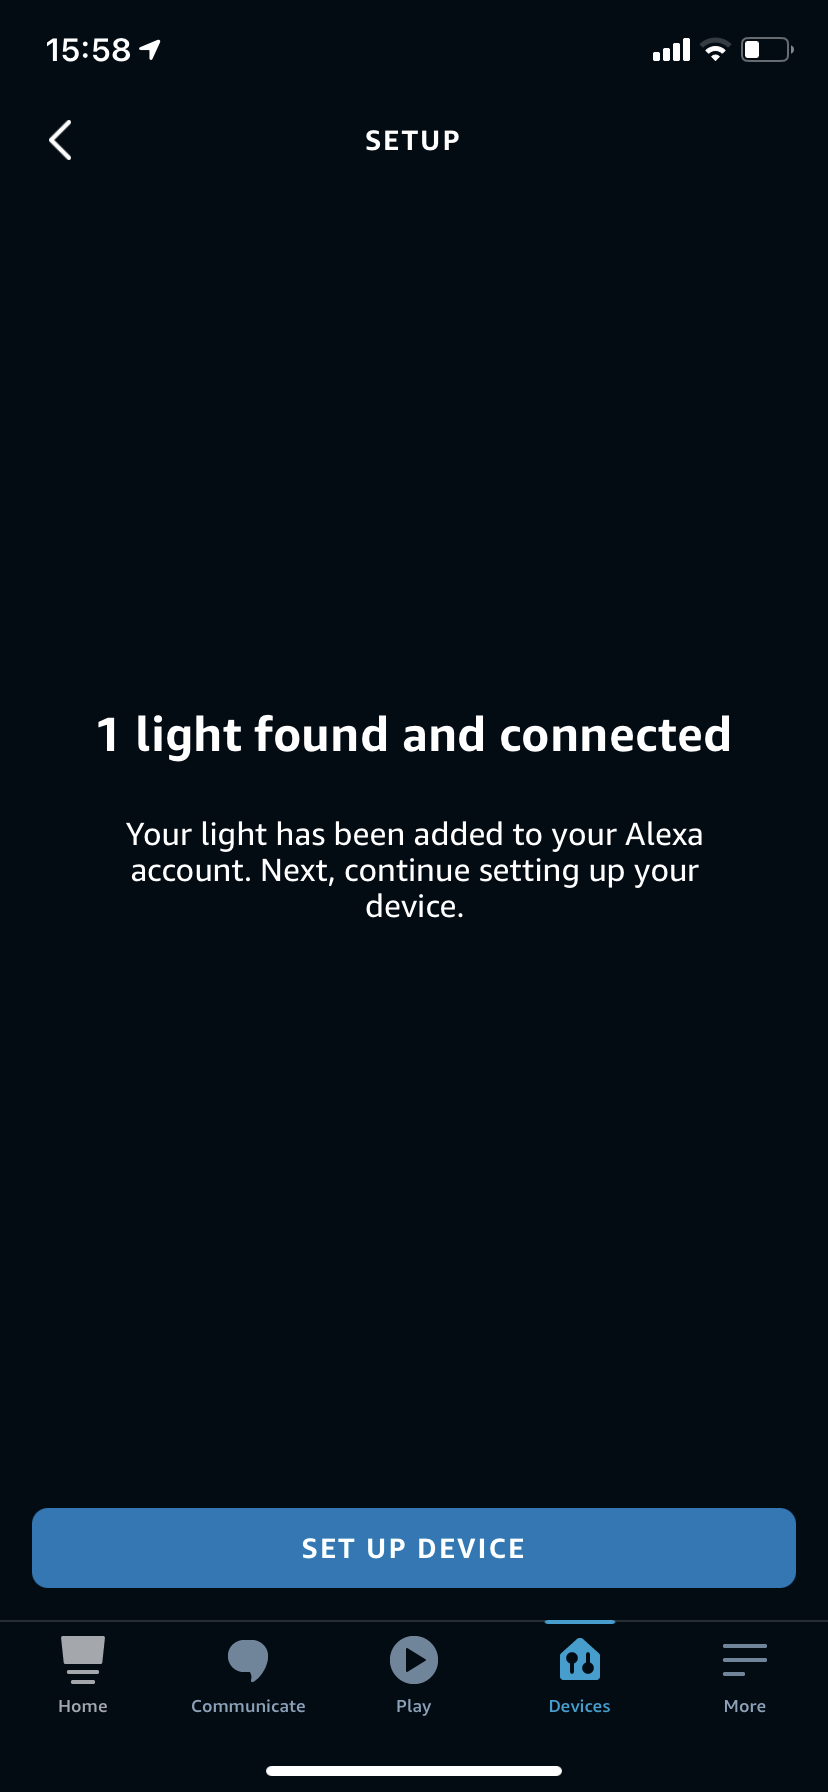
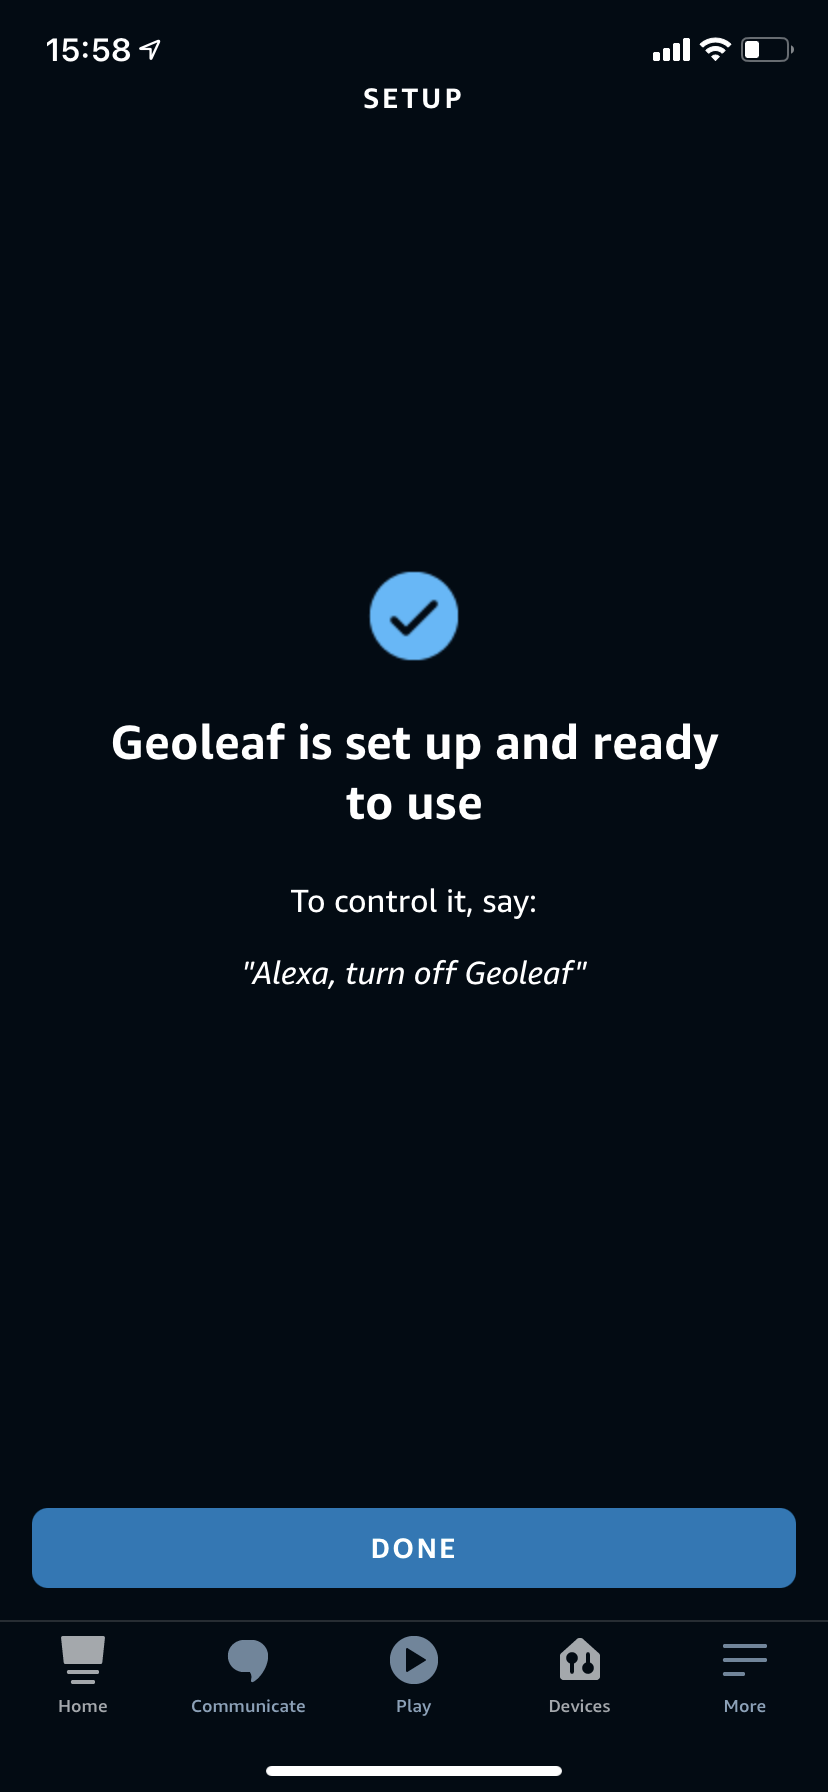
Integrating with Amazon Alexa
The Smart Lamp project can be integrated with Amazon's Alexa voice assistant service to allow you to control the colour, brightness and toggle the panels on and off with your voice. This option also allows you to further integrate it into other services such as IFTT's routines. It is very easy to add:


Integrating with Philips Hue
Integration with Philips Hue's smart lighting system is a little more involved than the Alexa integration shown above. To integrate with Hue we will have the project poll the Hue Bridge regularly and ask it about the status of one of your existing lights. The Geoleaf project will then try to replicate the settings of this build as closely as it can. For example, my Geoleaf panels are in my office and I have t follow the brightness of my ceiling light bulb. This way it switches on and off when I enter and leaf my home office space.
Here is some documentation provided on the official Wiki for WLED: https://github.com/Aircoookie/WLED/wiki/Philips-hue-sync
and here is some documentation from Philips Hue on interacting with your Hue bridge to find bulb IDs which you need to enter int the WLED app: https://developers.meethue.com/develop/get-started-2/. Both of these resources might help you with this integration but here is a super concise run through of what is required:
- Find the IP address of your Hue bridge by either clicking here(if you're on the same network at the moment) or by opening the Hue app, go to the settings menu, go to Hue Bridges, select your bridge and note its IP address.
- In a web browser navigate to: https://<bridge ip address>/debug/clip.html (ensuring you substitute your IP address). This will open the 'CLIP API Debugger' of your Hue Bridge.
- To be able to ask for more sensitive information about your Hue system you need to ask for a username to prove who we are. Do this by entering the following into the fields of the API Debugger:
URL = /api
Message Body = {"devicetype":"my_hue_app#geoleaf"}
And then press the 'POST' button. This should return an error saying 'link button not pressed'. This is a security step to ensure you should be allowed access to your Hue data. Press the physical button on top of your Hue Bridge and then press 'POST' again.
This time it will generate unique username for you. Note this down - it will be a long string of letters and numbers. - This time enter the following information into the fields:
URL = /api/YOUR-UNIQUE-USERNAME
And press the 'GET' button. This will return all the information about your Hue system. - This information can then be copied from the results and pasted into a JSON viewer such as http://jsonviewer.stack.hu. From here you can find the bulb you would like to mimic, take note of its ID and enter this into WLED.
FAQ / Support
Discord sever for project: https://discord.gg/XveRaSxamG
Comments