Giant Modular Seven Segment Display
How to build a super-sized expandable Seven Segment Display
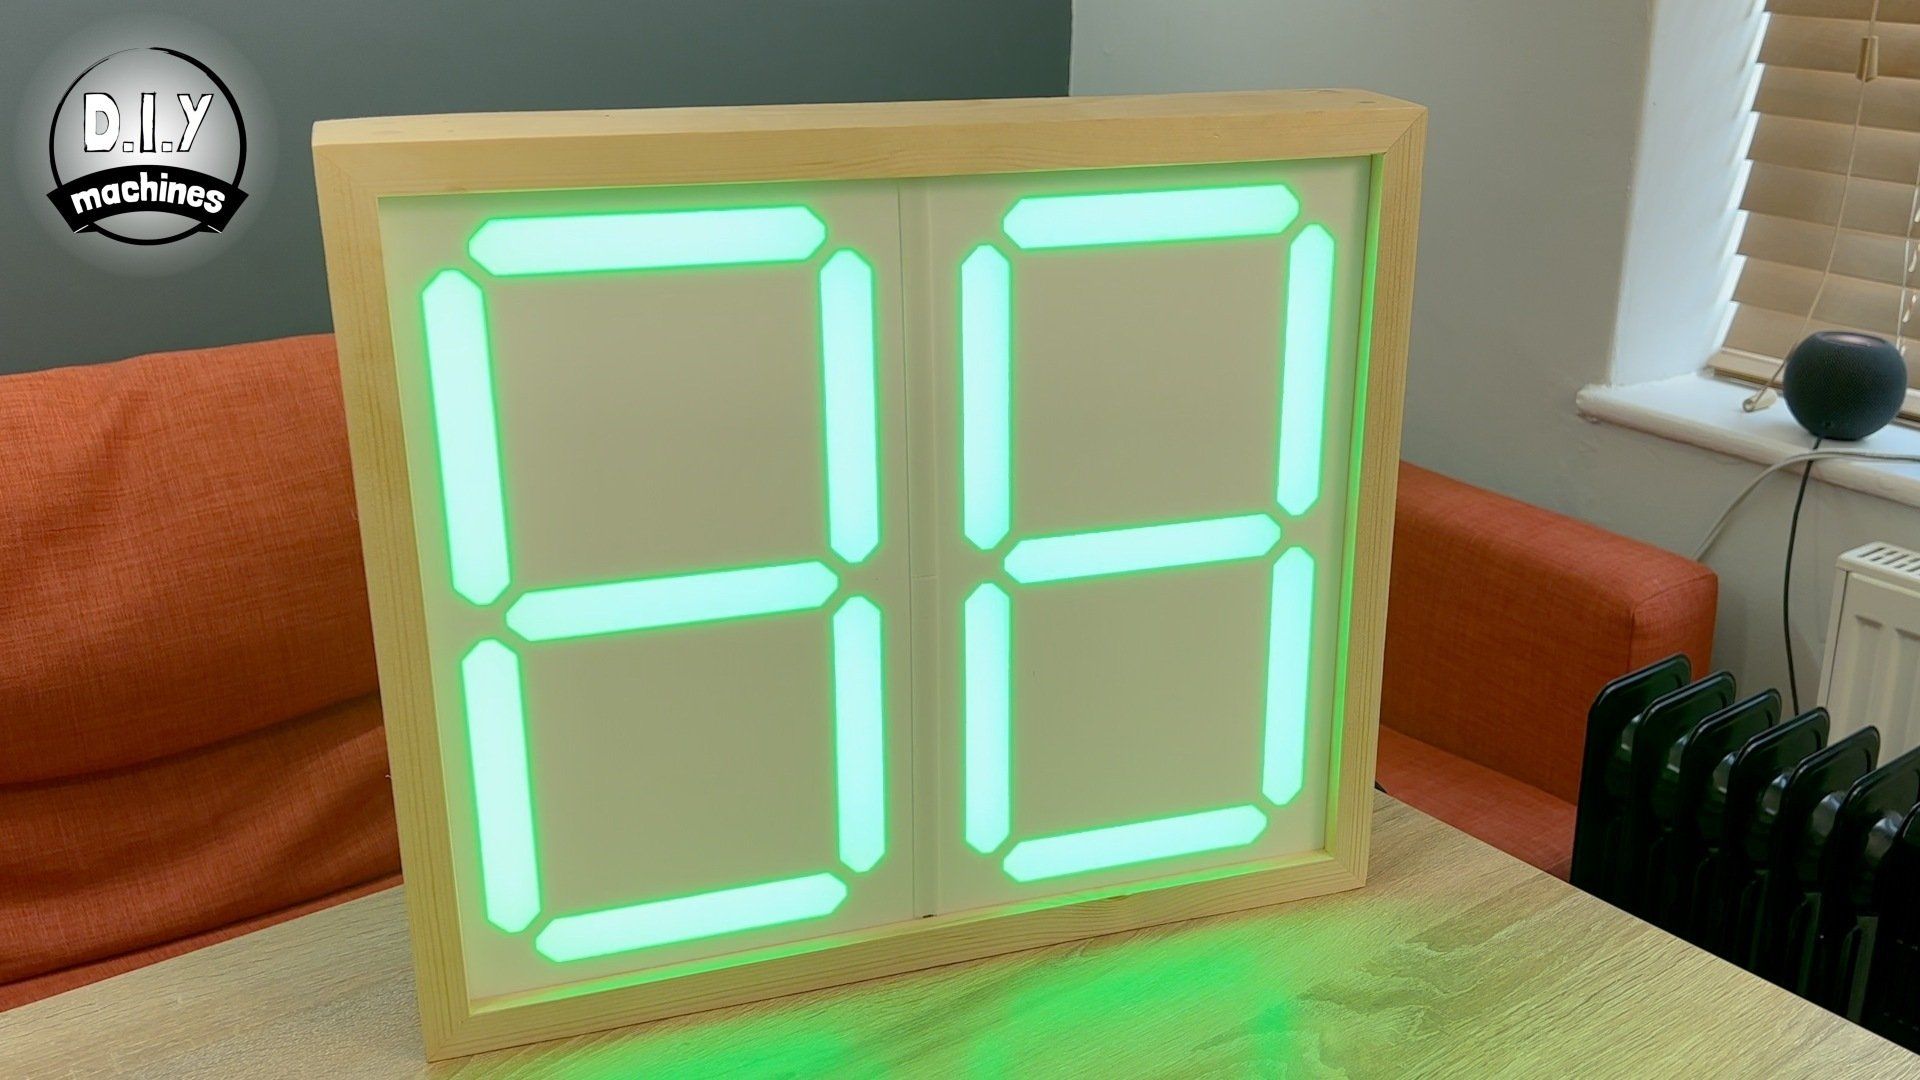
For a recent project that I was working on I needed a large seven segment display. I could find some ready made one about two or three inches tall - but I needed bigger. For that reason I set about designing my own and have documented it here so you can use the display as a basis for your projects.
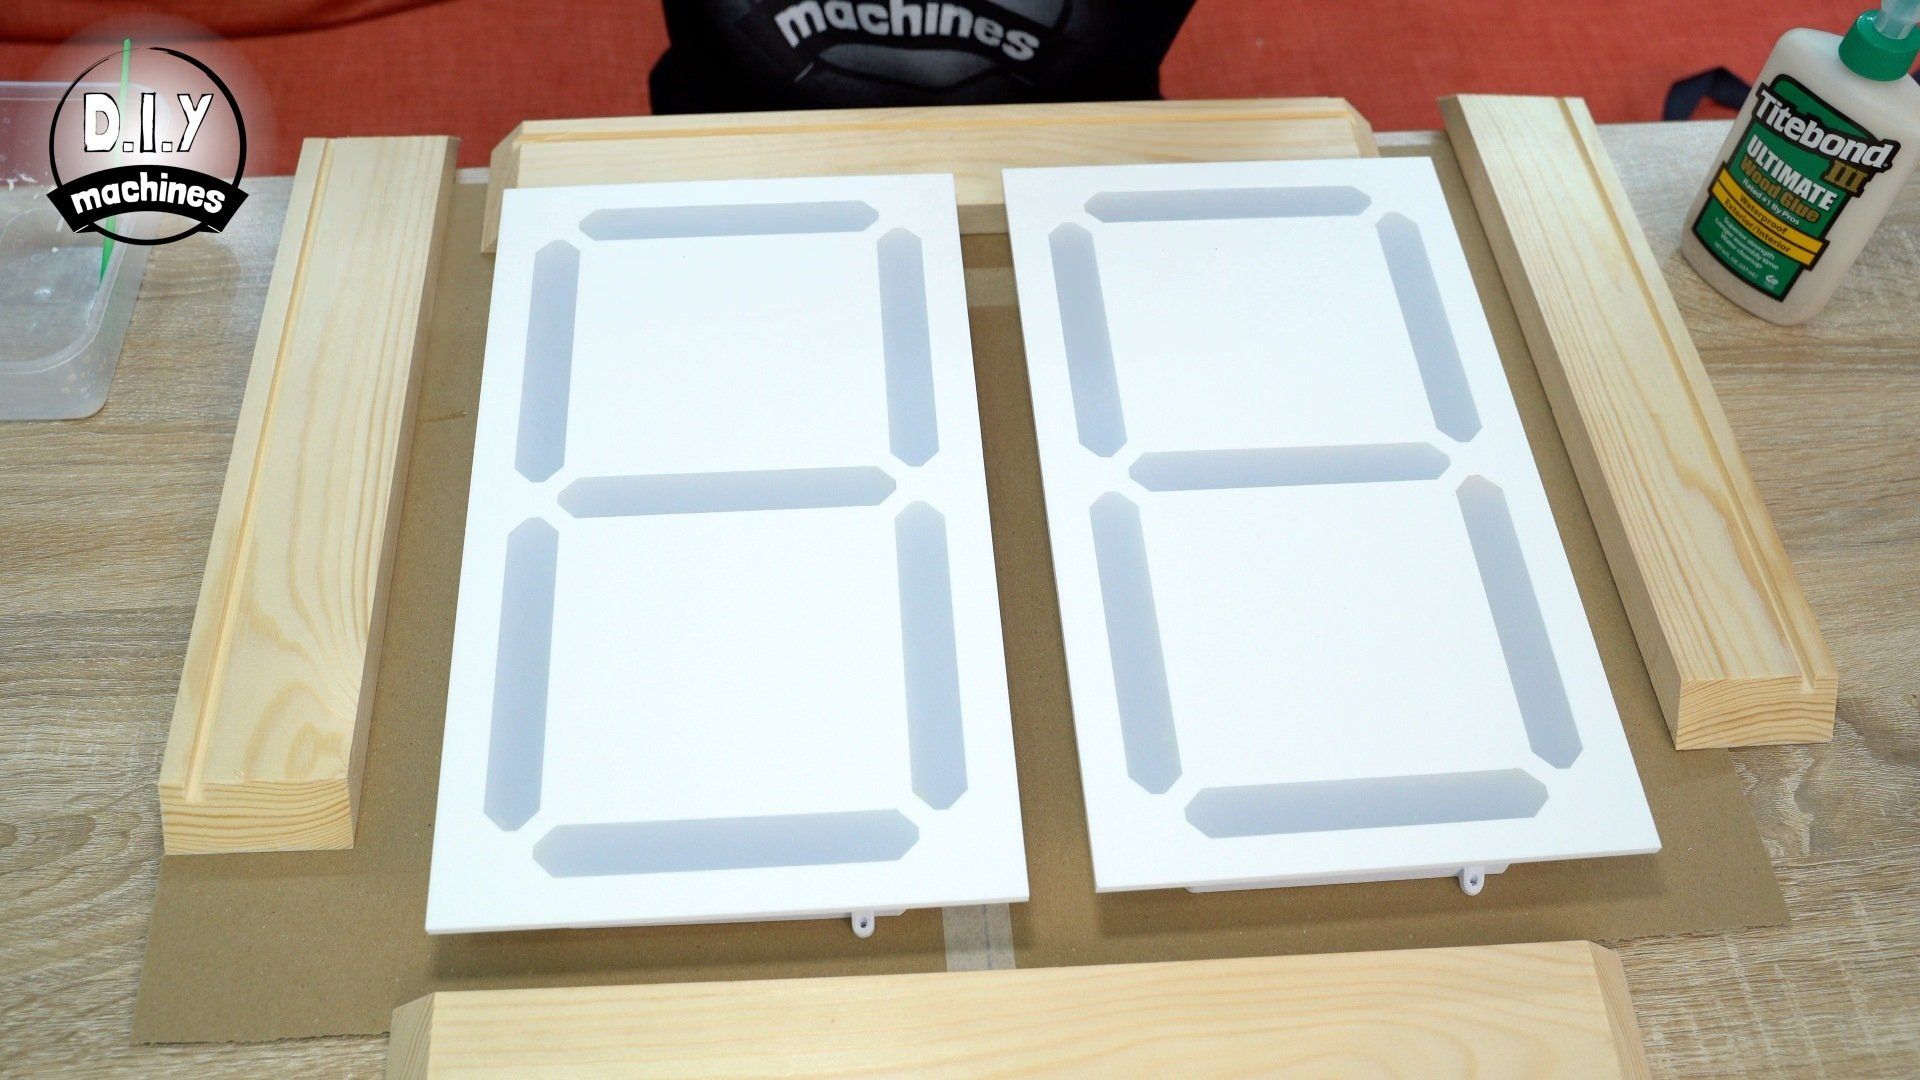
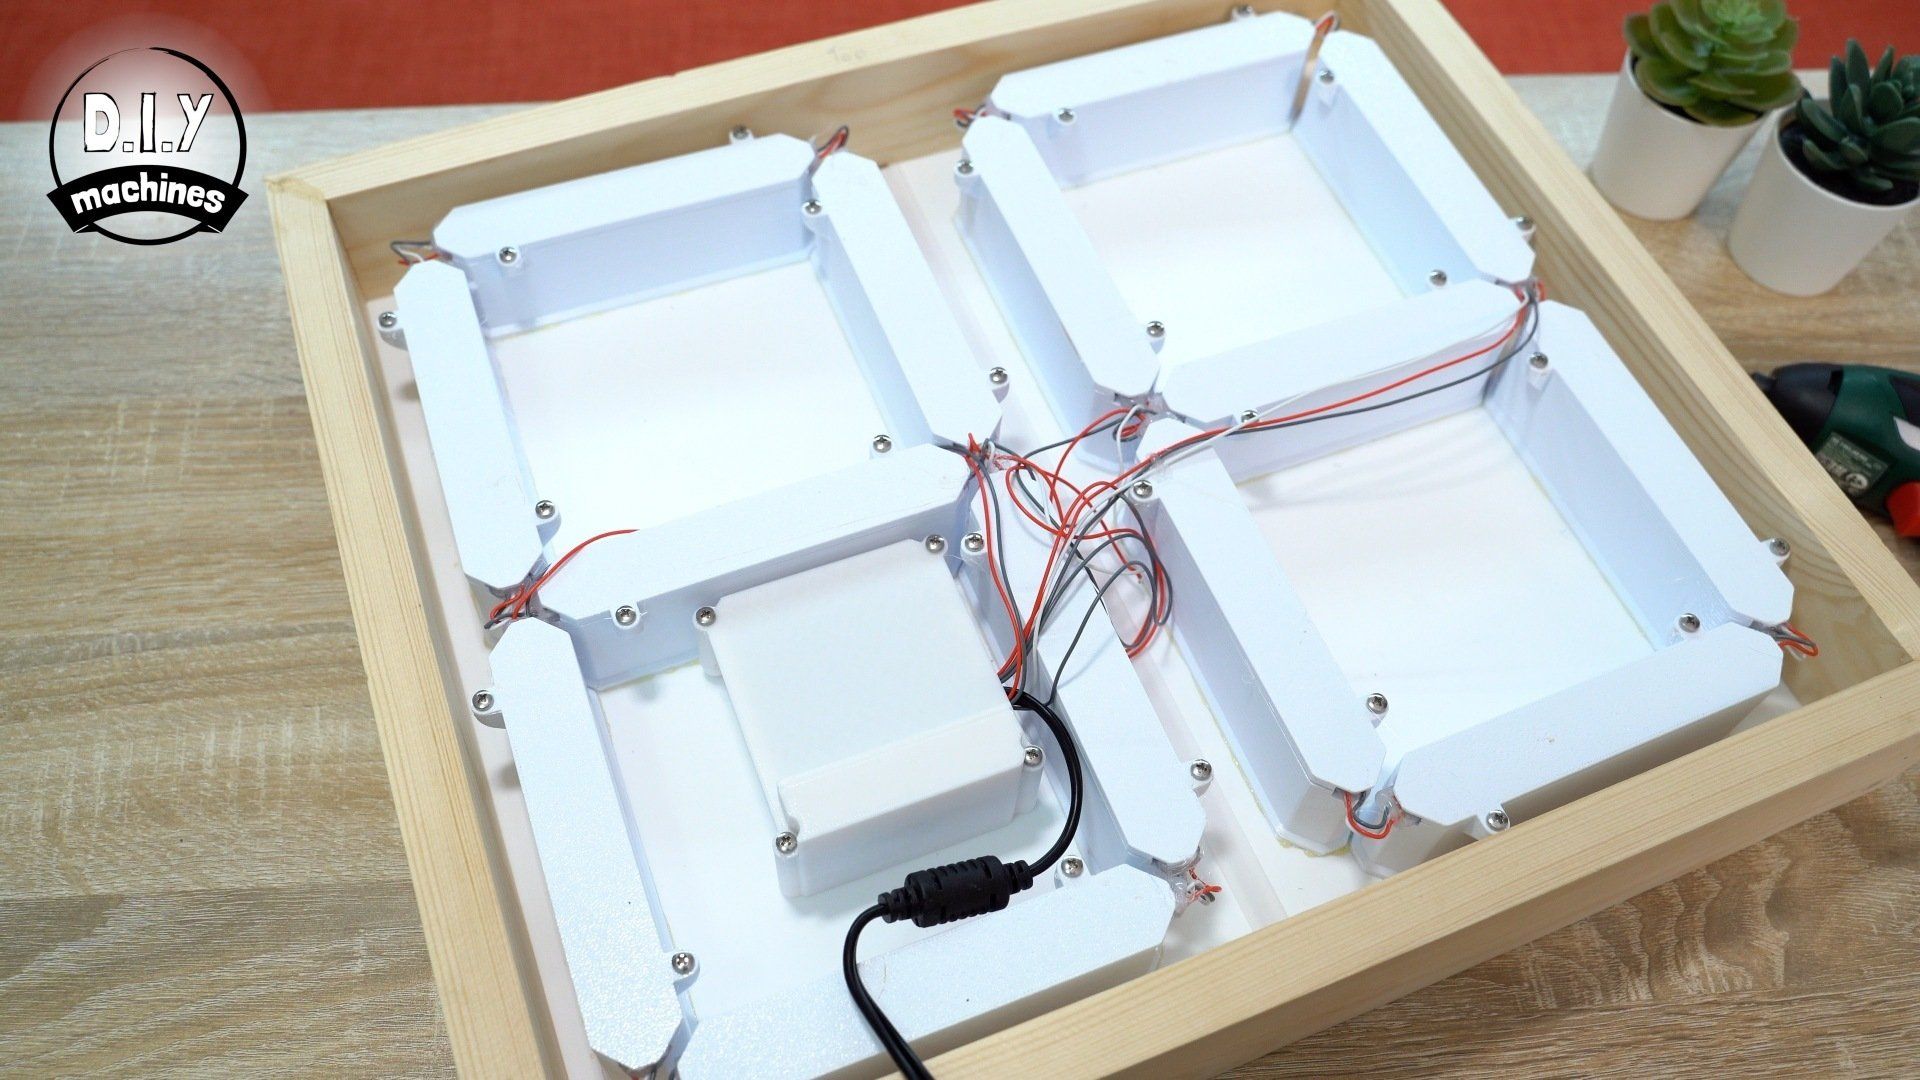
It has been designed in a modular way using acrylic sheets and 3d printed components for each character on the display, you can one or more of these depending on the display requirements. These are then held together using a simple to make wooden frame.
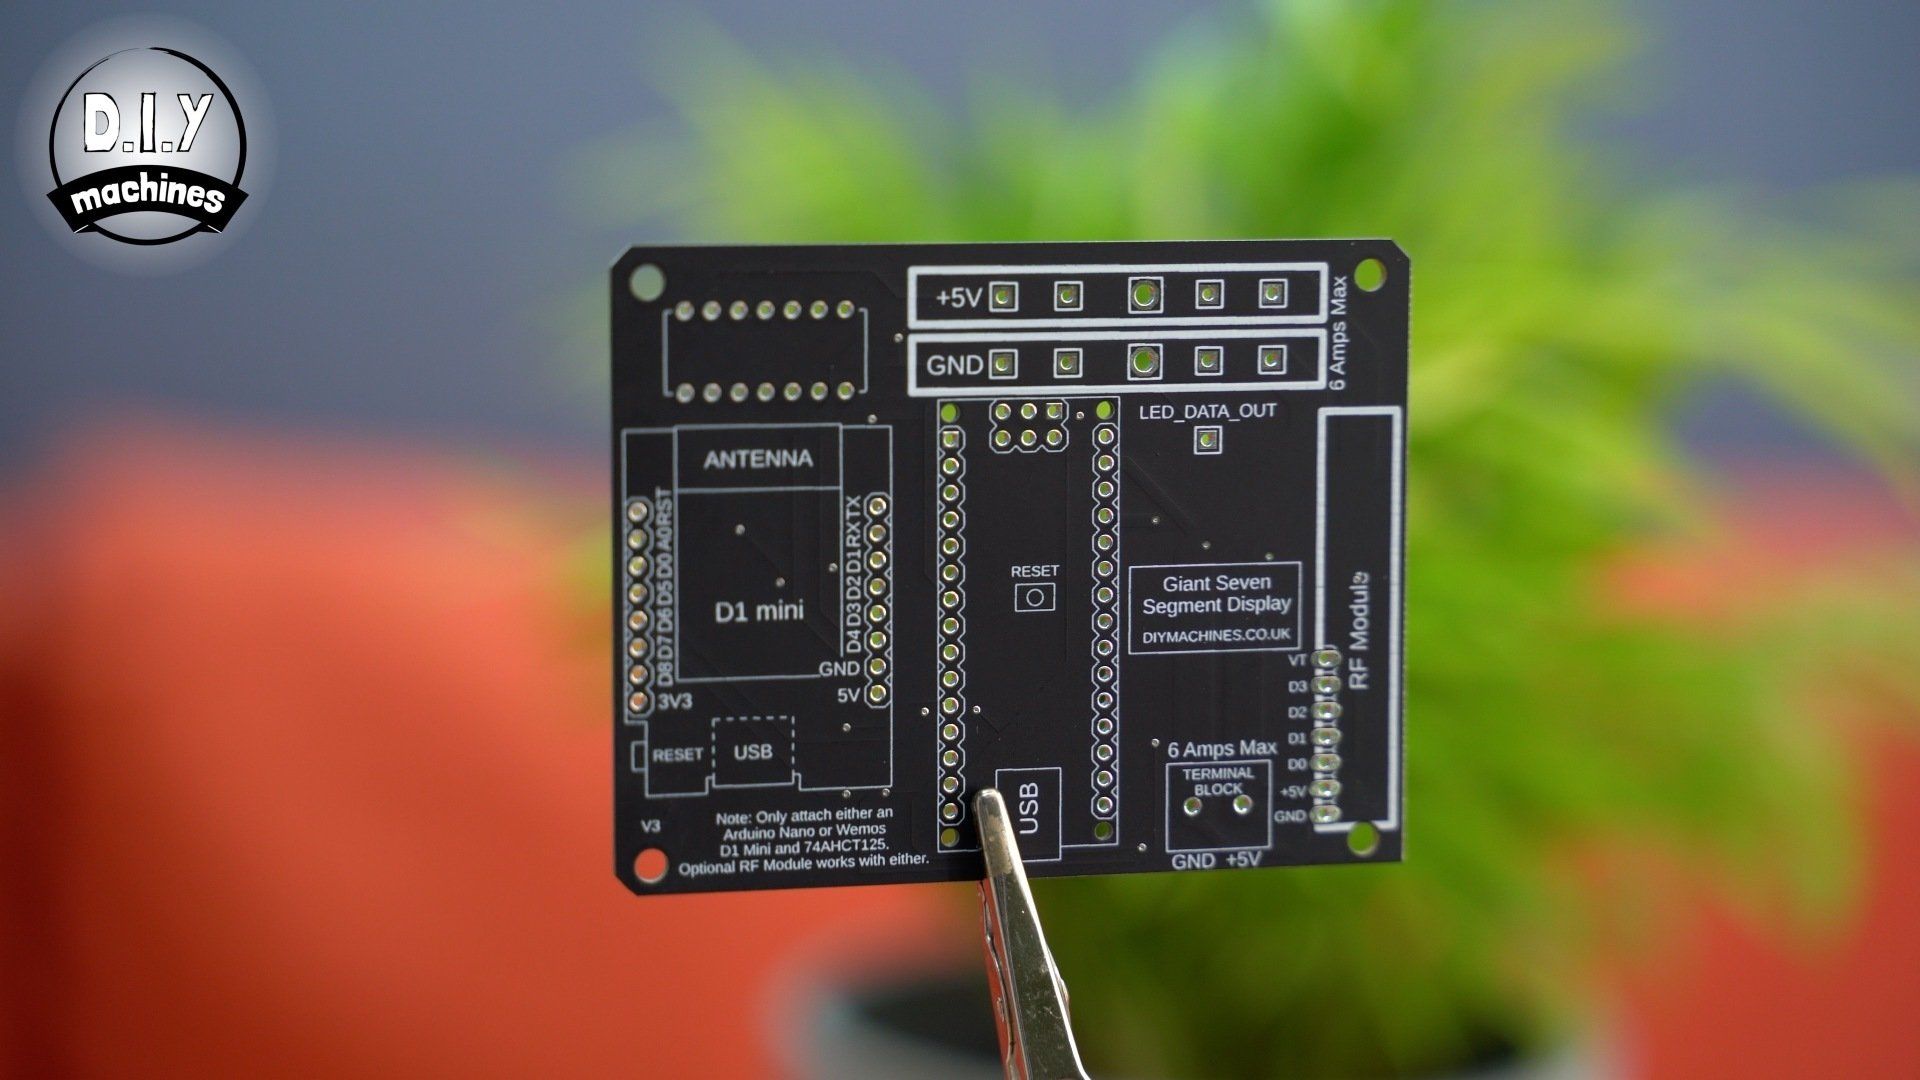
I created and published code for both an Arduino (Uno or Nano) or Wemos D1 Mini (ESP8266) that will turn the display into a giant two digit lap timer. The optional PCB I have designed for the project also provides routing of power to the programmable LED strips and a connection point for a 315mhz radio receiver. This let's it receive a signal from a four button garage door like key fob and a react to it.
Mine was turned into a lap timer for the local swimming pool so the buttons either reset the counter or trigger a three stage countdown sequence using colours before starting the timer.
I’ll share with you how I made it - it is rather simple. As always there is a complete list of parts and links to amazon down below this video, and included some helpful tips and an FAQ here on my site. Enjoy.


List of items used in this project and where to find them / BOM:
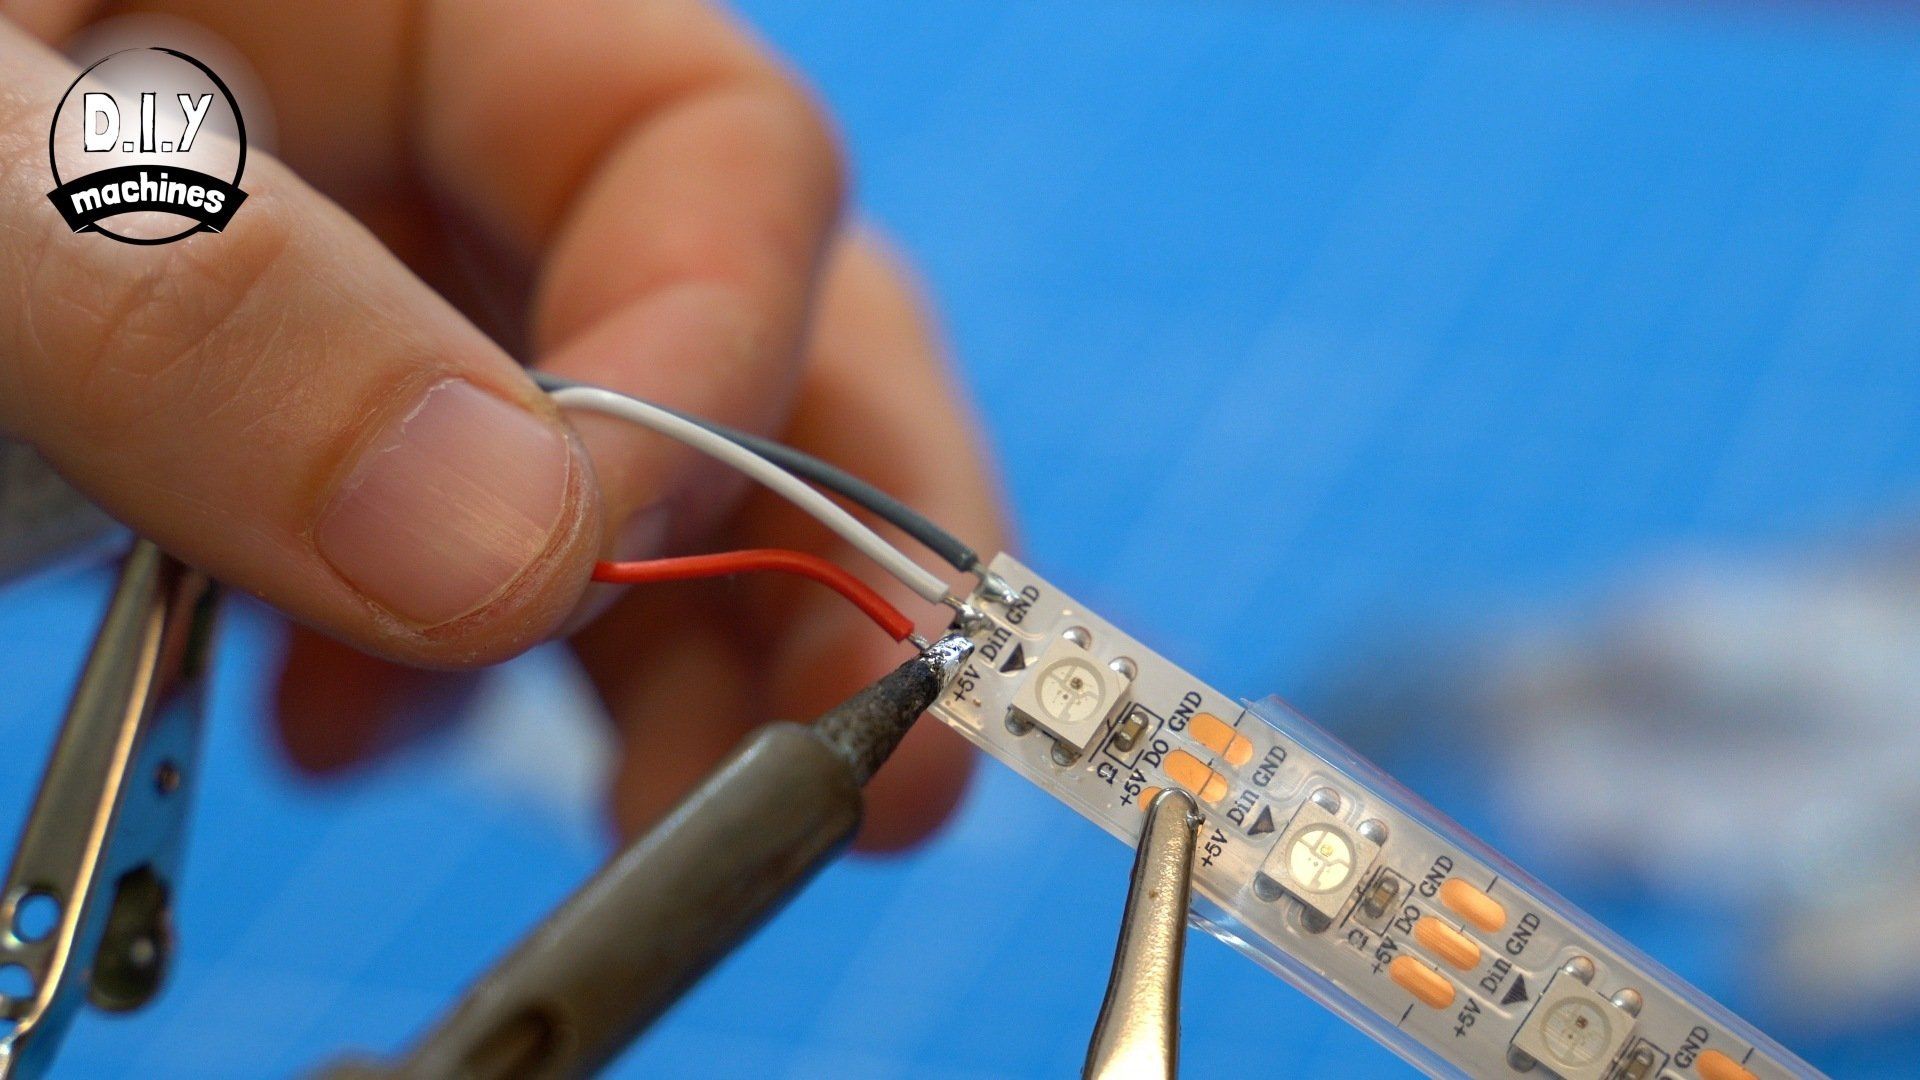
- WS2812B LEDS 60/m (1 Meter required per digit): https://geni.us/5mWS2812B60m
A microcontroller, either
- Elegoo Arduino Nano (x1): https://geni.us/ArduinoNanoV3
or
- Wemos D1 Mini and LLC for Wifi and IoT Control (x1): https://geni.us/wemosD1
- And Logic Level Shifter (74AHCT125): https://geni.us/74AHCT125-LLS
- Power supply 5v (x1): https://geni.us/5vPowerSupply3A (Budget at least 1.5amps per digit, 3.6 amps if your going to turn them all on bright white simultaneously).
- Barrel Connector (x1): https://geni.us/HighAmpDCBarrel
- Plenty of M3x6 bolts: https://geni.us/NutsAndBolts
- 5mm Solid Acrylic: https://geni.us/SolidAcrylicSheets5mm
- 3mm Semi-translucent/Frosted Acrylic: https://geni.us/OpalFrostedA4Acrylic
- 3D Printer Filament: https://www.3djake.uk
To connect the electronics either:
- Projects PCB from PCBWay: https://geni.us/Giant7SegPCB
- Wago style connectors or similar: https://geni.us/Wago221
Optional radio control add-on:
- Radio Receiver: https://geni.us/315mhzReceiverMoment
- Radio transmitter fob: https://geni.us/315mhzTransmitter-4b
- Some wood for the frame. I used four pieces of pine 20x68x436mm (x2) and 20x68x381mm (x2)
- To work out the wood lengths for different thickness of wood please take a look at the cheat sheet I made for you. You'll find them further down this page.
- Glue (I used Wood glue and Gorilla Glue): https://geni.us/Gorilla-Glue
Downloads:
3D models for printing: https://www.printables.com/model/220012-giant-modular-7-segment-display
Code:
Here I will include links to code created for the display, both by me and others:
- 60 Second Lap Timer with RF remote controller (DIY Machines): https://github.com/DIY-Machines/Giant-Modular-7-Segment-Display
If you would like to see your code linked to here then please let me know in the comments below or on the Discord server for this project.
Calculating Wood Cutting Lengths:
I have created this PDF guide which you can download to help you calculate what lengths to cut your wood depending on the number of characters in your display and the thickness of the wood.
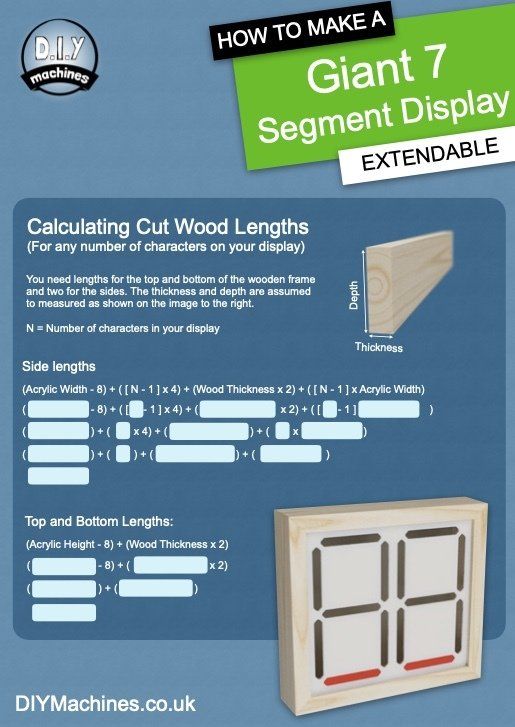
Download the free guide by pressing the button below:
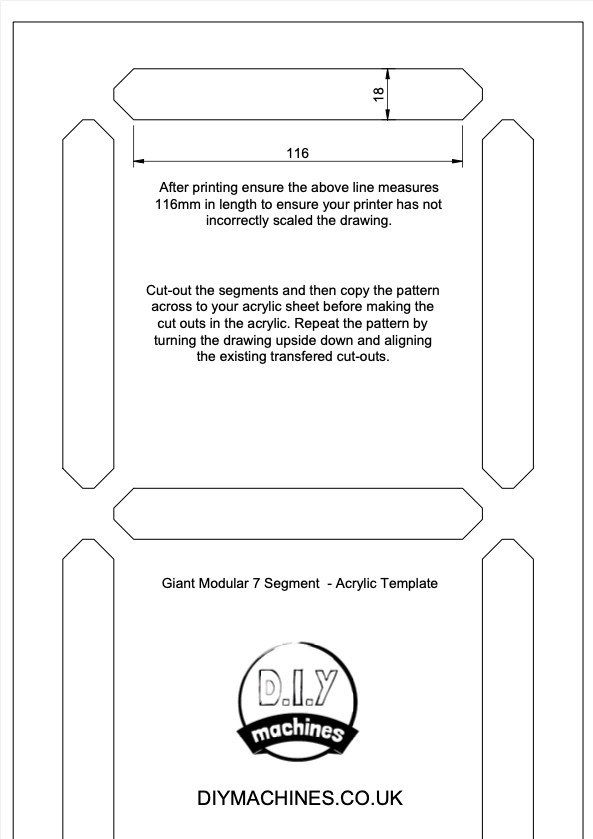
Acrylic Cutting Files:
If you are cutting your acrylic using hand tools (routers or saws) then you can print the below PDF and use it to copy the markings of the cutouts onto your sheet of acrylic before cutting it.
I've also included the CNC files for if you have access to a CNC router or similar.
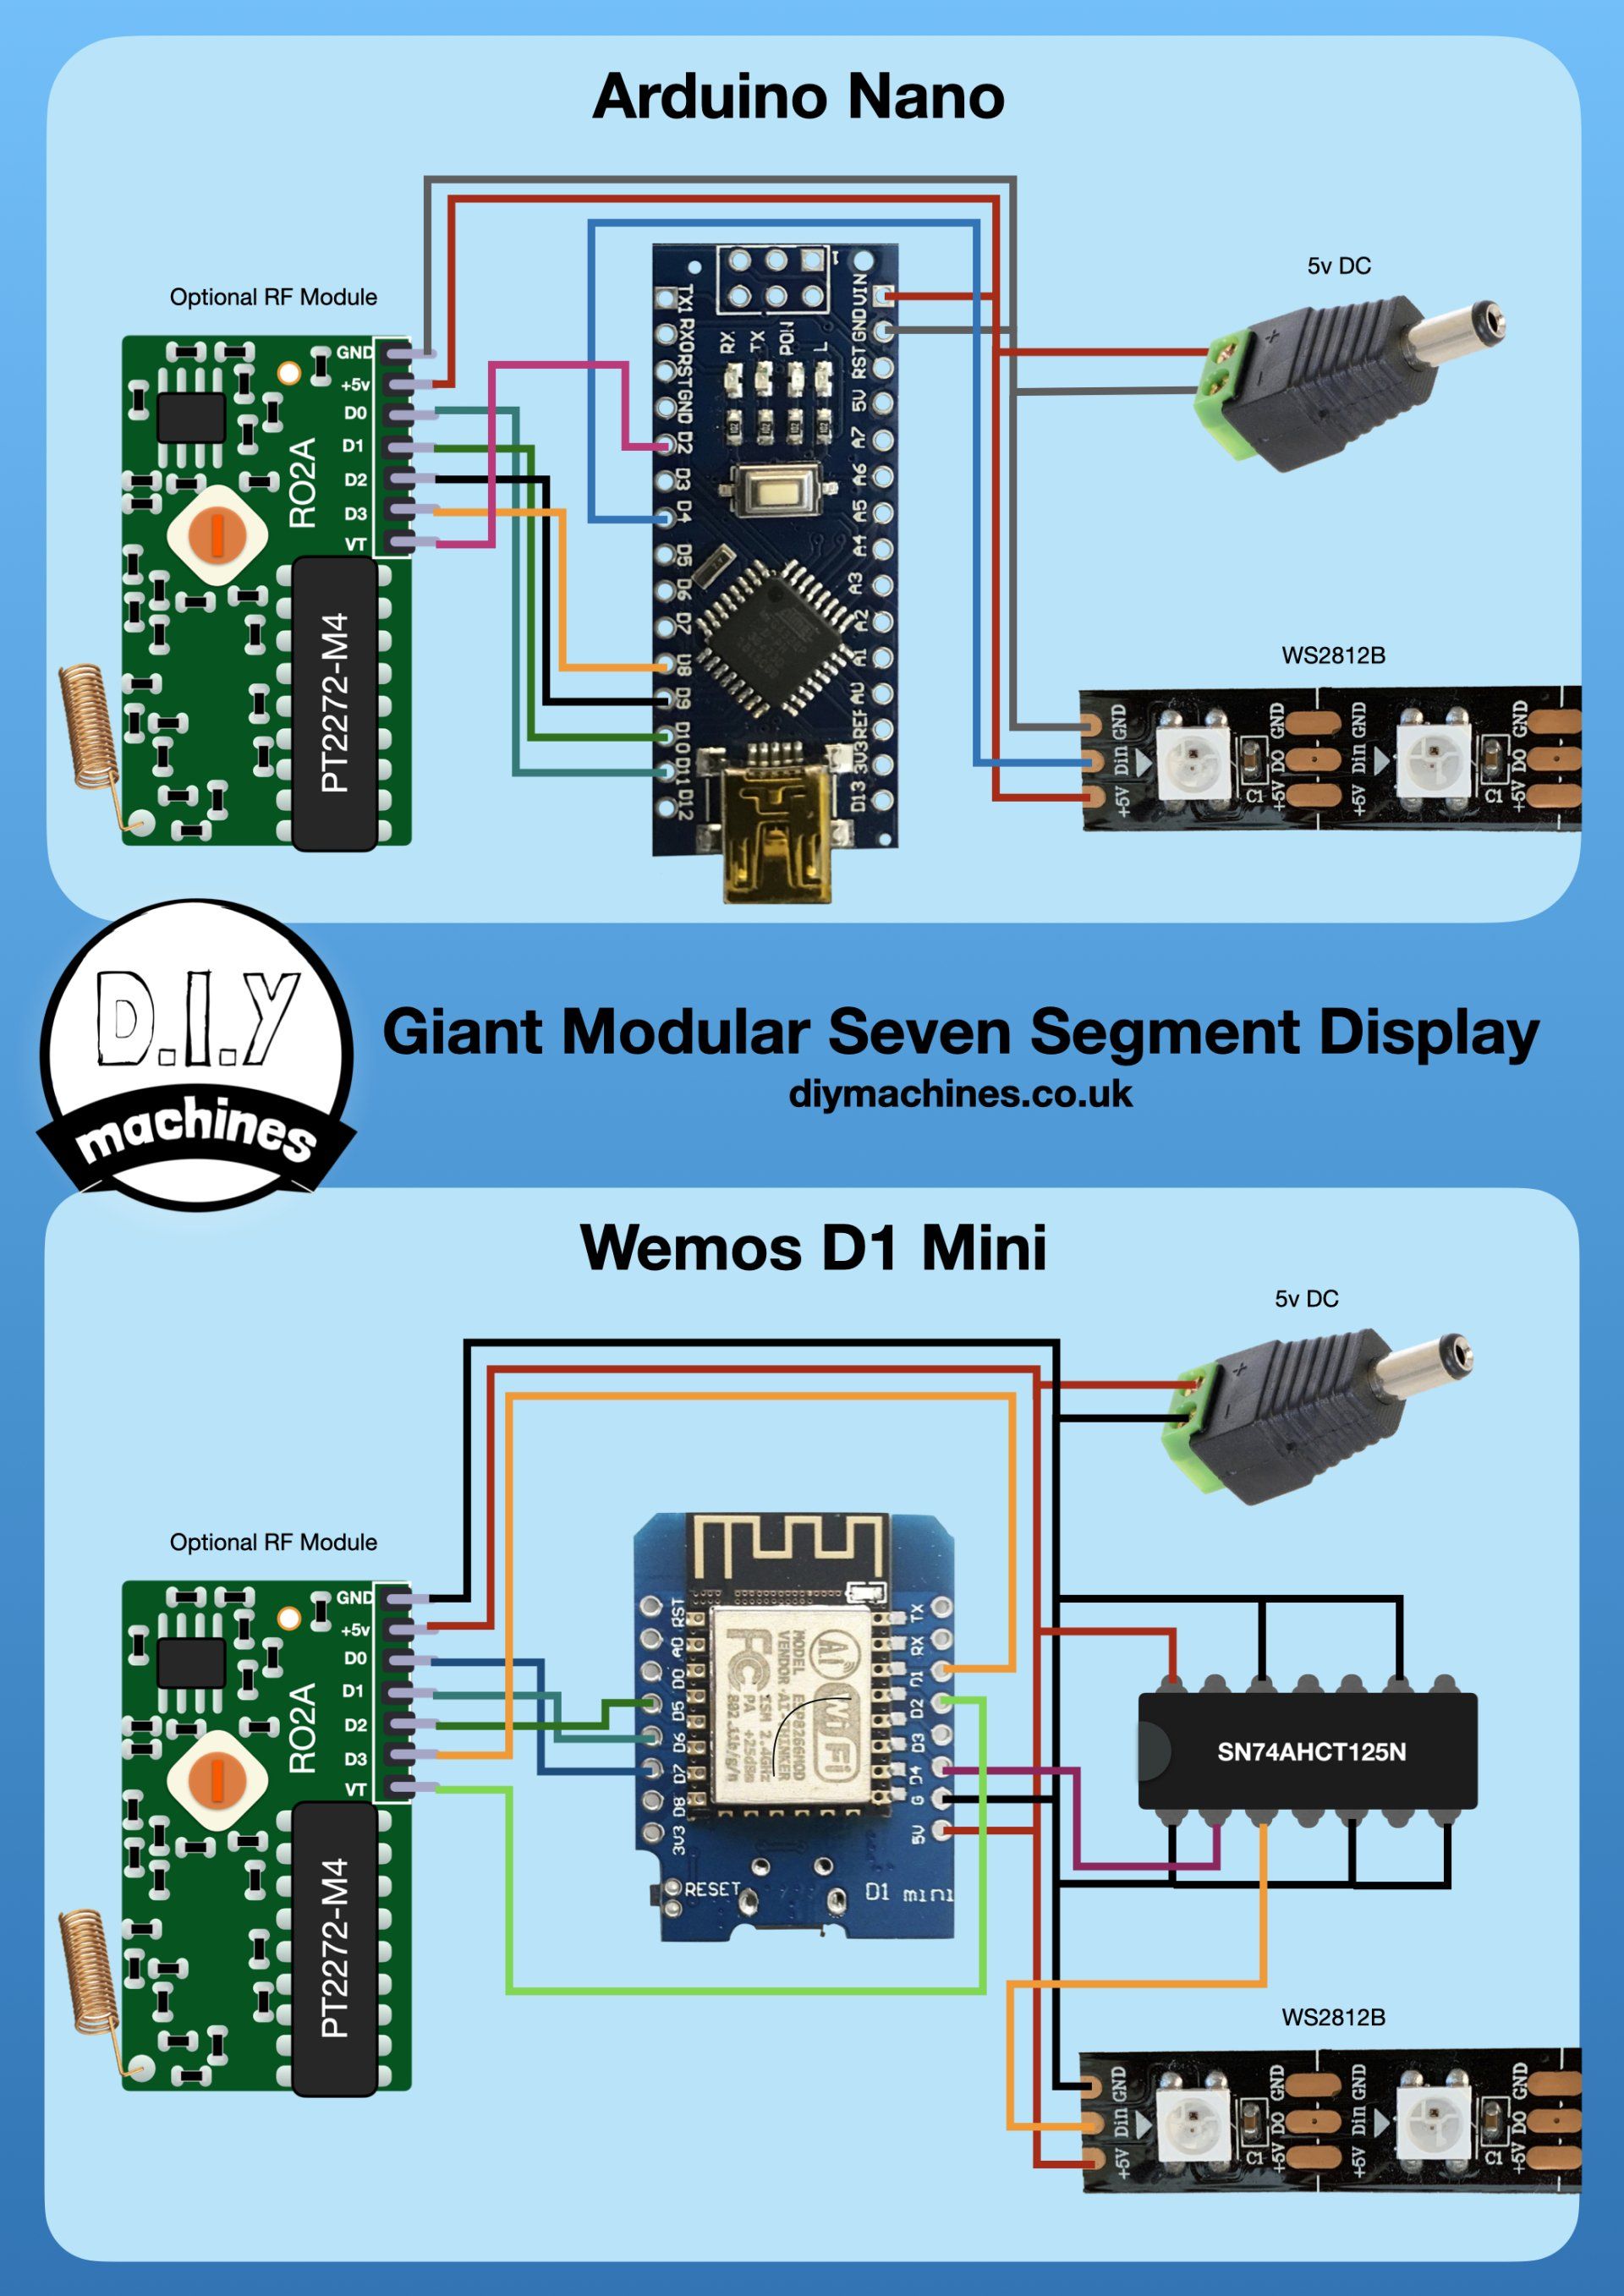
Wiring Diagram - Non PCB:
This is a diagram showing you how to connect either an Arduino Nano / Uno or Wemos D1 Mini to your display without a PCB. This wiring will work with the code I have written in the CODE section above.
Community:
Discord sever for project:
Comments