Snapmaker J1S Review
Snapmaker J1S
This printer has been available for just over a year (first released on November 8th 2022). Now with some experience under its (timing) belt and slight revision we put it to the test. 🙂
Pros:
- Arrives almost completely ready to run
- Two independant extruders
- Some very impressive print speeds
- Enclosed printing volume for maintaining heat
Cons:
- About average build volume when printing in 'default mode'
- Fans are quite noisy
- Reasonably long time for the hot bed and nozzle to pre-heat
Where to buy:
- Snapmaker: Snapmaker J1S
- Amazon: Snapmaker J1S
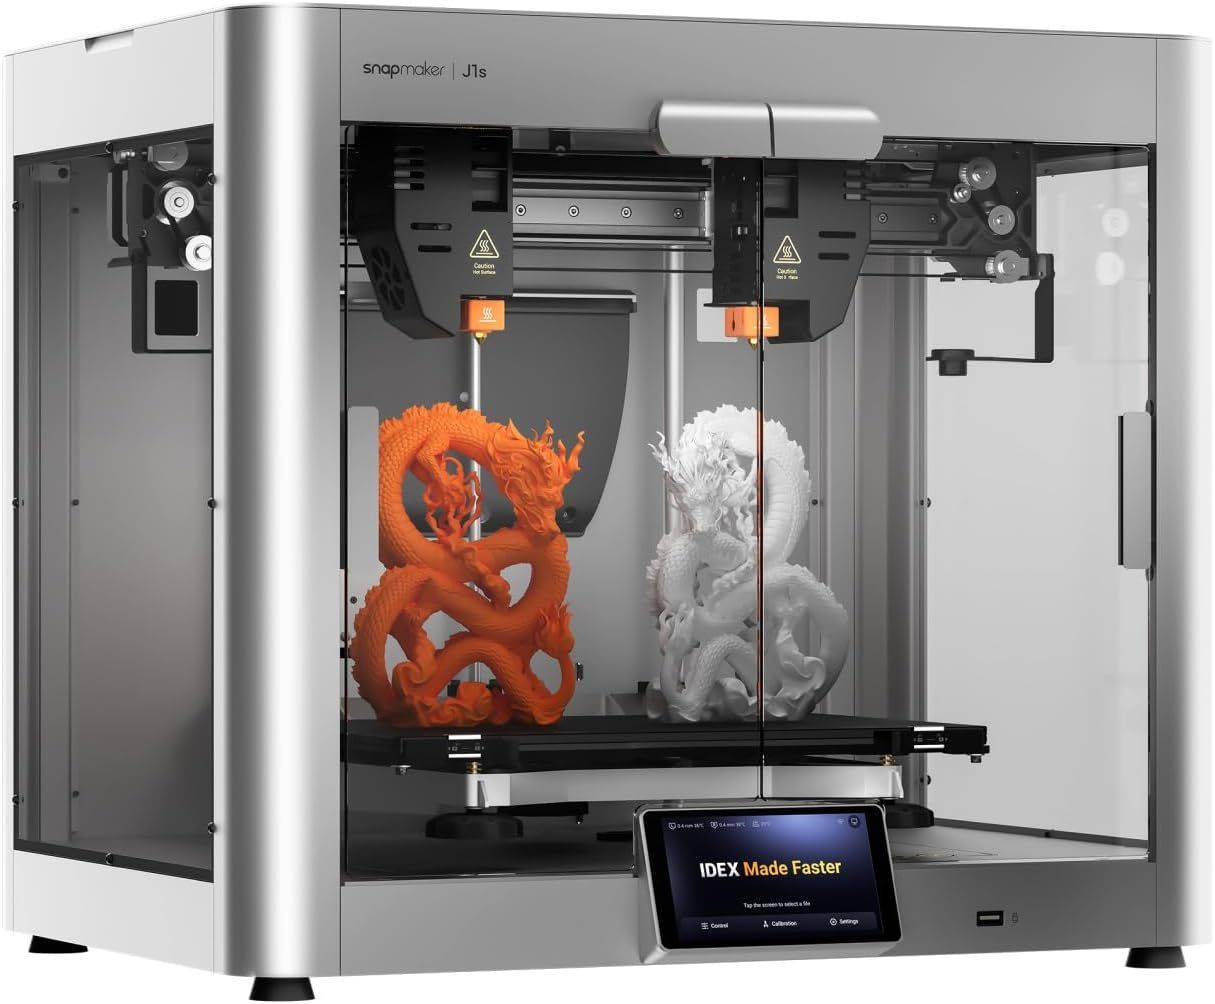
What is it?
The Snapmaker J1S is a high-quality 3D printer featuring a dual extruder (IDEX) system. It stands out for its ability to use two different filaments in one print, thanks to its two extruders. This feature, along with the vibration-compensation technology, allows for higher print speeds while maintaining good print quality. The printer's build volume of 300 × 200 × 200 mm³ is considered mid-range, suitable for most projects but not for very large objects. However, the maximum speed of 350 mm/s is notable, especially for a printer with IDEX capability.

The Technical Overview
| Printing Technology | IDEX FDM | |
|---|---|---|
| Print Volume | 300 × 200 × 200 mm³ | |
| Layer height | 0.1 to 0.4mm | |
| Max. nozzle temperature | 300℃ | |
| Max. bed temperature | 100℃ | |
| Printable Filaments | PLA, ABS, PETG, TPU, TPE and infused (i.e wood, marble etc.) | |
| Extrusion Type | Twin Extruder, Direct Drive | |
| Acceleration | Up to 10,000 mm/s² acceleration and up to 350 mm/s printing speed |
For a more detailed technical table please see the end of this review.
So, the Snapmaker J1S is an FDM, IDEX, CoreXY printer with vibration compensation.... got that?
Just incase, here's those terms explained:
FDM (Fused Deposition Modelling)
printers have been found in domestic homes far longer than other 3D printing technologies such as resin based MSLA (Masked StereoLithogrAphy). As such their price continues to become more affordable and the technology is proven, refined and easy to work with. I cut my teeth on 3D printing with an FDM printer and mostly use them to this day.
IDEX (Independent Dual Extruders) offers the capability to use two different filaments simultaneously, which is a significant advantage in multi-material printing.
CoreXY printers are a type of 3D printer that uses a precise and efficient mechanism for moving the print head. In this design, two stepper motors control the movement along the X and Y axes in a coordinated manner, allowing for fast and accurate printing. The print bed typically moves only up and down (Z-axis), contributing to a more stable printing process, especially for taller objects. This configuration is known for its speed, precision, and compact design.
Vibration Compensation is a algorithmically driven feature that reduces vibrations caused by the movement of printer parts (by anticipating changes in direction and speed), thereby improving print quality and allowing for higher printing speeds without sacrificing detail or accuracy. This does work in hand with the Snapmaker's rock solid frame construction.
Visually it is a very sleek machine thanks to Snapmakers easily recognisable use of Aluminium Alloys encompassing the single piece die casted base and upper frame. The result is a very sturdy machine, ables to dissipate heat with the minimal of wobble and thankfully fingerprints. (Though the acrylic panels are magnets for those so stick to using the handles!)
You'll also find adjustable LED lighting concealed in the top of the enclosure which provides more than enough light to monitor your prints. Something occasionally overlooked on other enclosed printers.
Let's go over some other features worth noting in quick fashion before delving into others in more detail shortly:
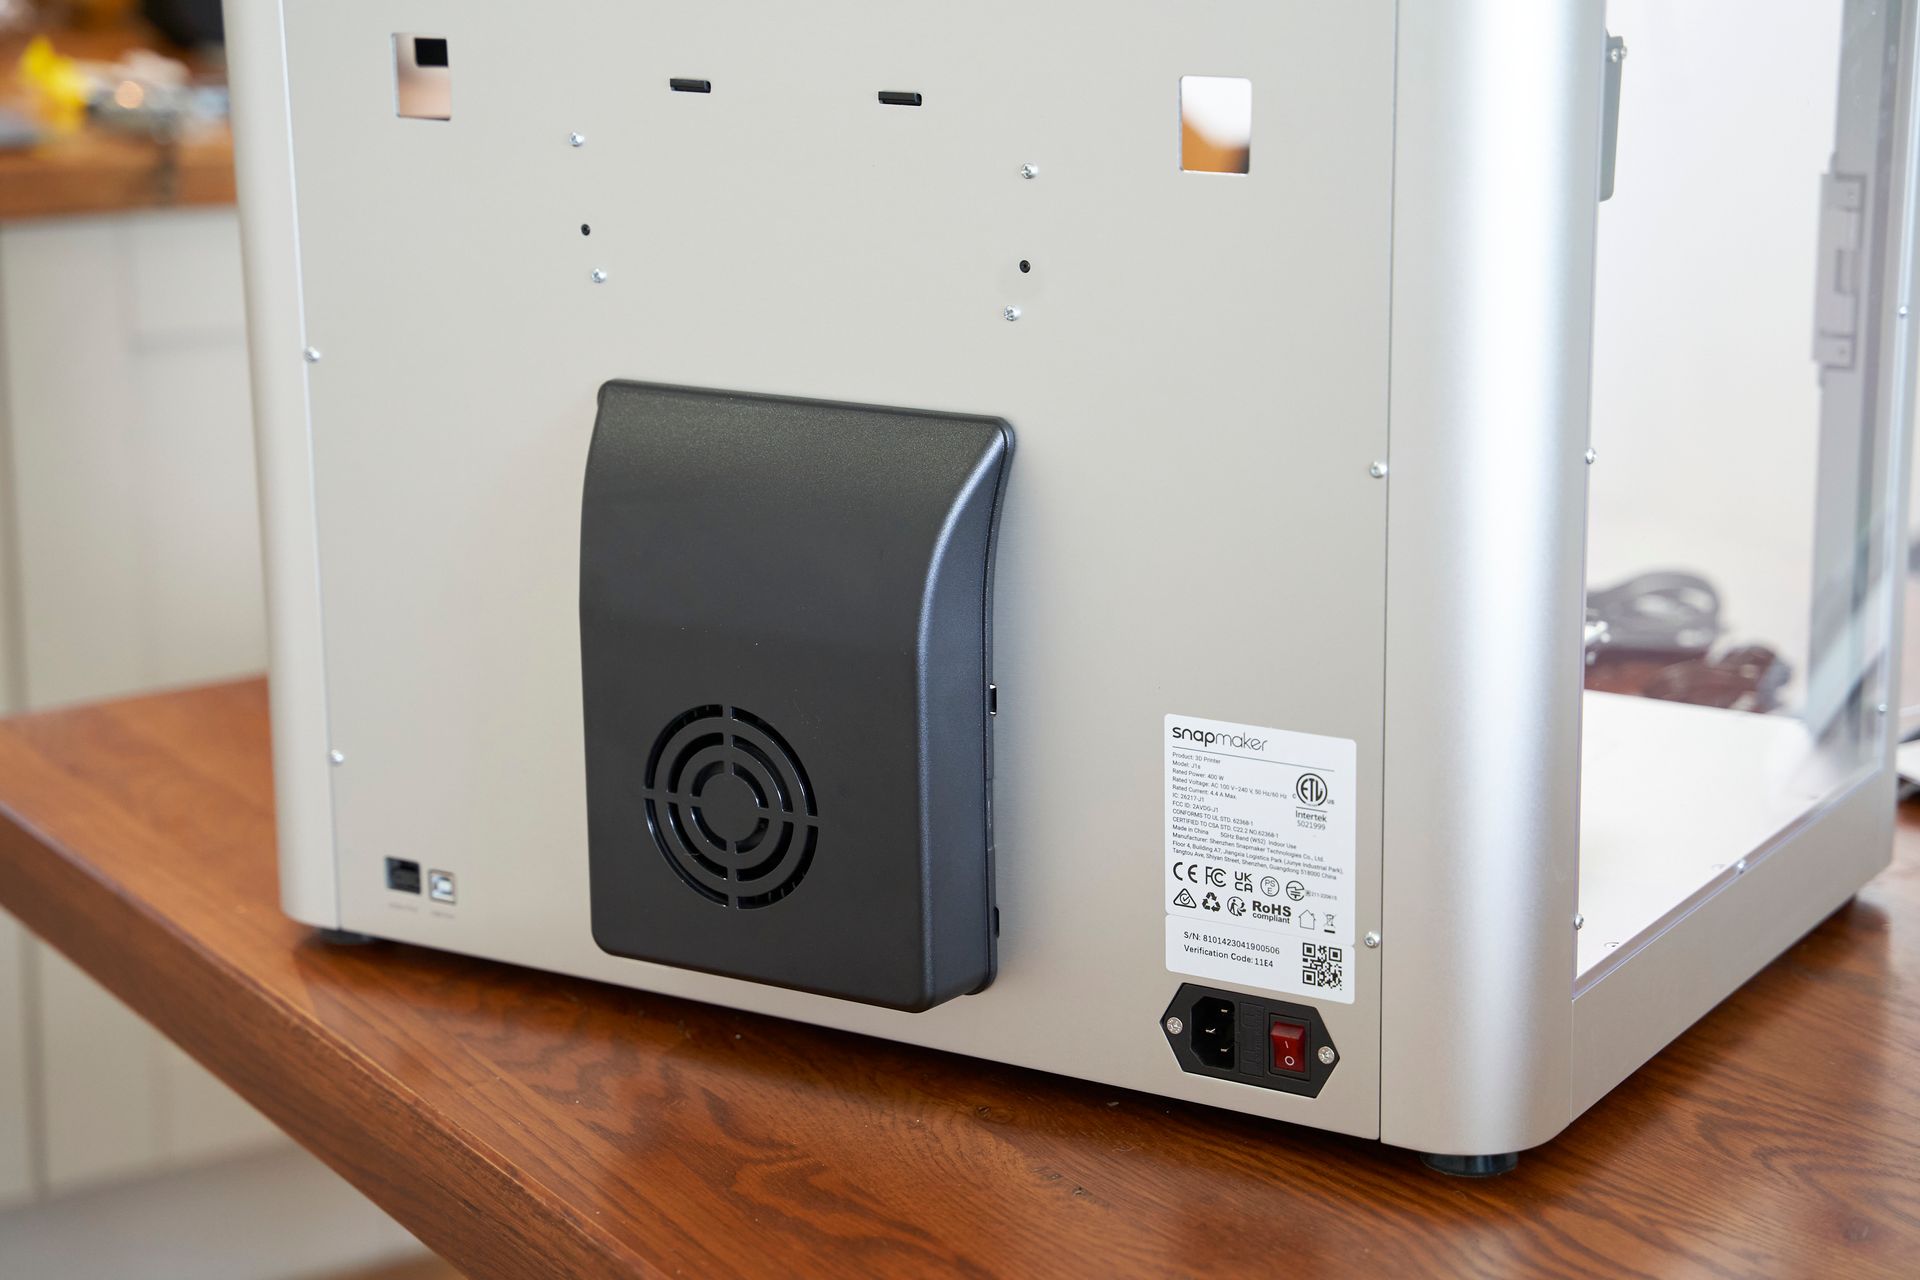
- The power supply is built in, so need for a chunky power brick to be concealed somewhere.
- The top panel is a sturdy sheet of aluminium that can be simply lifted up at anytime. It is held in place by magnets.
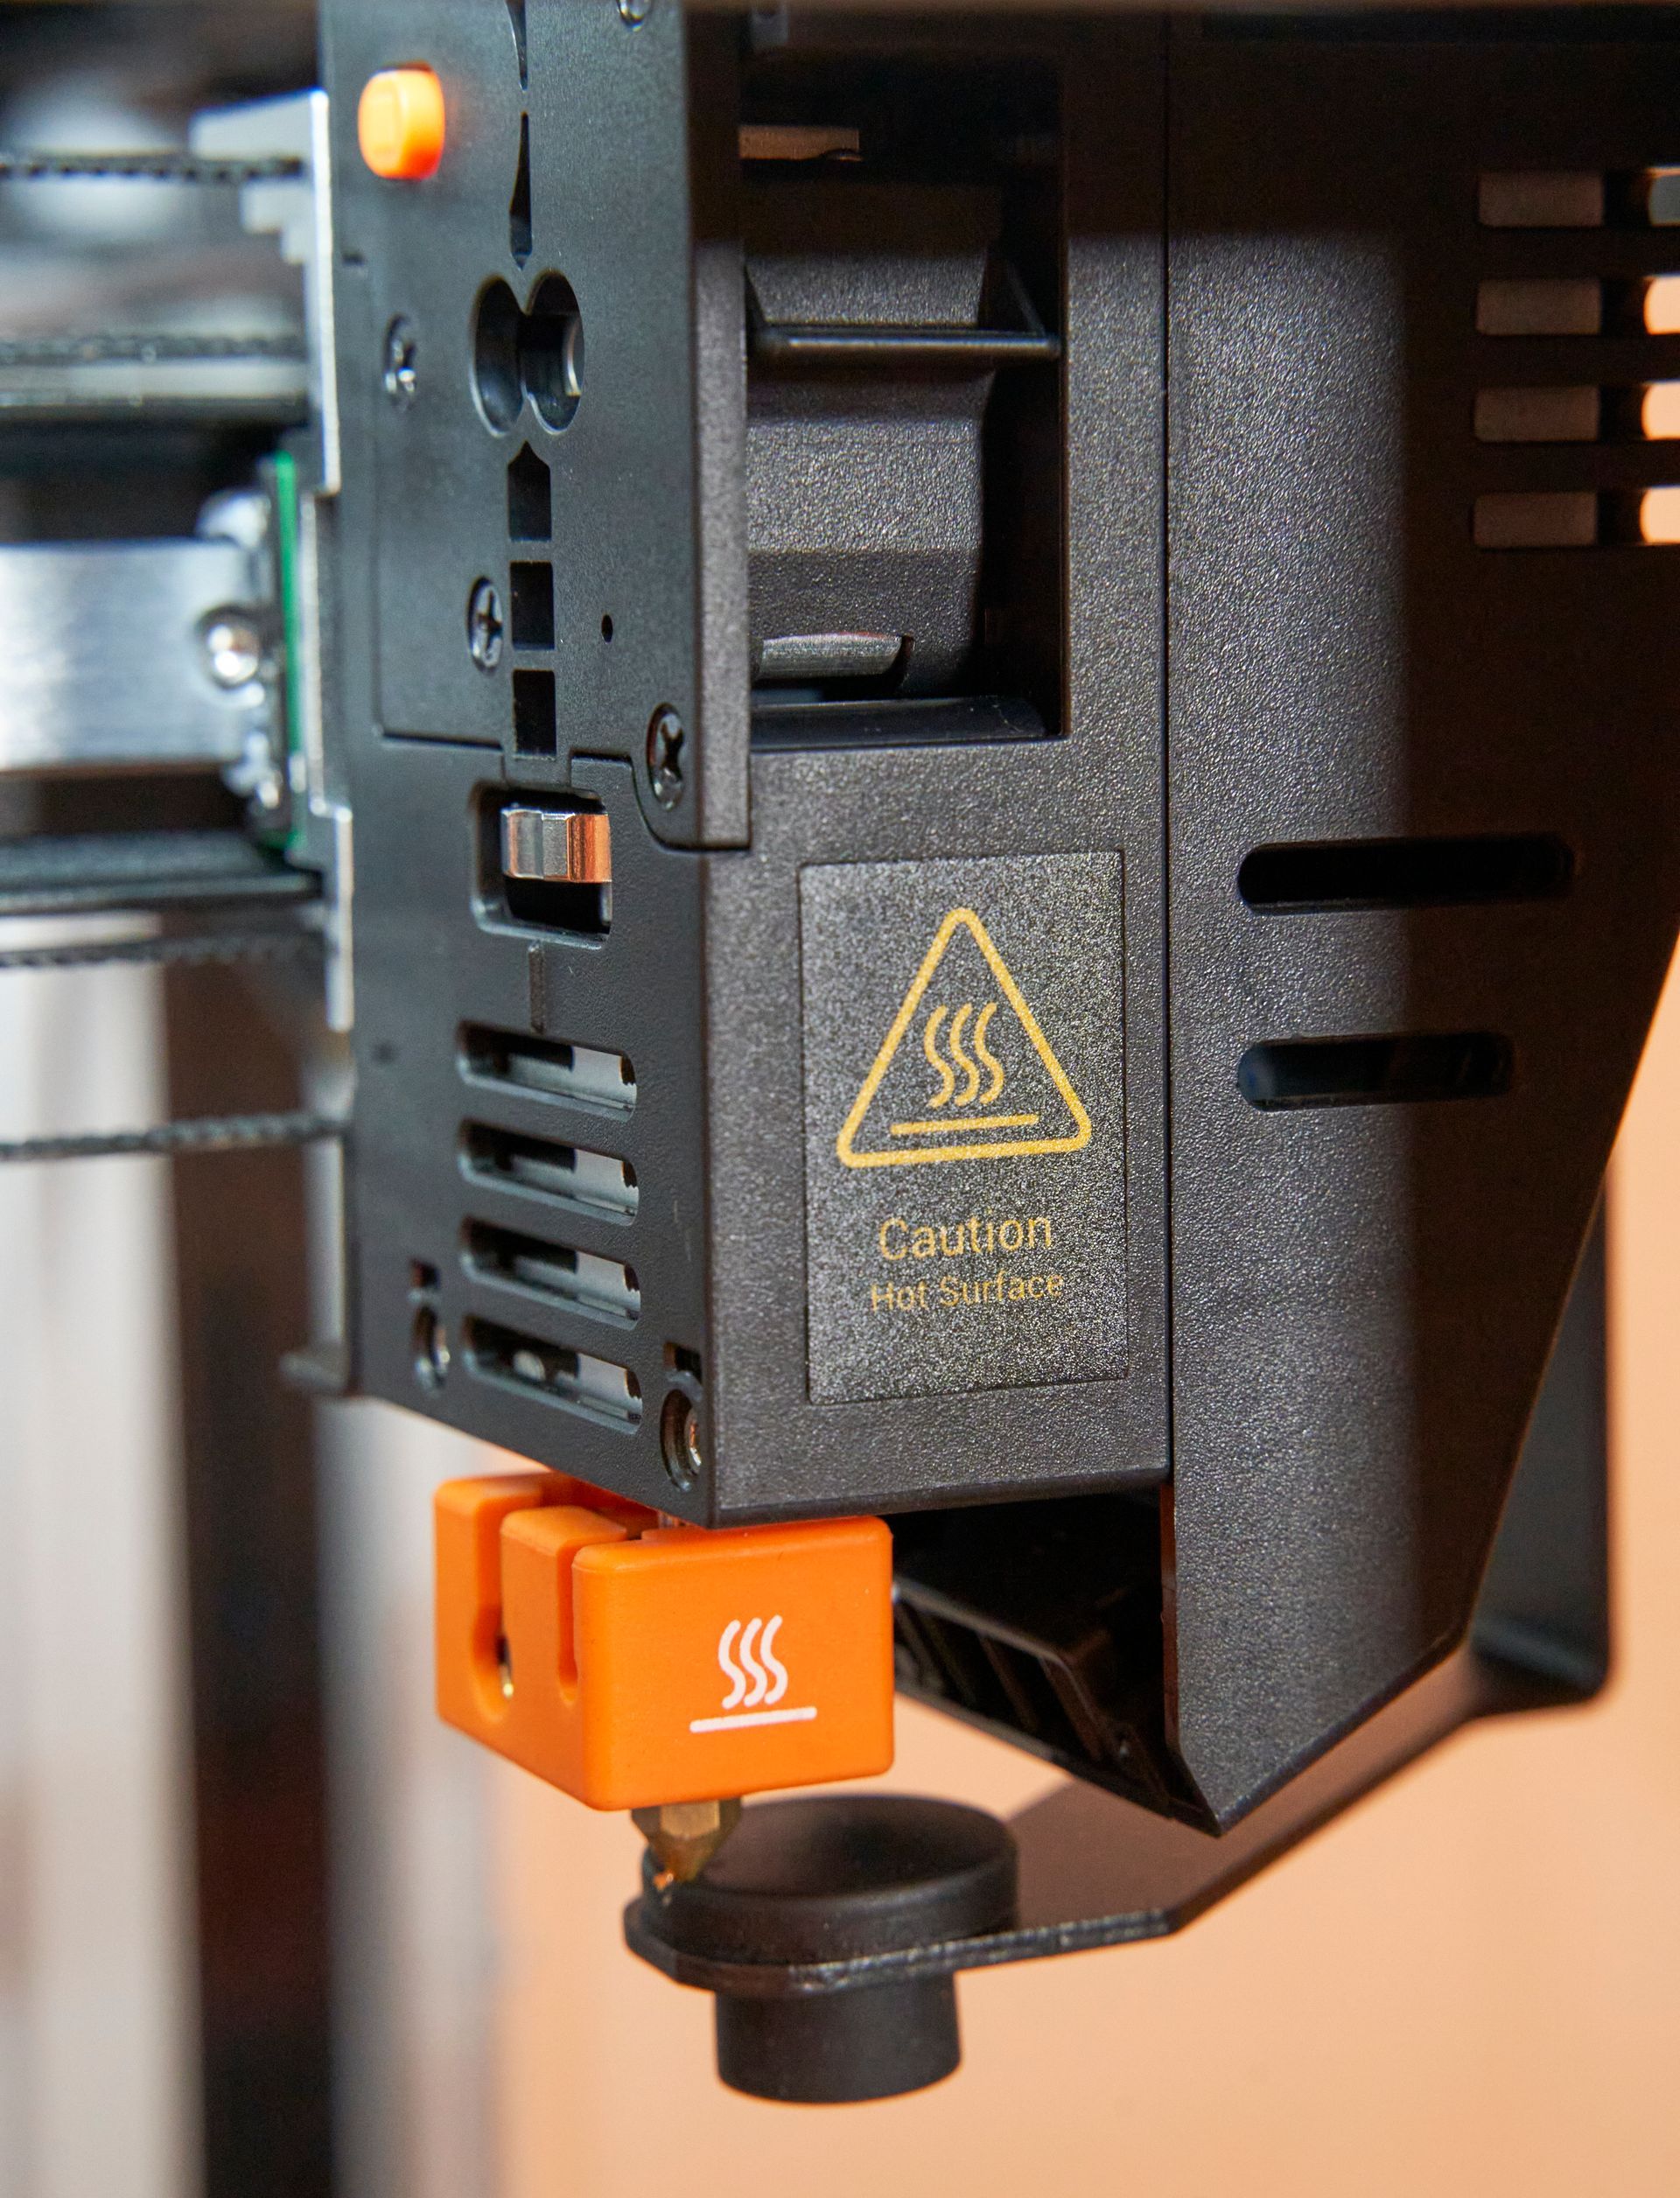
- The default nozzle size supplied is 0.4mm on both extruders. Four silicone socks are also included. The first two are preinstalled.
- The spool holders for your filament are located on the back. It looks good but I just don't find it practical so will be making my own mounts to relocate them to the sides of the machine.
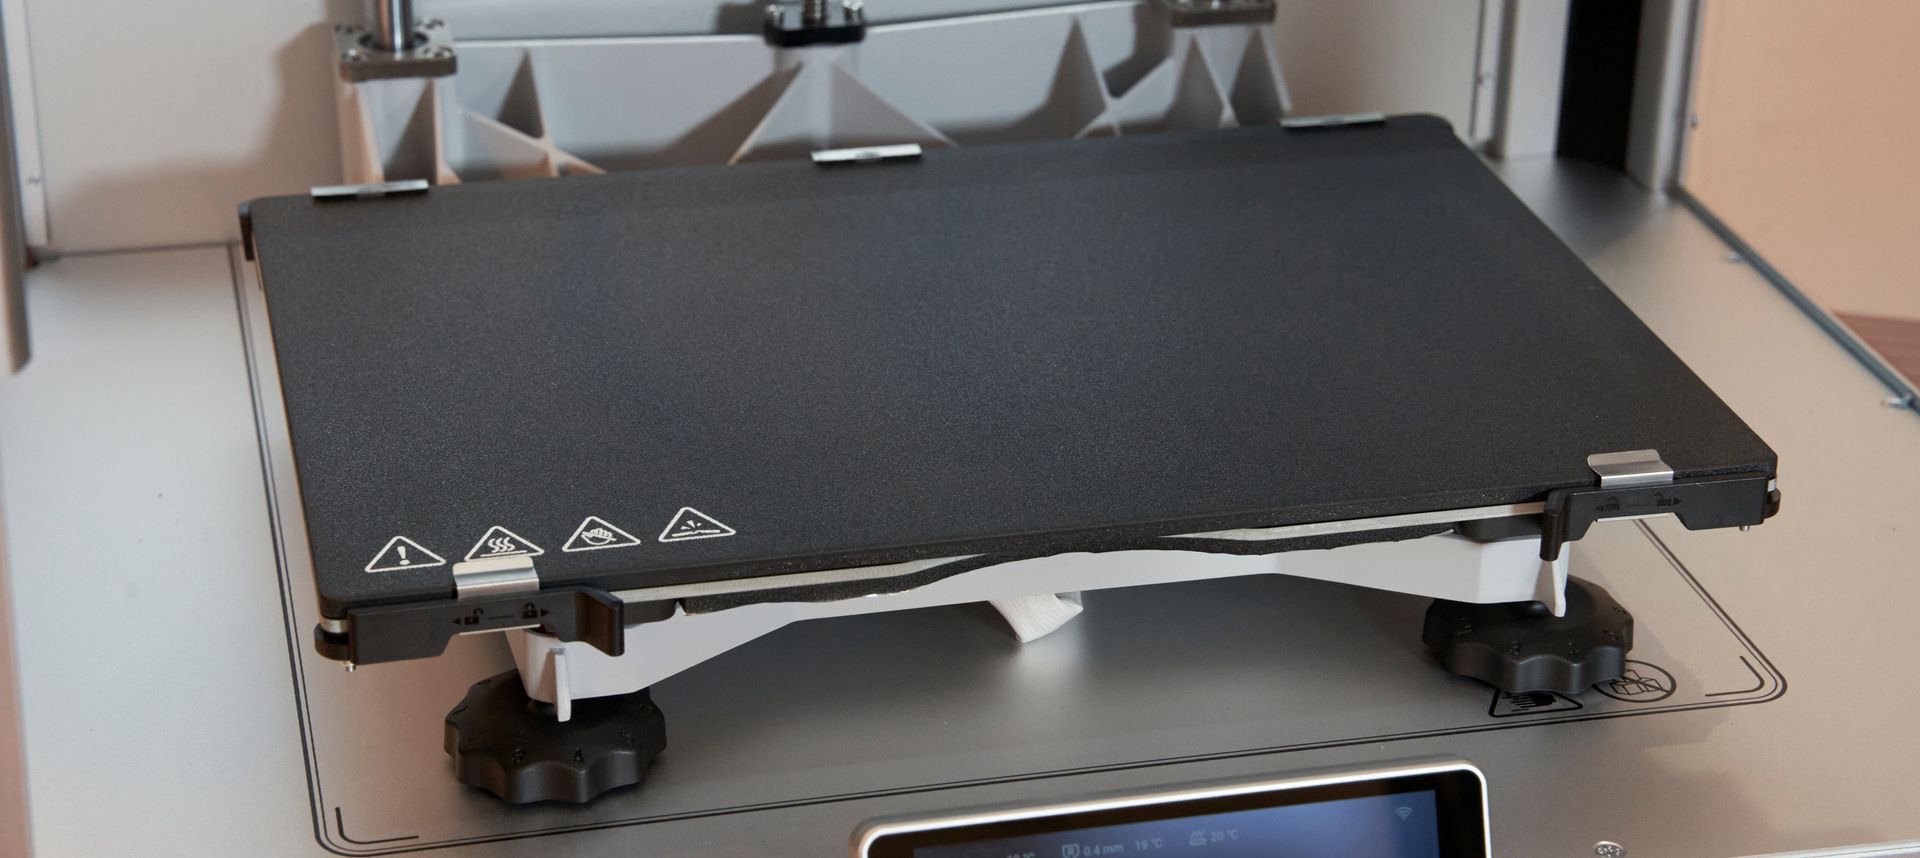
The Snapmaker J1S comes with a weighty glass backed PEI print bed. All the 3D printers I use have a PEI coated surface, but are backed on a removable, magnetic and flexible steel sheet. So, naturally I was worried about removing prints with ease.
So far (I've printed about 20 objects) every single one has detached itself whilst cooling after a successful print. I'm really happy and impressed by this. I imagine that with proper long term maintenance and cleaning the sheet should continue to perform. The sheet is removable by opening the front two clips, so you could treat yourself to a second print surface and swap them out in order to achieve a quicker succession of prints.
I have checked and Snapmaker do keep additional print beds and print nozzles in stock online. You can also get different nozzle sizes to suite your requirements and preferences.
Print Speed
This is one of the headlines features for the J1S so let's do some comparisons to put it in perspective. I could bamboozle you with numbers such as its maximum speed of 350 mm/s and maximum acceleration of 10,000 mm/s2 but realistically these numbers mean little to the maker. What we really care about is how quickly our print job will be completed whilst the quality and reliability are maintained.
I've compared the printers I have to hand, they are also found at a smiler price point then say a Creality or Elegoo branded machine.
Benchy
| Printer | Print Time |
|---|---|
| Snapmaker J1S | 24mins |
| Snapmaker Artisan | TBC |
| Prusa i3 Mk3s | 78mins |
| Prusa i3 Mk4 | 40mins |
Kickstarter Torture Test
| Printer | Print Time |
|---|---|
| Snapmaker J1S | 215mins |
| Snapmaker Artisan | TBC |
| Prusa i3 Mk3s | 225mins |
| Prusa i3 Mk4 | 126mins |
It's worth noting that the Snapmaker J1S can effectively 'halve' the print time when printing in 'Mirror' or 'Copy' mode by printing two objects simultaneously. More about that further down the review.
There is an unusual result when looking at the print times for the Kickstarter Torture Test. Whilst watching the J1S complete this print I did notice some unusual path planning and a tendency for it to momentarily pause repeatably which resulted in the inflated print time.
Outside of the confines of running these popular tests the machine defiantly feels fast.
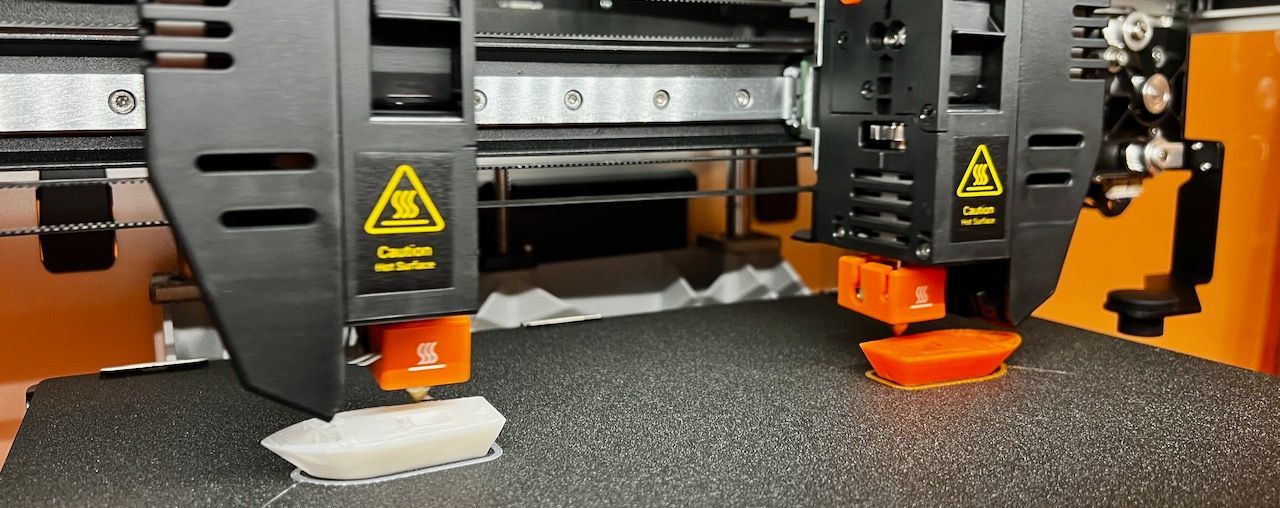
IDEX
As mentioned earlier, IDEX stands for 'Independent Dual Extruders'.
On the J1S this means we have two independent extruders which can be heated to independent temperatures and travel left to right independently. Because of the CoreXY motion system employed they are required to move forwards and backs as one and they of course share the same Z-axis (up and down). What benefits does IDEX bring to this 3D printer? Well actually, a fair few...
Modes
The 3D printer offers four different printer modes thanks to the IDEX system which can be selected either at the time of 'slicing' (the process of converting the 3D models in 2D slices and then motion paths which the printer will then follow to recreate the model) or on the printer itself when loading a print file.
According to Snapmaker, the modes are as follows:
- Default: The printer acts as your common 3D printer and quickly reproduces a single object using just one of the two extruders which you preselect.
- Copy: Print two identical objects in one go. It is especially suitable for batch printing, empowering studios and enthusiasts. If one of the prints runs into an issue, you can stop that print without affecting the other. This mode is a lifesaver for a promised delivery on a tight schedule.
- Mirror: J1s directly mirrors your model and prints the original and the mirrored one in one go. For a symmetrical model, you can import half of it and print it in Mirror Mode to cut your wait time by 50%, perfect for quick drafts and concept models. Like in the Copy Mode, you can stop one print without affecting the other.
- Backup: With Backup Mode, you print with one extruder while the other stands by. If the working extruder bumps into a hiccup, the stand-by one would take over the job seamlessly and still deliver a fabulous print to you.
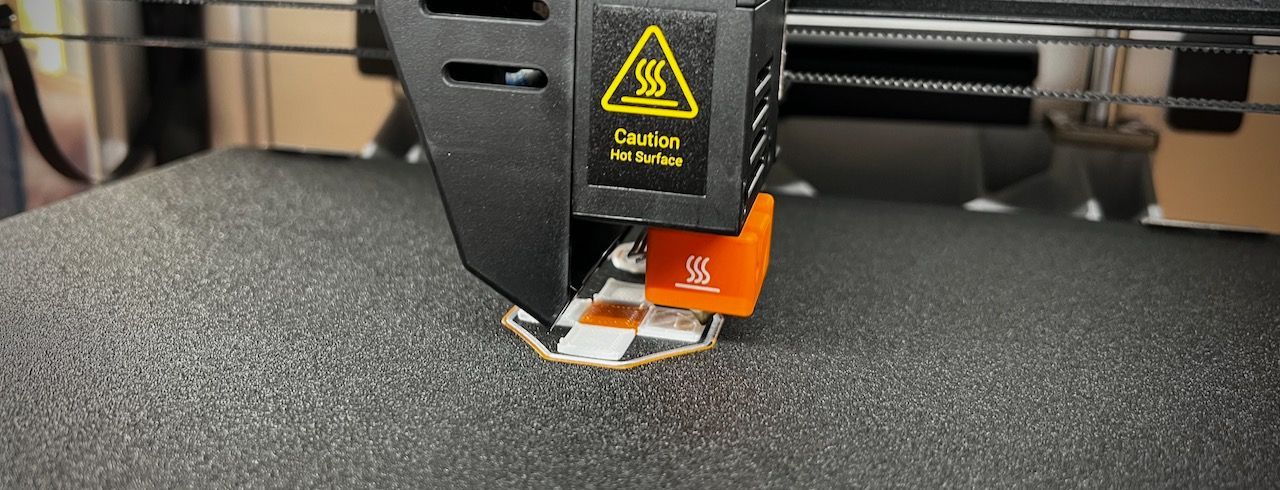
Multi-materials and Colours
Having independently heated extruders allows you to work with not only two different colours interwoven in a single print, but also two different materials. For example you could print a wheel for a remote controlled car in a single object using PETG for the hub of the wheel and flexible TPU for the tyre itself creating a single pre-assembled component.
Connectivity
The main unit features the power switch and kettle lead connection at the rear of the machine, while the base unit's front panel hosts the USB port and large 5-inch touchscreen.
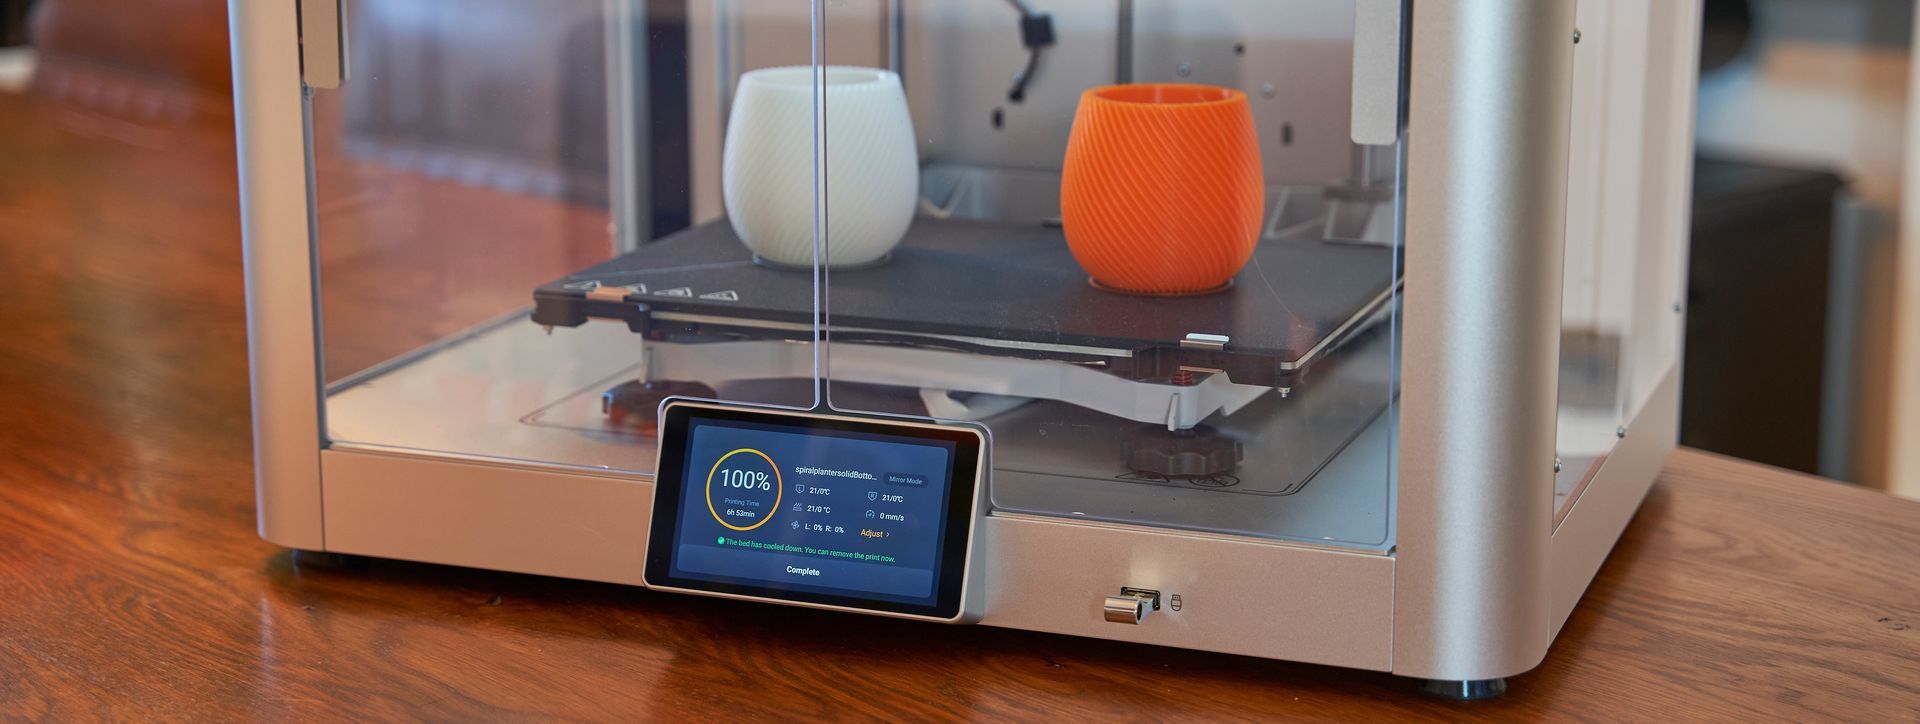
5 Inch Touch Screen
There is a very large and clear touch screen control mounted at the front centre of the machine. This provides clear previews when navigating print files as well as live print statistics during a current print job.
There are many items that can be controlled during prints such as:
- Internal lighting brightness
- Print speed (between Silent, Standard, or Fast)
- The ability to cancel just one object if it fails during a multi object print - this is without interrupting the other items
- Adjust the settings for either extruder (Z offset, flow-rate and temperature) or the heated print bed
- Alter the fan speed
- Enable 'Backup' mode mid print allowing the machine to automatically switch print heads if an error is encountered on the current one (such as a filament run-out)
There is a very clear, well-designed, wizard which steps you through tasks such as its initial set-up and plenty of on device help menus handily linked to at the right moments which saves you needing to return to the printed instructions.
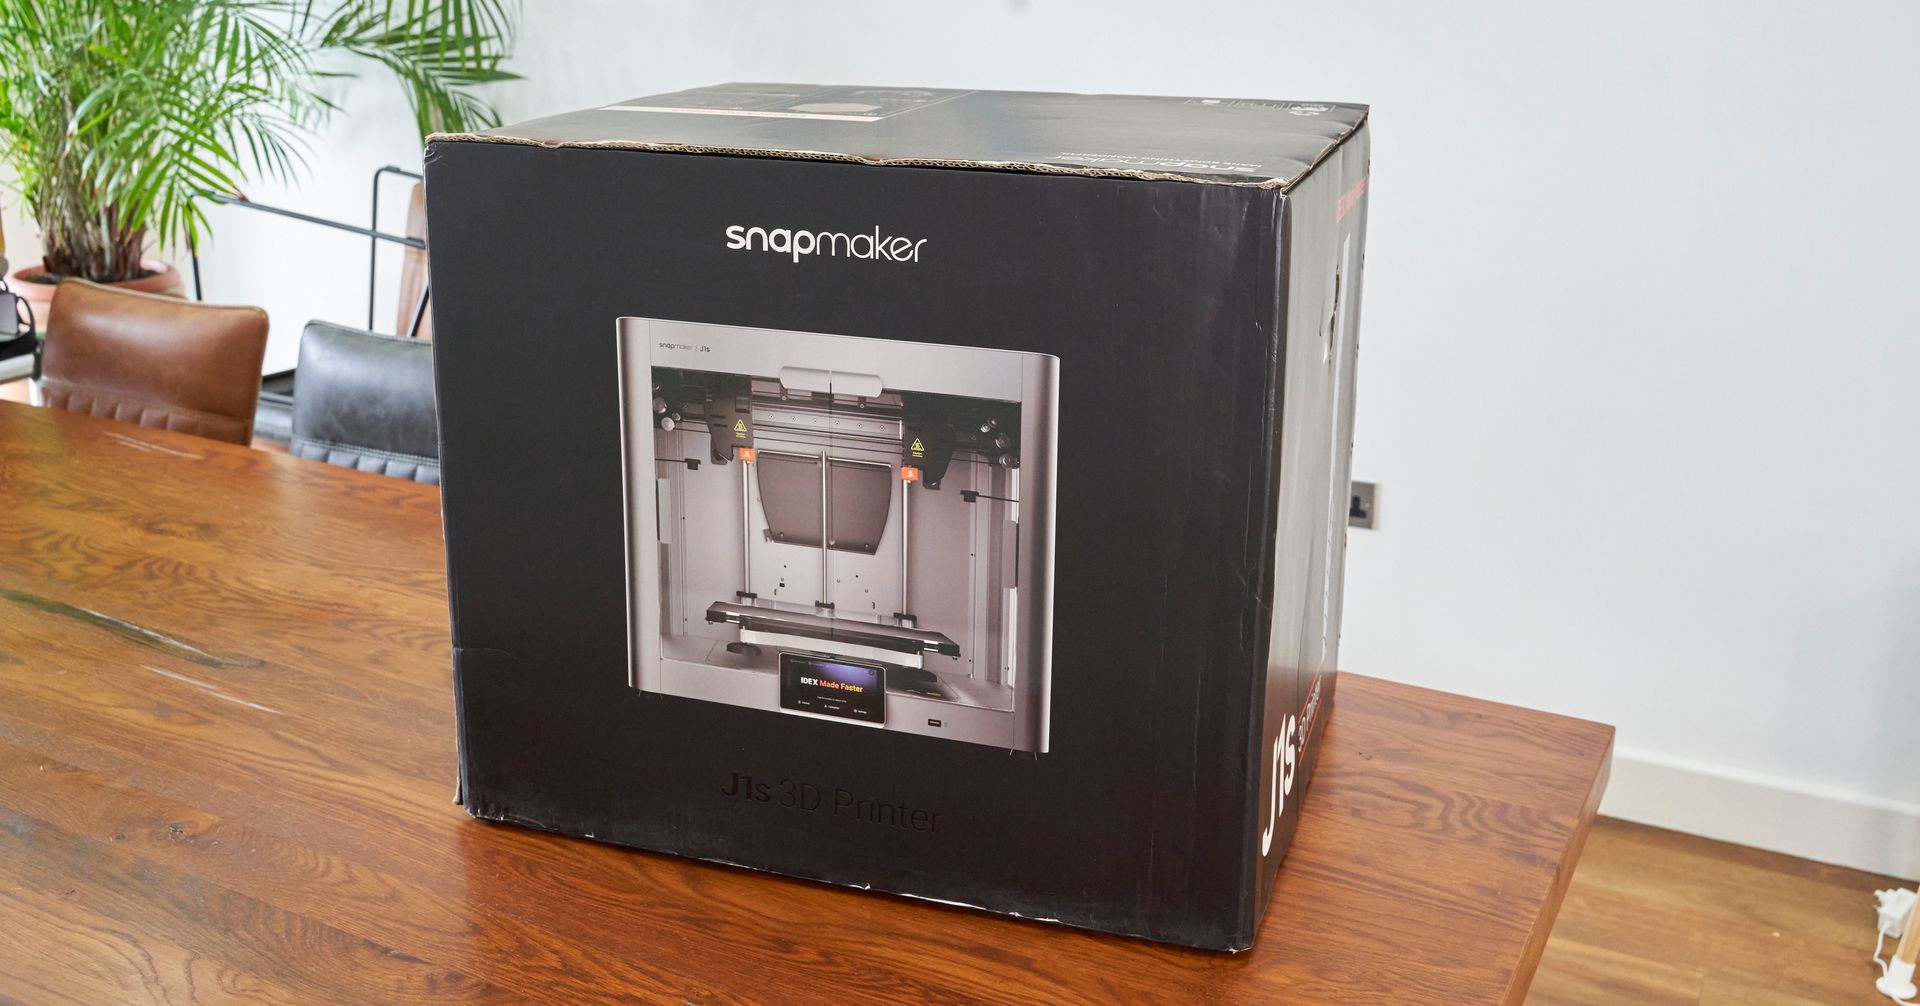
Shipping and Packing
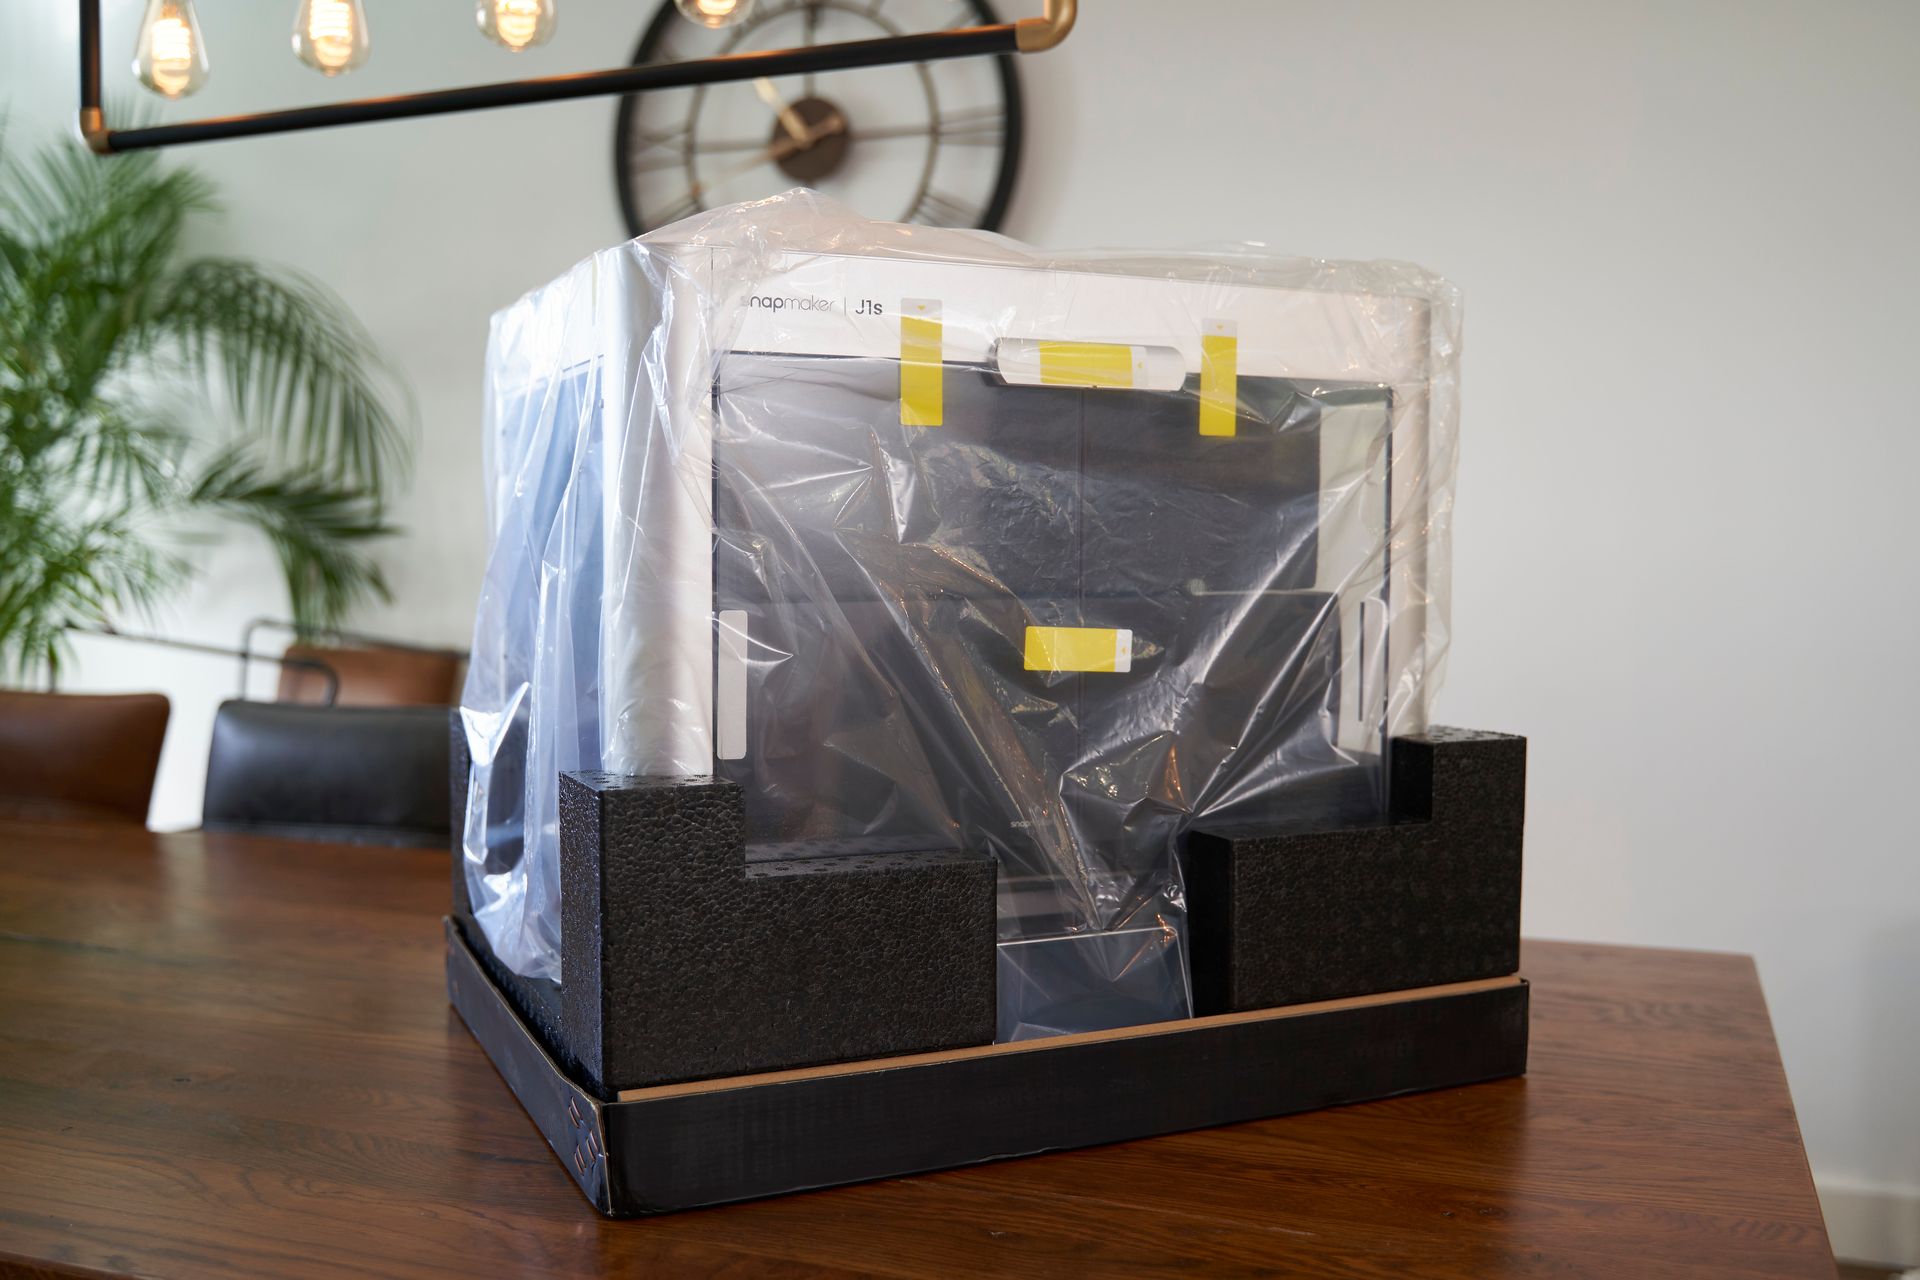
The printer arrived extremely quickly and well packed. In the image below I have already removed the plastic shrink wrapping (to protect it from moisture) and the band straps. Word of warning here, the band straps are what keep the top and bottom sections of the printers shipping box together so ensure you have it near to where you want to unpack it before removing the band clamps.
The box measures about 62 x 51 x 53cm (WxDxH) and it has a very weighty reassuring feel. You may find the help of a second person welcome when lifting the machine from the box and removing the plastic bag at the same time.
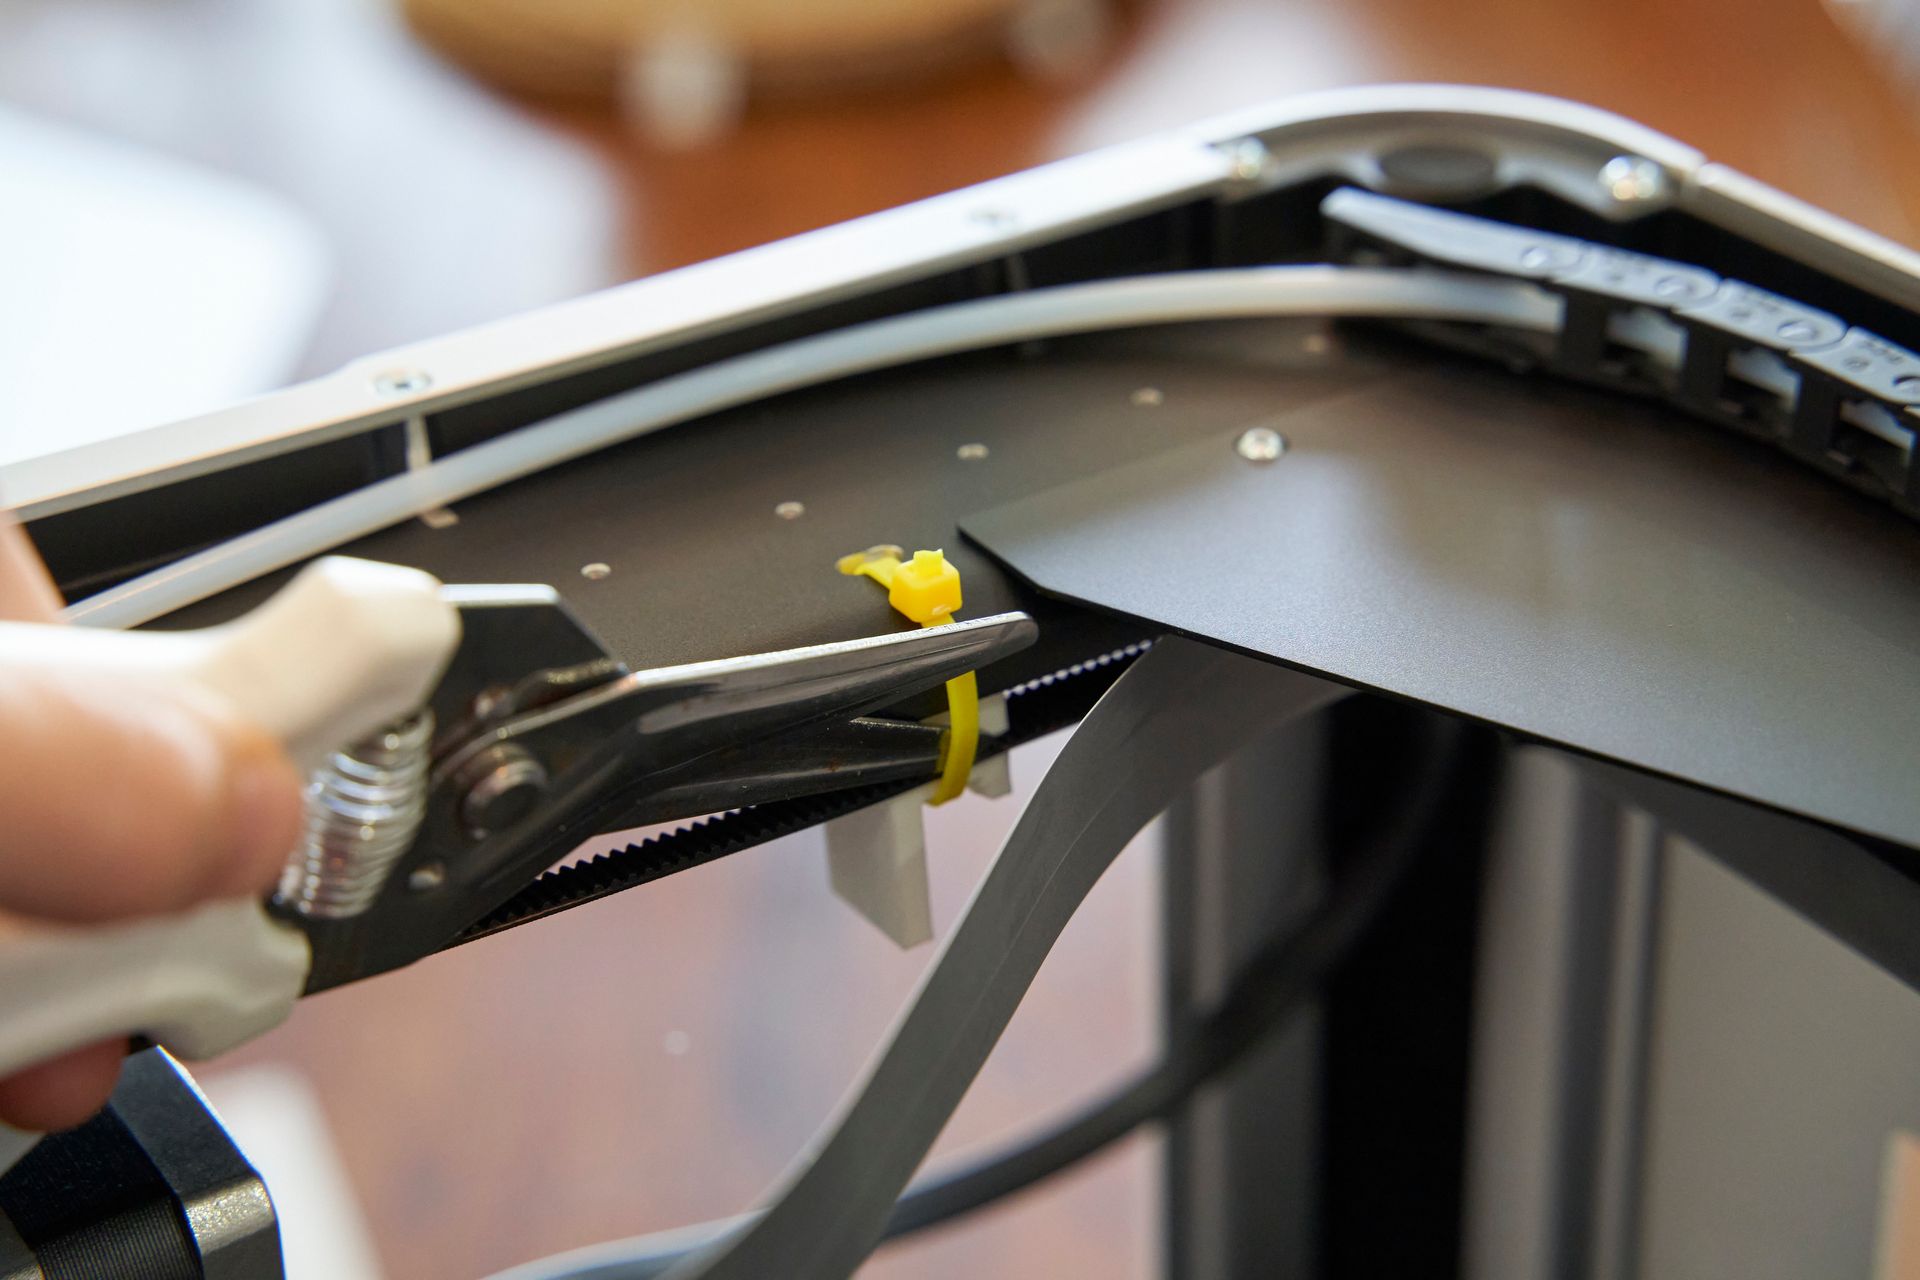
After the lid has been lifted up you'll immediately see a well positioned 'Unpacking Guide'. This is brief, concise and perfectly steps you through unpacking the machine and removing the transit restraints used to protect the machine during shipping.


What else is included?
This FDM 3D printer comes fully equipped with a range of accessories to ensure that you have everything you need to get started. It's an ideal choice for first-time users as it includes all the tool's you'll need to set-up and then use your machine. Spare silicone socks are provided.
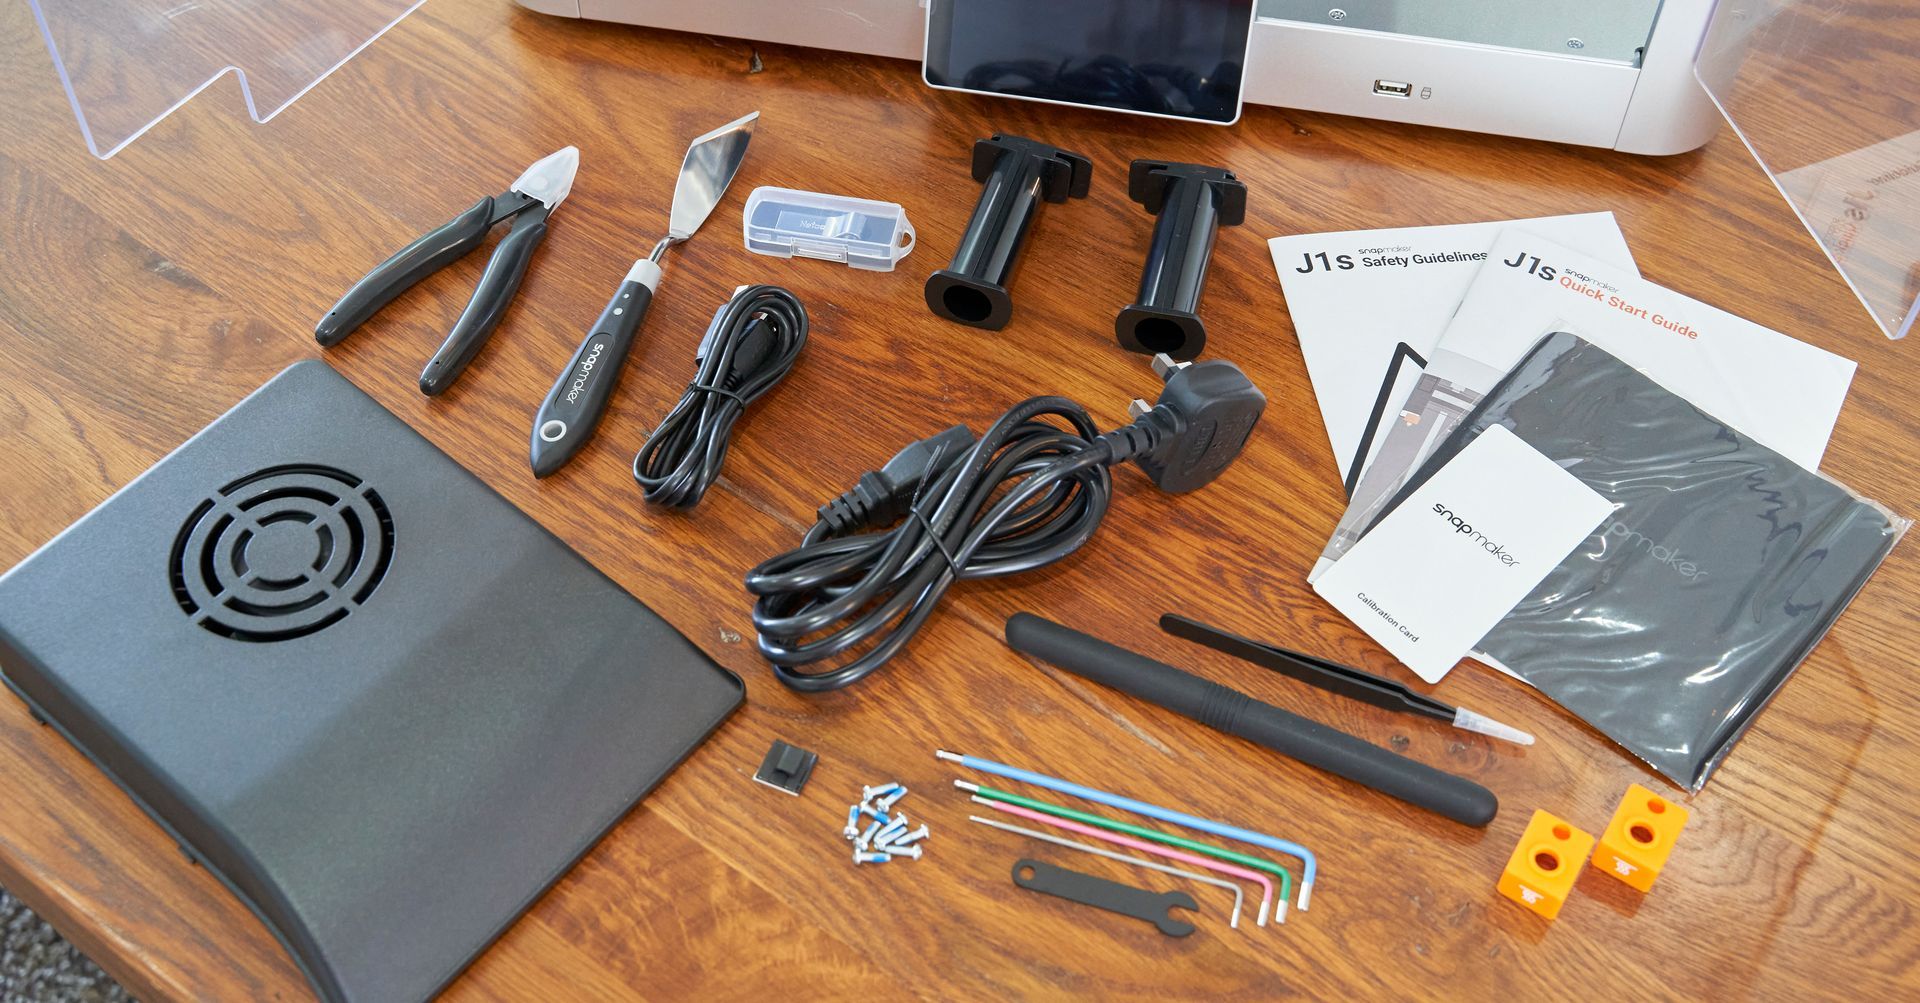
- Print removal spatular
- Spanners for changing nozzle
- Two spare silicone socks
- USB Memory Stick
- Spool holders to be installed.
- USB cable
- Selection of Allen Keys
- Print bed fan (to be installed)
- Tweezers
- Cleaning cloth
- Snips
- Two 1kg samples of Filament
- Cable clip
- Bolts for assembly
- Wire brush
Assembly
There are only three parts which require attachment during assembly, the two spool holders which clip onto the rear of the machine and the fan assembly which you bolt onto the rear (via the inside of the machine). This is such a streamlined process and easily makes the J1S one of the quickest 3D printers to set up that I have experienced.


In essence, the assembly process can be broken down into the following steps:
- Thread the power lead for the fan assembly through the rear of the machine then use it's clips to hold it temporarily in position.
- Insert and tighten three screws from inside the machine.
- Clip on the two spool holders on the rear of the machine.
- During the on-screen setup wizard the machine will raise the print bed so you can access and install two more bolts.
Rest assured that these steps are straightforward and easily manageable.
Instruction manual
The included instructions are short and only consist of a Quick Start Guide, Unpacking Instructions and Safety Brief. You can download and read the Quick Start Guide using the adjacent button here.
Don't be fooled though. The on screen Wizard and help sections on the built in screen on the Snapmaker IDEX printer more than cover what you need to do at the correct moments.
First Print
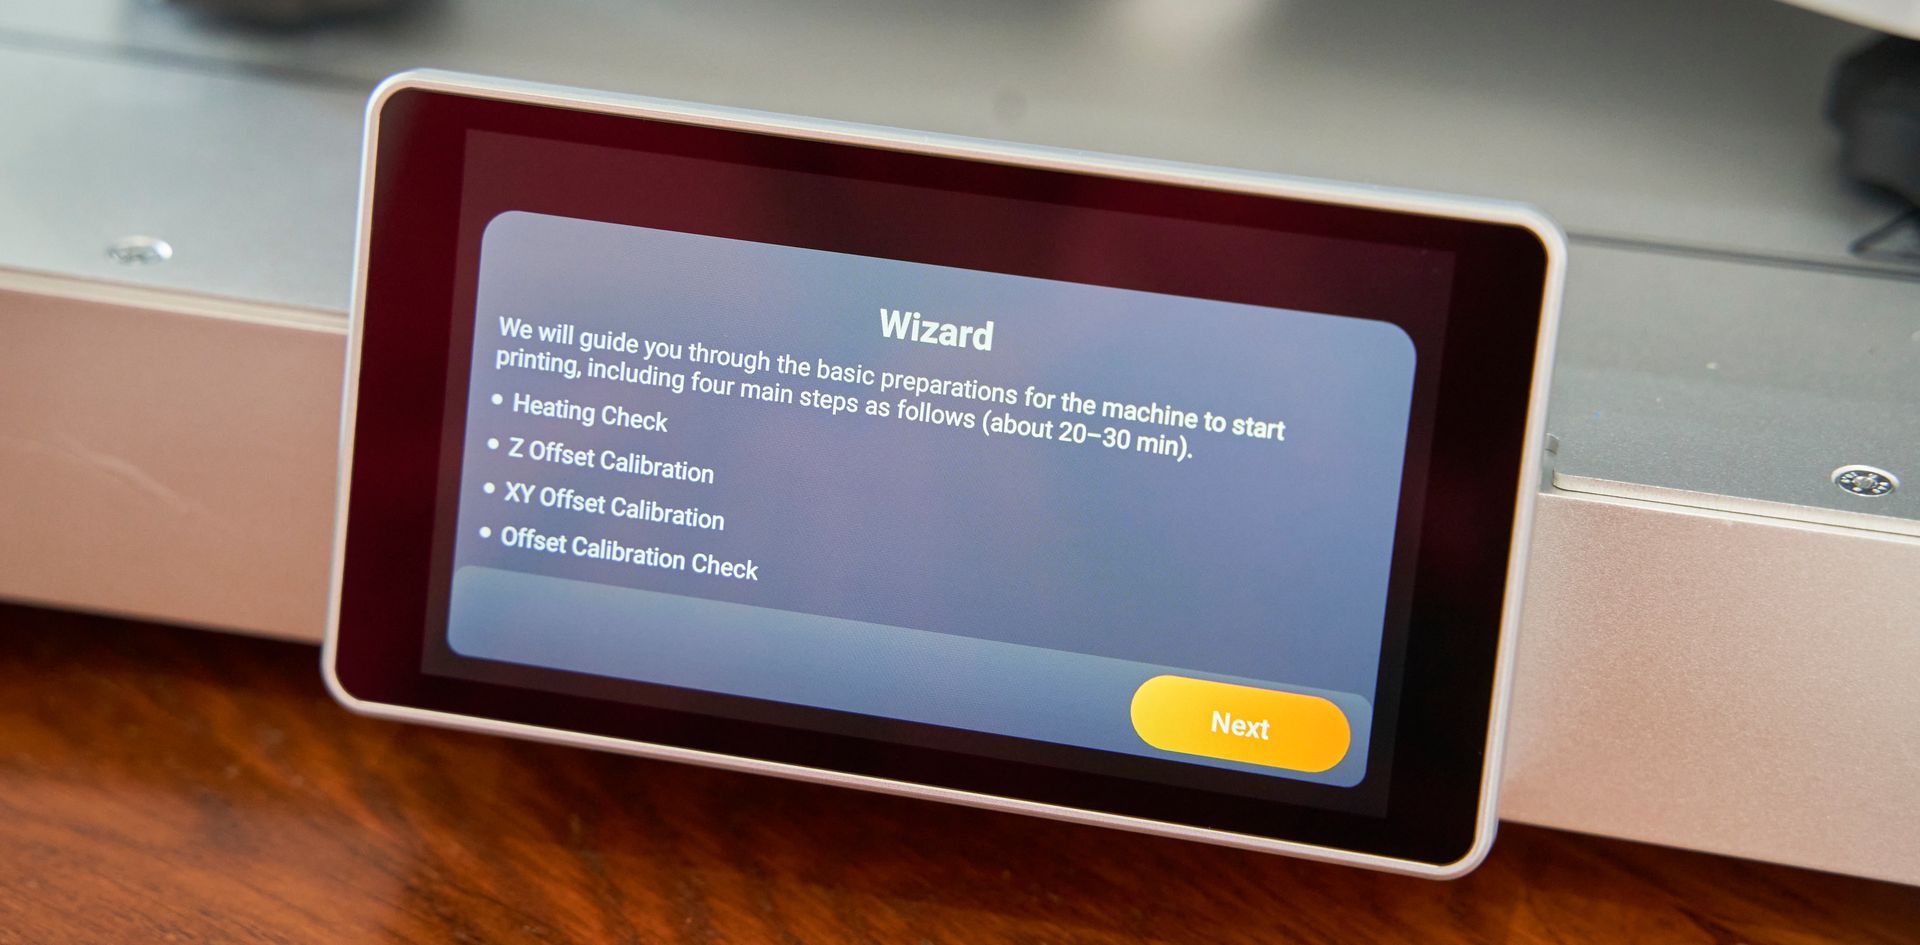
You're a Wizard
Before your very first print the Snapmaker J1S will guide you through four main steps to ensure that the printer is in tip-top shape. This boils down to checking the heating elements and sensors behave as expected. Setting the Z, X and Y offsets and then confirming these setting with a test print.
The heating check is handled automatically by the machine. For the Z Offset you are required to remove the glass print bed (just loosen two clips at the front and slide it out) so that the nozzles can access the built in sensor in the main platform of the print bed.
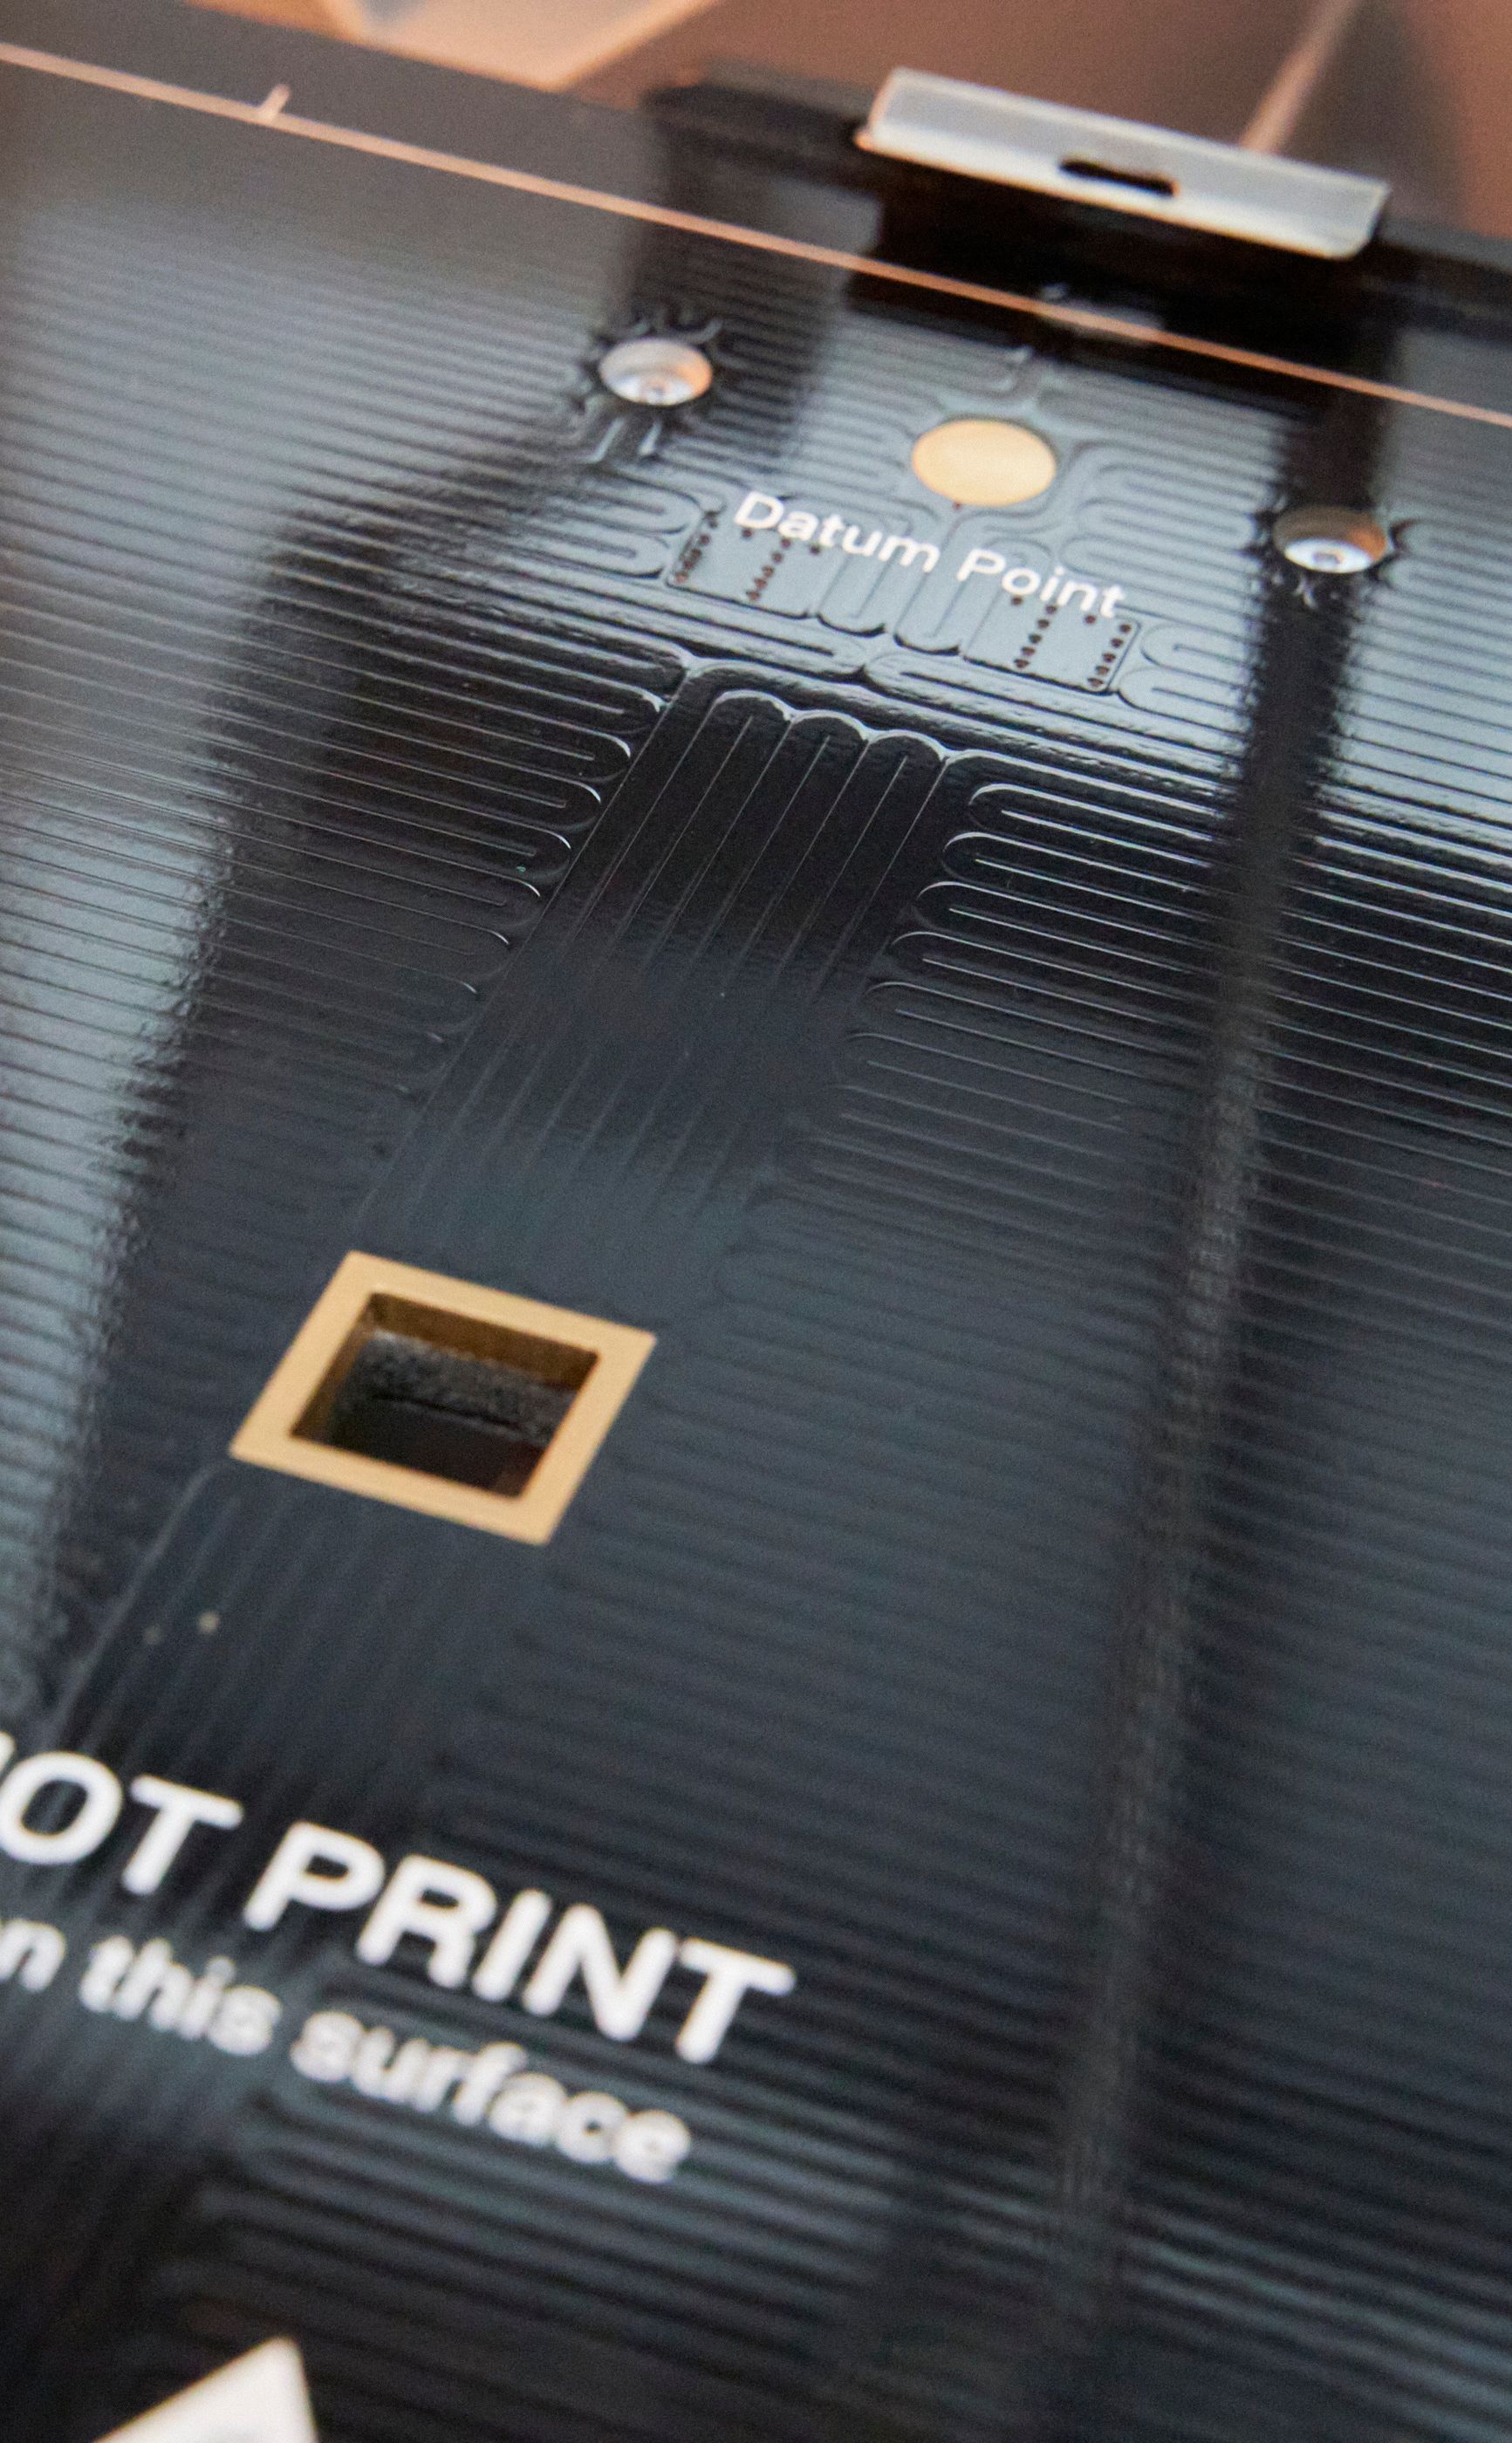
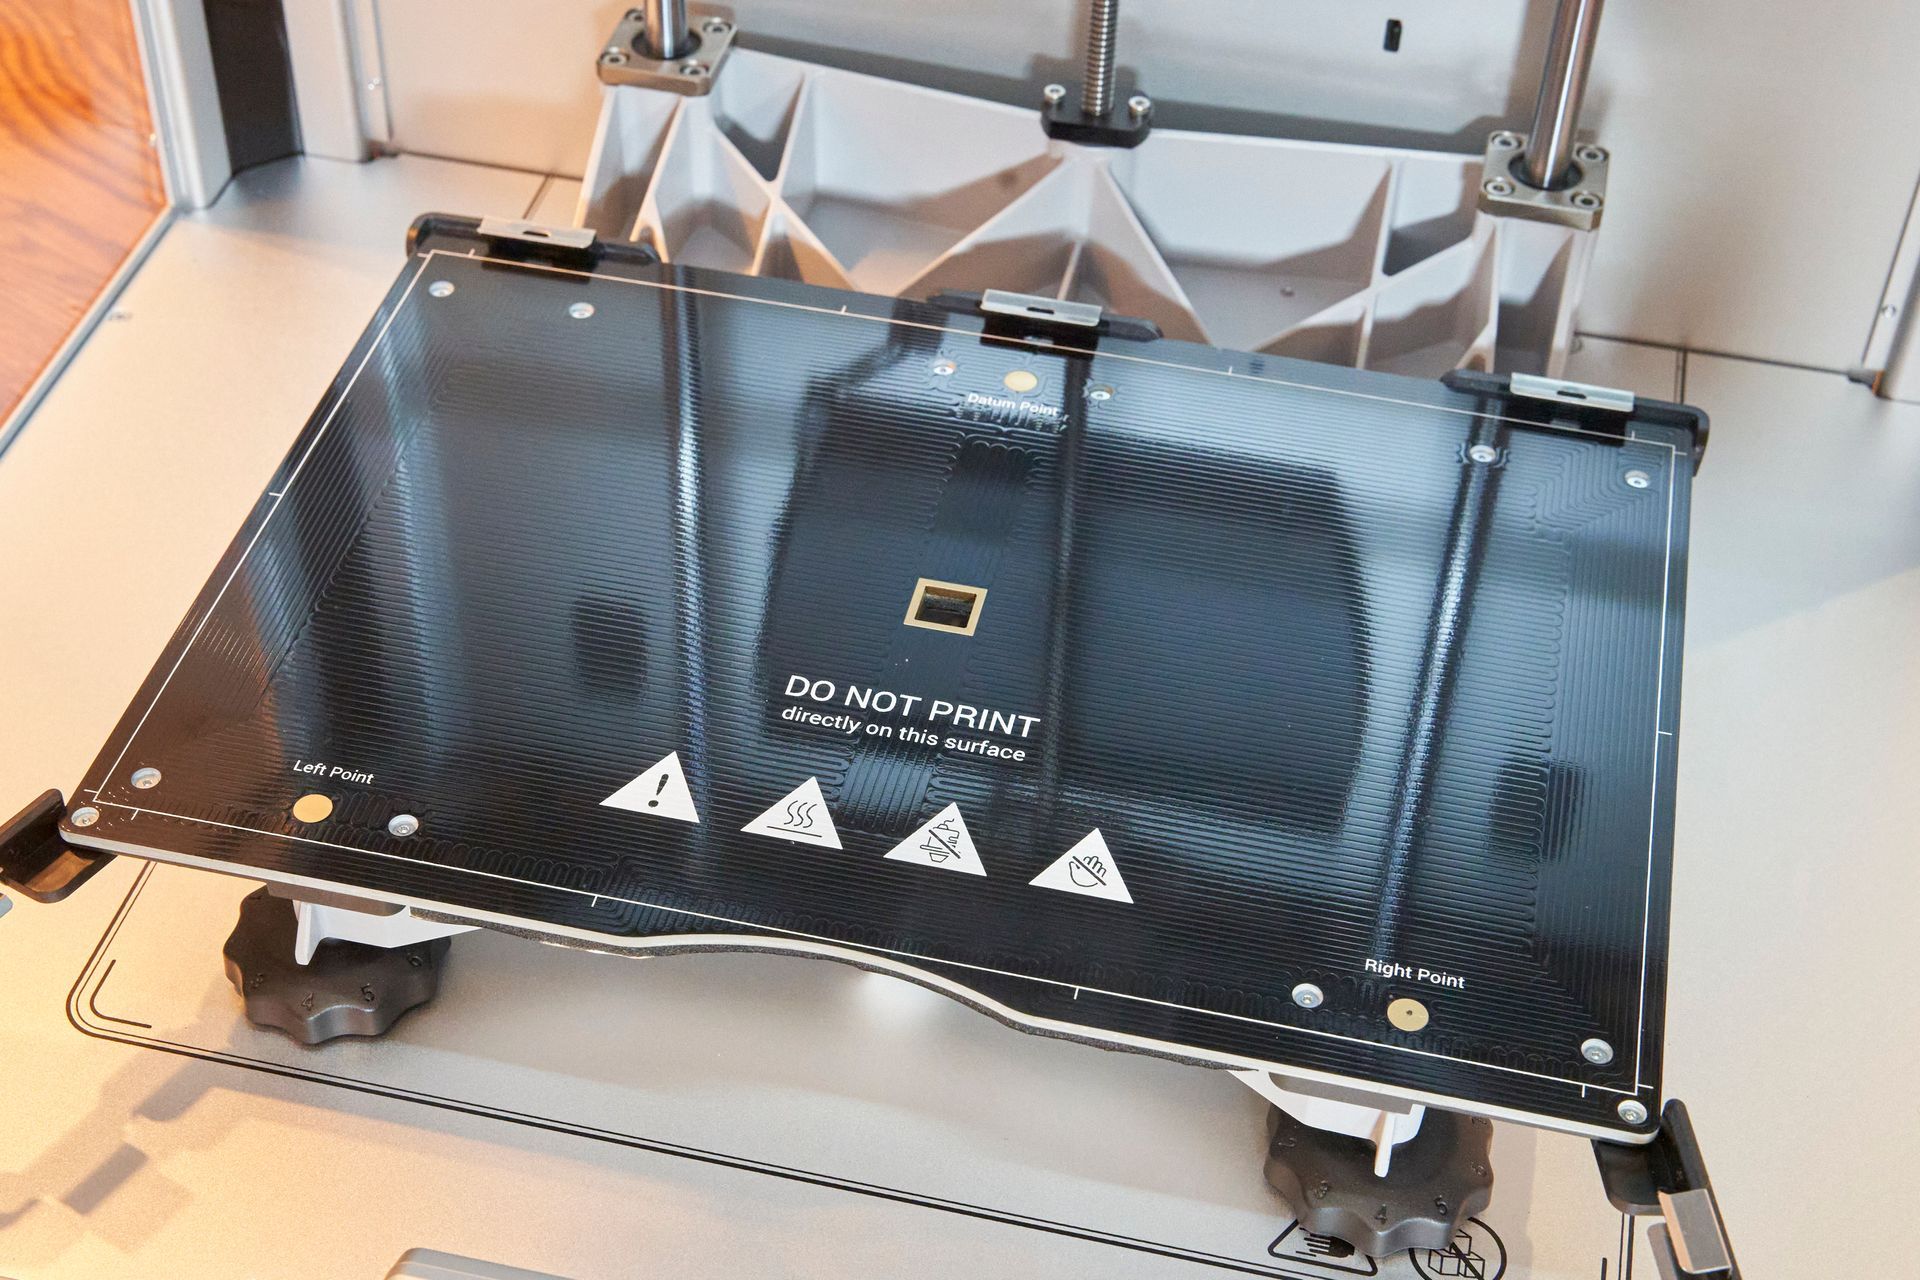
Here you can see the various copper contact points the machine uses to calibrate the Z, X and Y positioning of the nozzles in relation to one another and the print bed itself.
During the Z calibration an onscreen bar is displayed as each print nozzle probes the surface in turn. This onscreen bar graph shows you how much and in what direction to turn the large adjustment nobs on the front corners of the print bed.
It's all very easy and simple thanks to the well designed Wizard.
Loading the Filament
The two filament spools are mounted on the back of the machine. To load the included sample spools (each are a very generous 1kg) you simply place them on the spool holders and begin to feed the filament strand through the white tubing. For reference, the two filament paths cross over, so when viewed from the back, the filament spool on the left goes to the extruder on the left when viewed from the front.
You can remove the top of the machine to better see the filament as it passes through this tubing. The top of the machine is only held into place with magnets so no need for tools.
You then pre-heat the nozzle using the on screen control and then press 'Load'. This starts the extruder gears turning and as you push the filament in it will grab the strand and begin to eject the filament out of the nozzle. Once you are happy that it has purged any previous filaments you can press the onscreen button to finish the load process. Unloading happens in the same fashion but in reverse.
Printing the included Sample Model
There are two sample models included in the printers onboard memory storage. A Benchy and a dual filament, print in place, flexible shark. Naturally I started with the Benchy and printed it four times to test multiple settings.
For each print I adjusted the print settings on the printer itself. I printed the following (left to right in images below):
- One at Standard setting
- One set to Fast print speed
- Two in Mirror mode
- Two in Copy mode

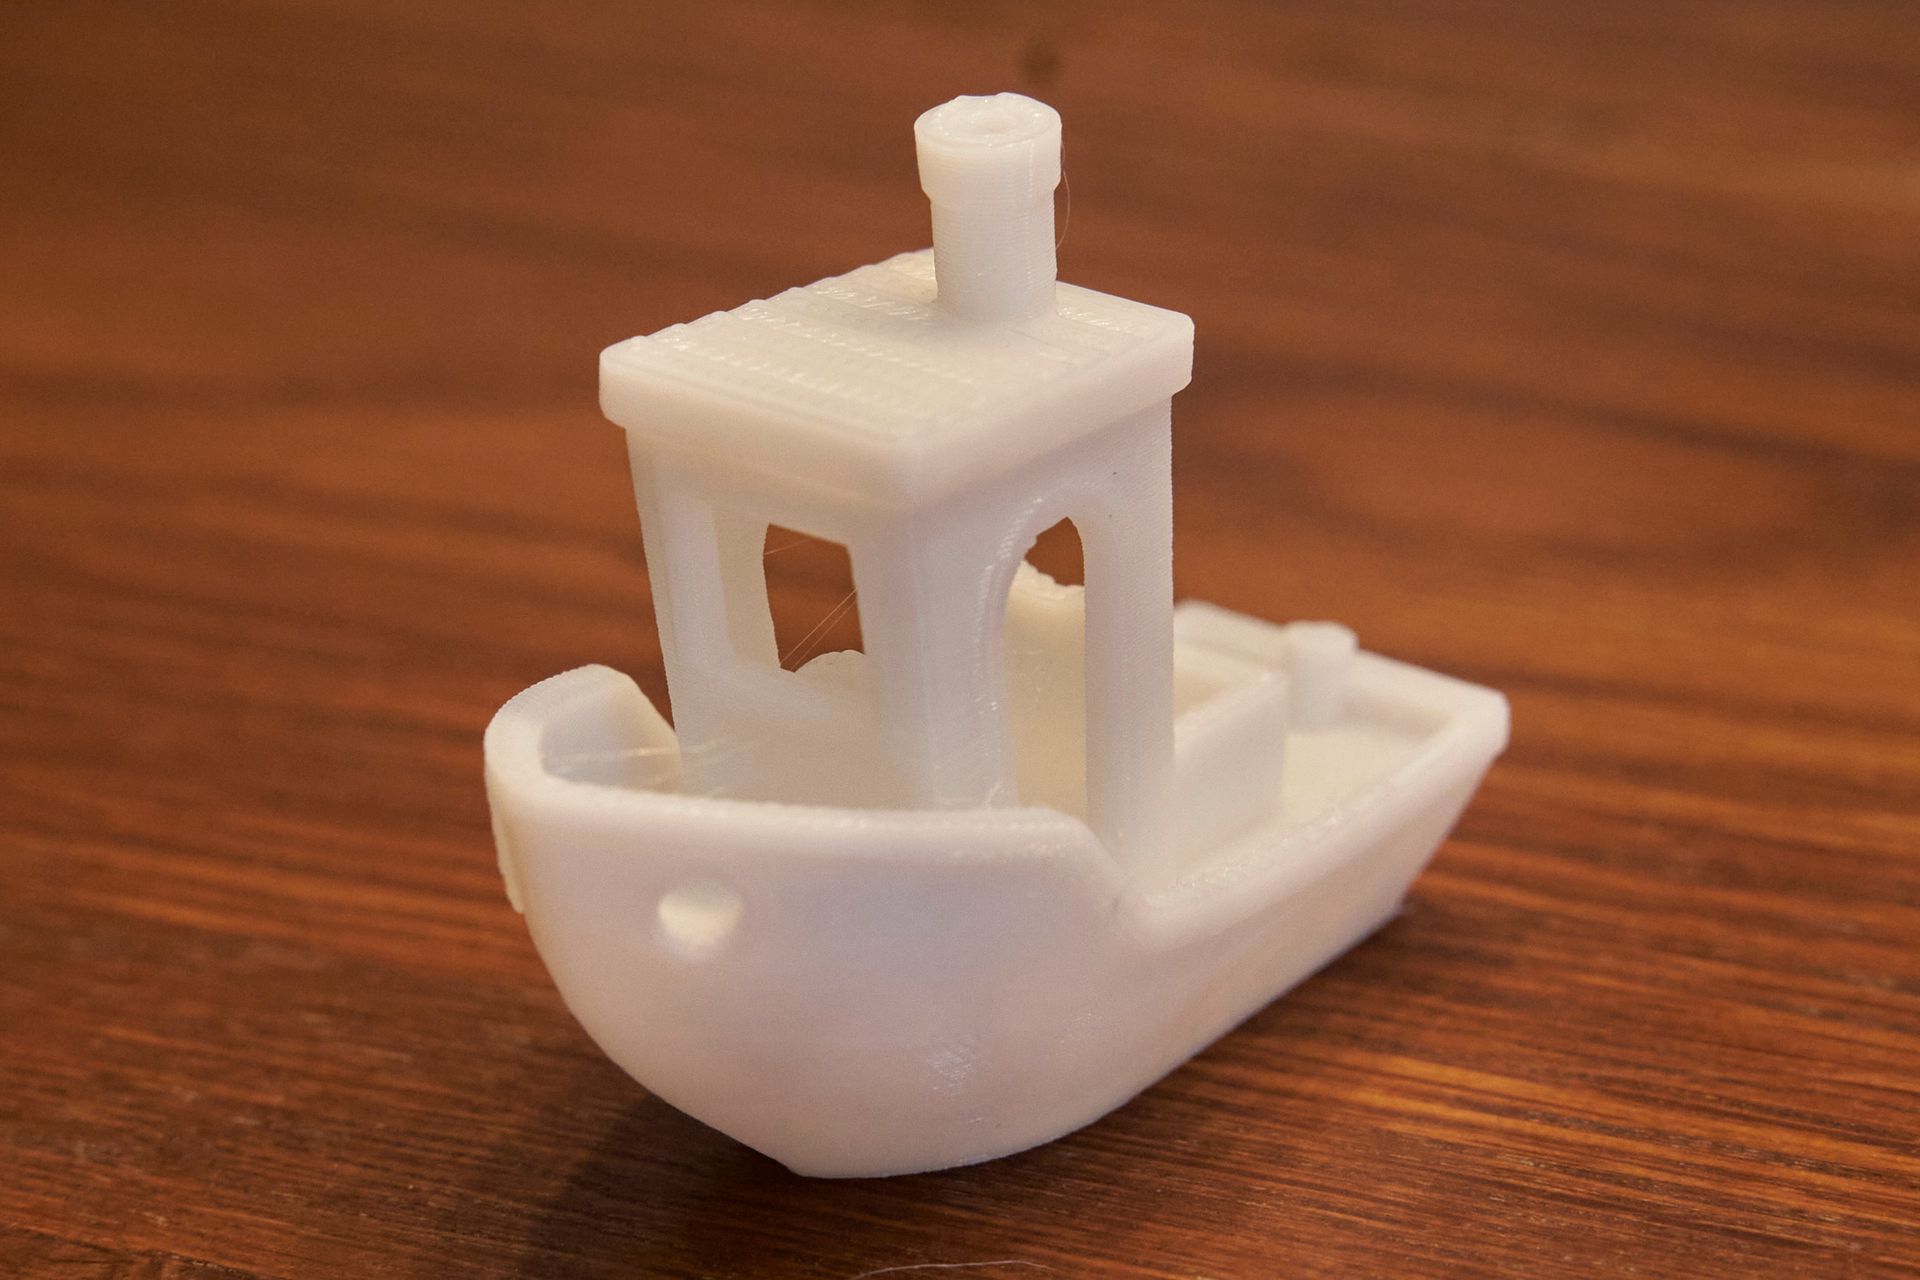
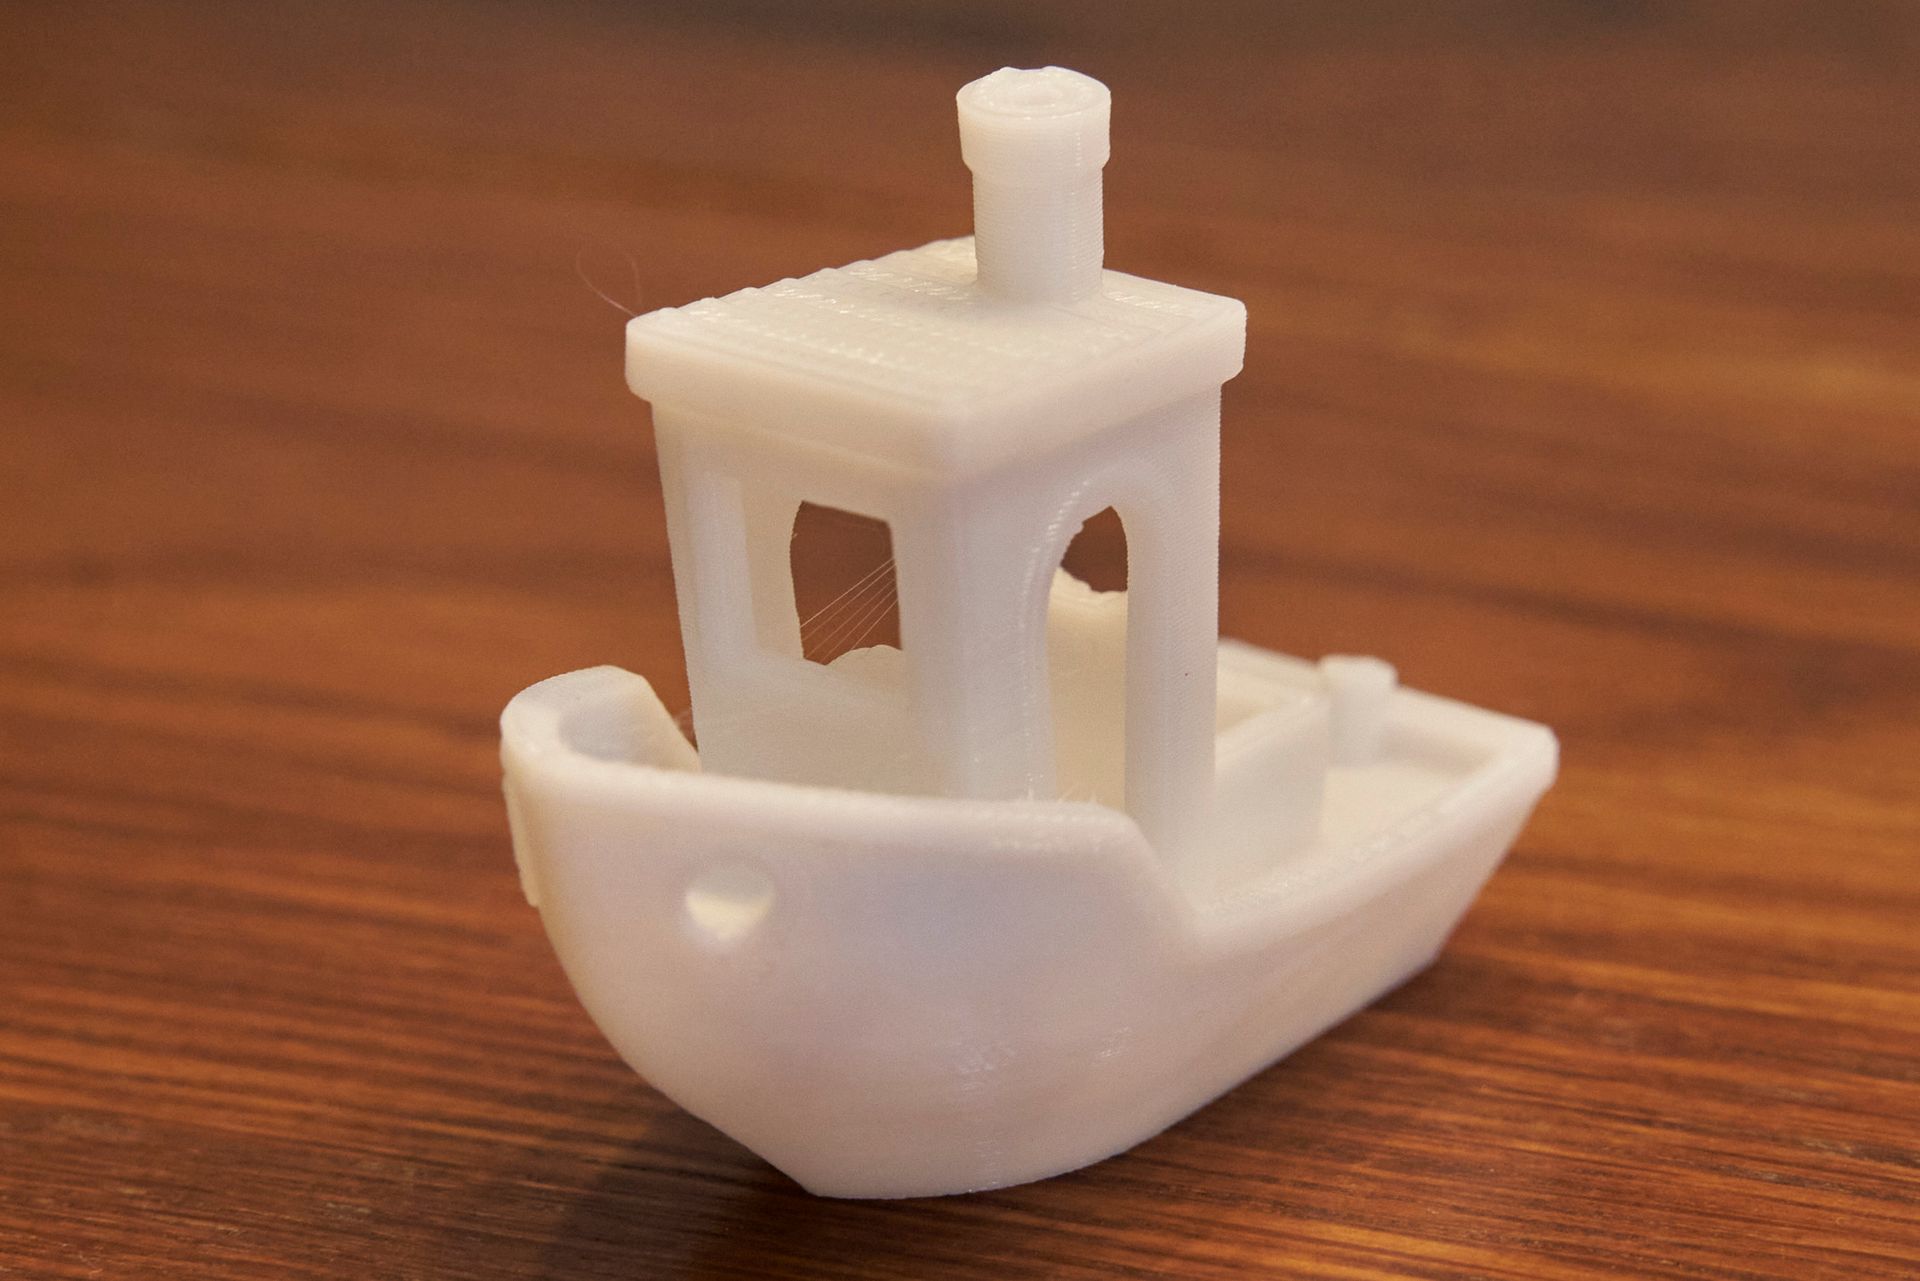
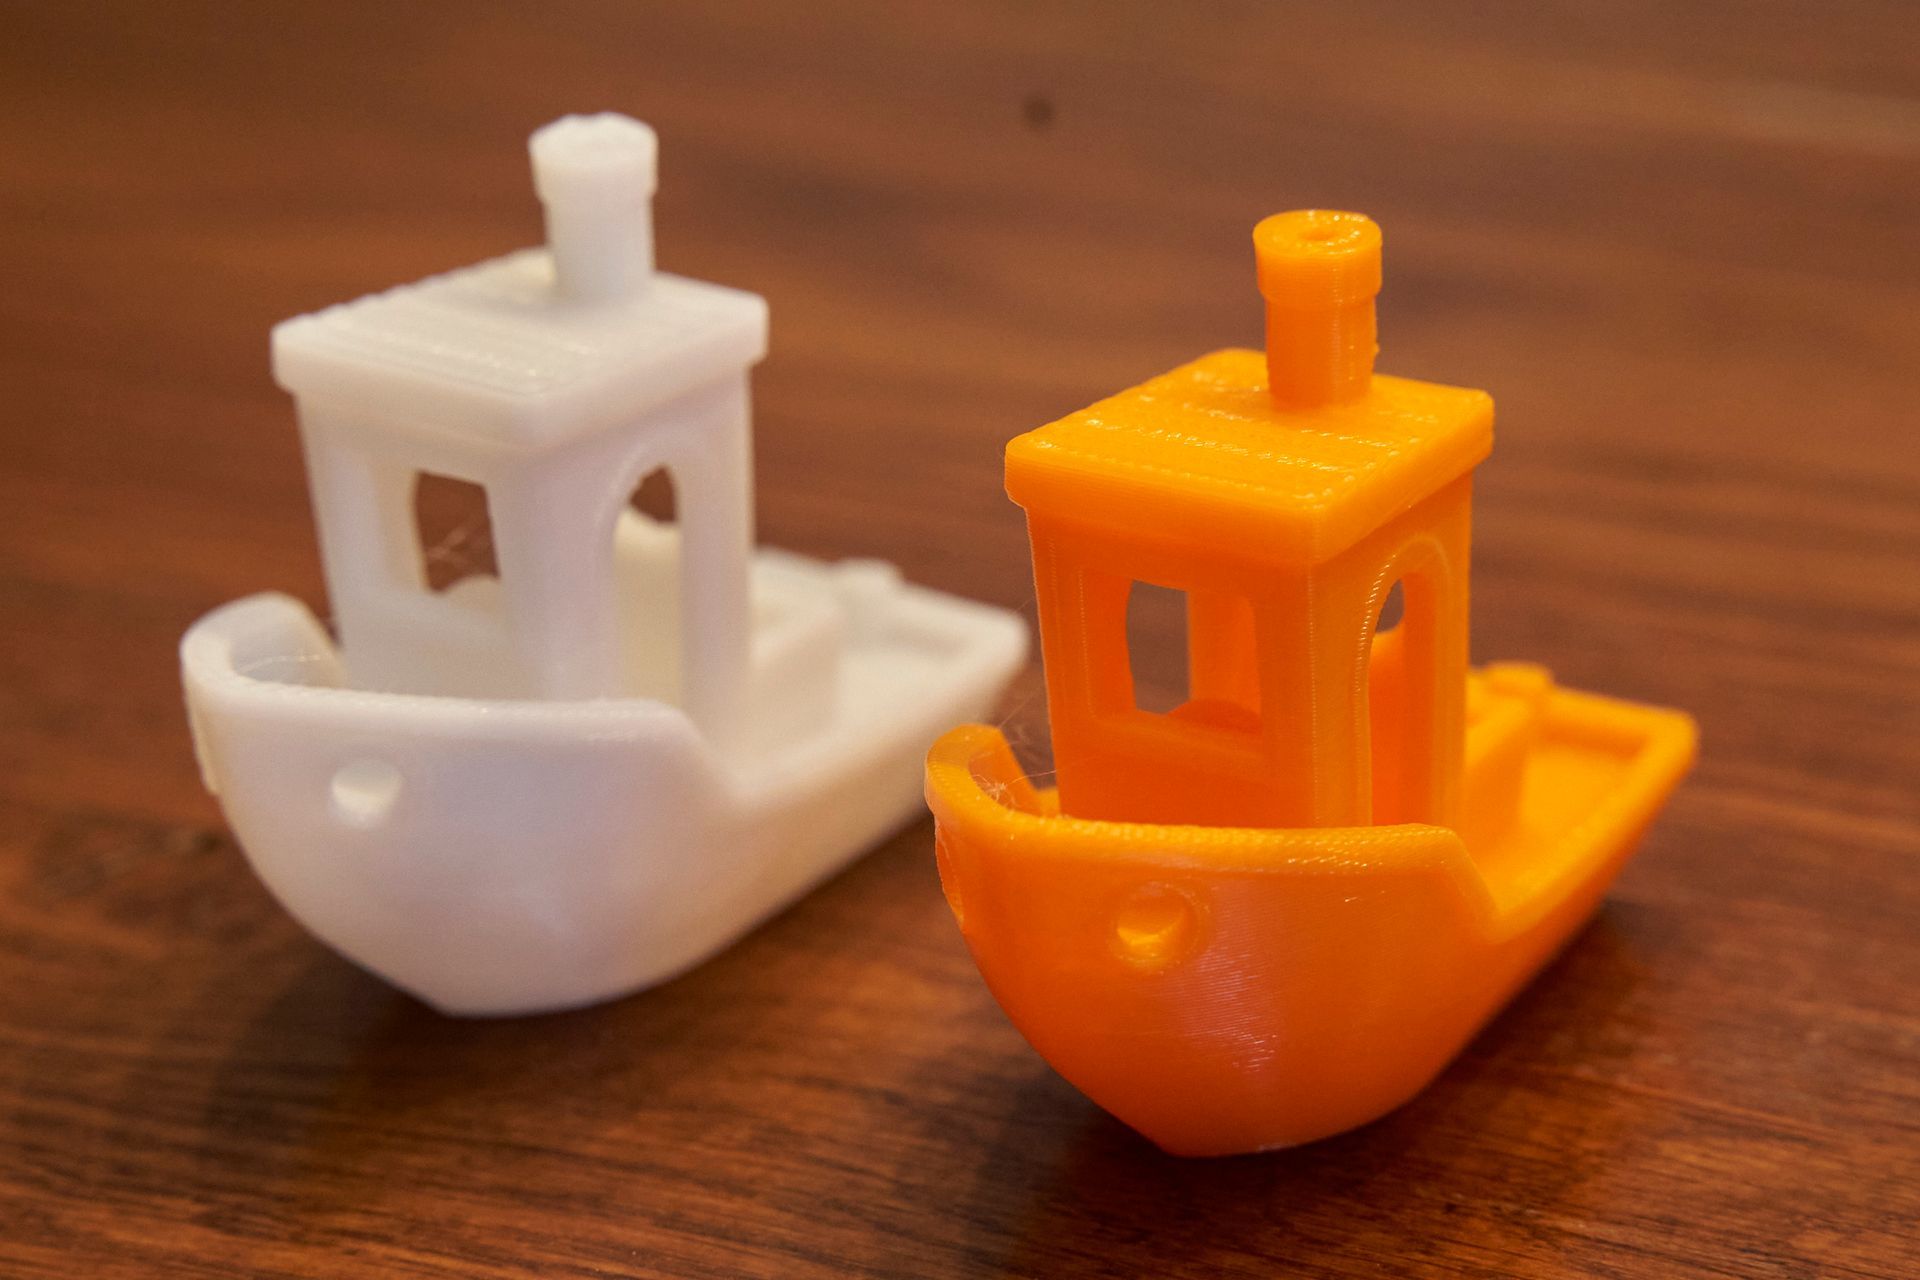

Click on either of the photos of the sample print to view a larger size and judge the quality for yourself. I am very impressed. They were all printed at a 0.15mm layer height. No lifting or warping of the base occurred and extrusion appears to be consistent. Nothing unexpected here. All the prints self released from the print bed when allowed to cool.

Torture Test
A mere print of Snapmakers preselected model would not suffice for a comprehensive review. Naturally, they would have selected a model that falls within the machine's capabilities.
Therefore, I have opted to print a torture test instead. The torture test, created by AutoDesk and Kickstarter, is my go-to for all FDM printer reviews as it enables me to thoroughly test the machine's limits in overhang, bridging, and retraction abilities. Moreover, it provides a fair and convenient basis for comparison.
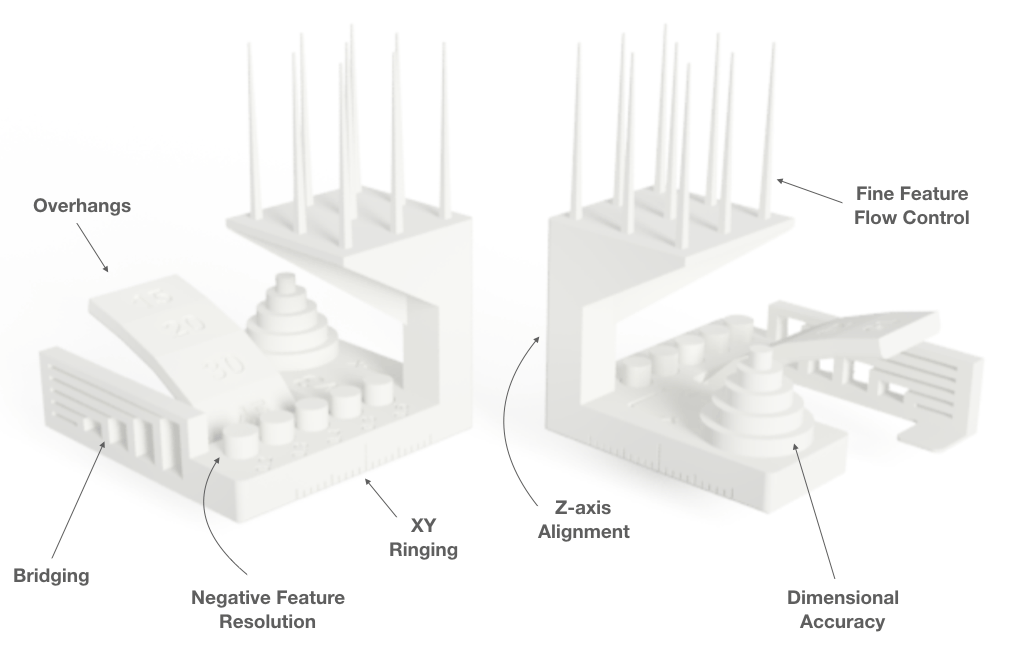
Don't forget to click on any image to open a higher full width and resolution copy to inspect for yourself.

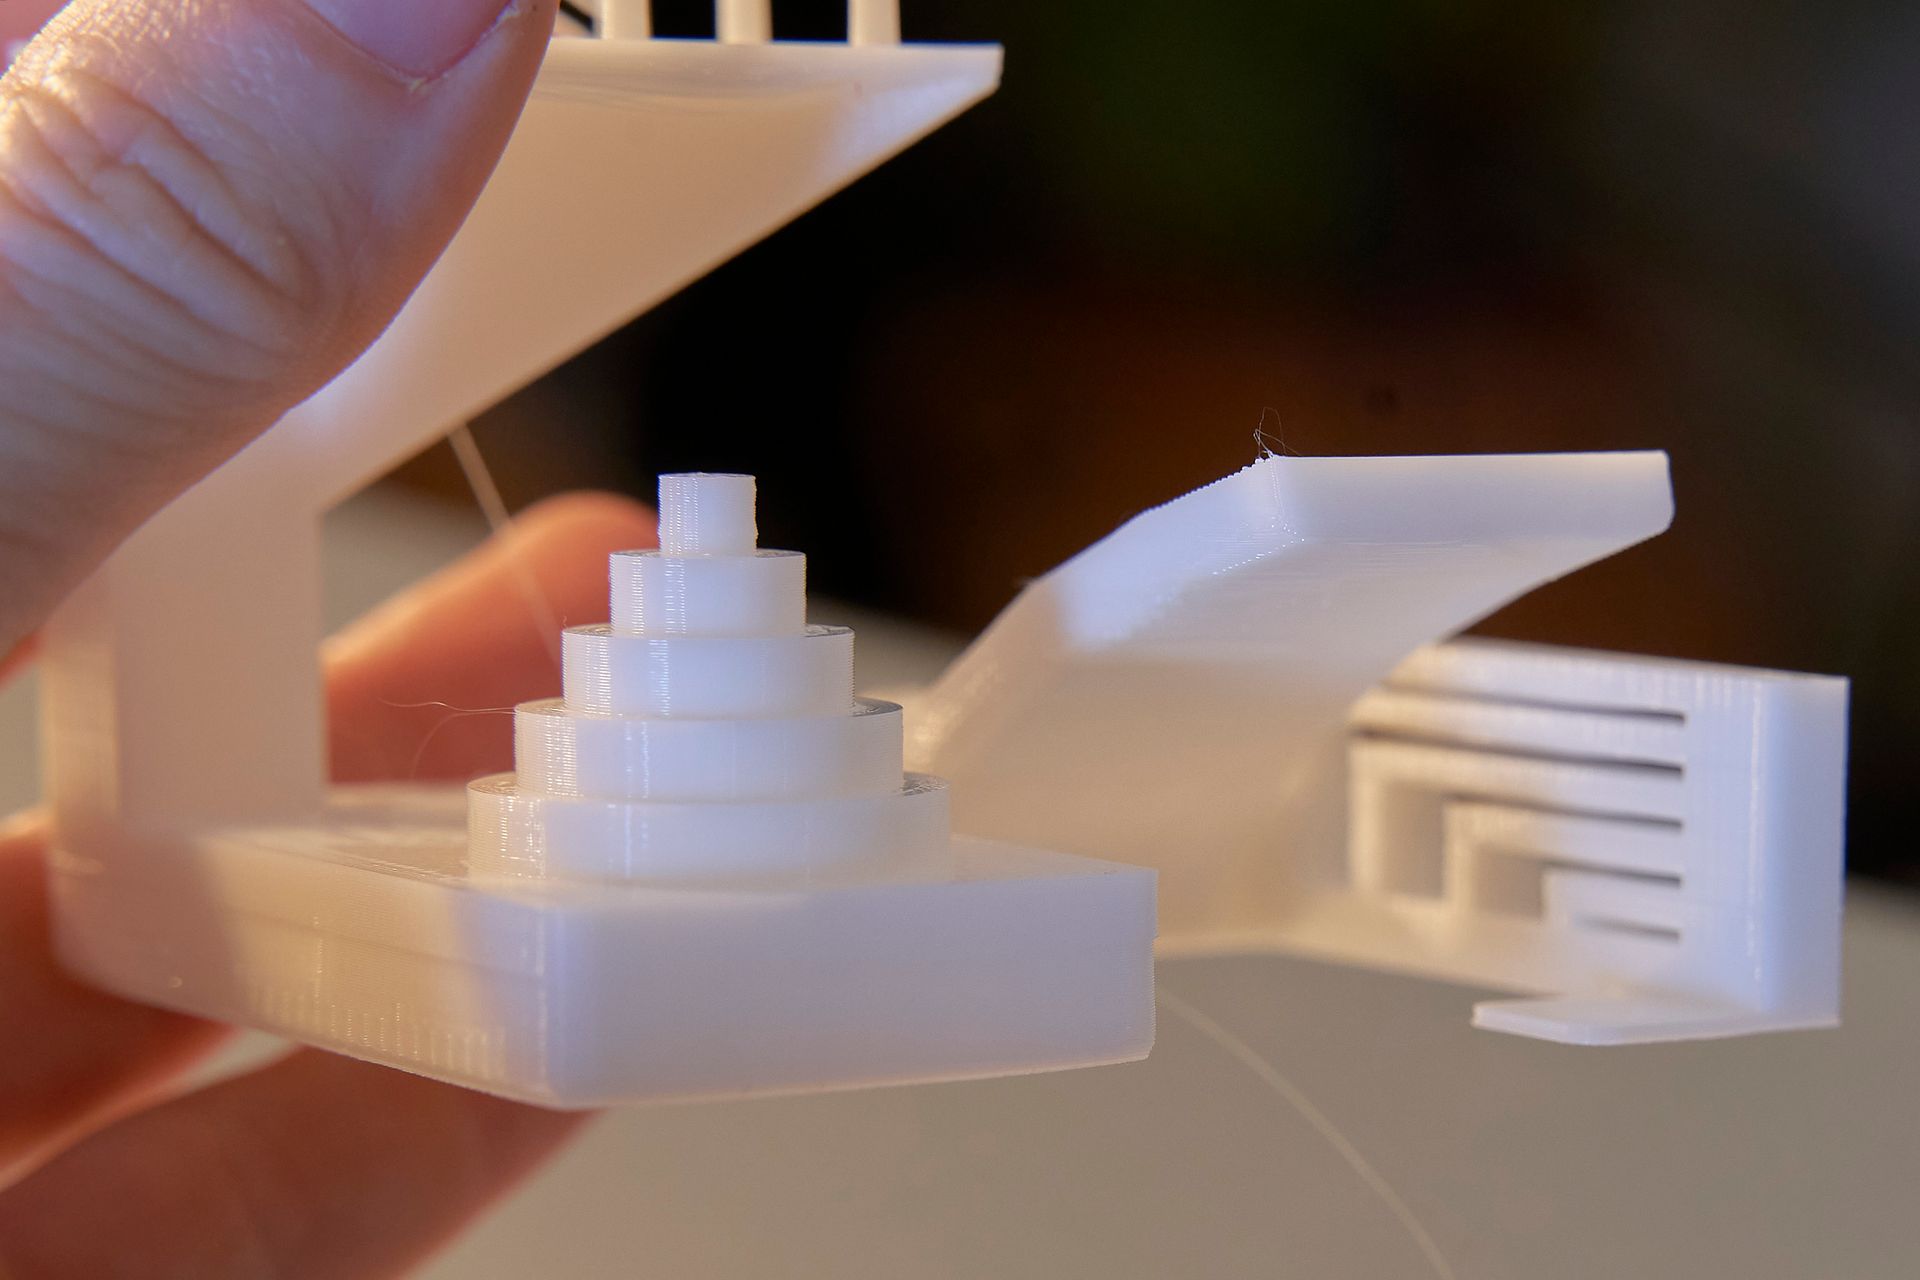


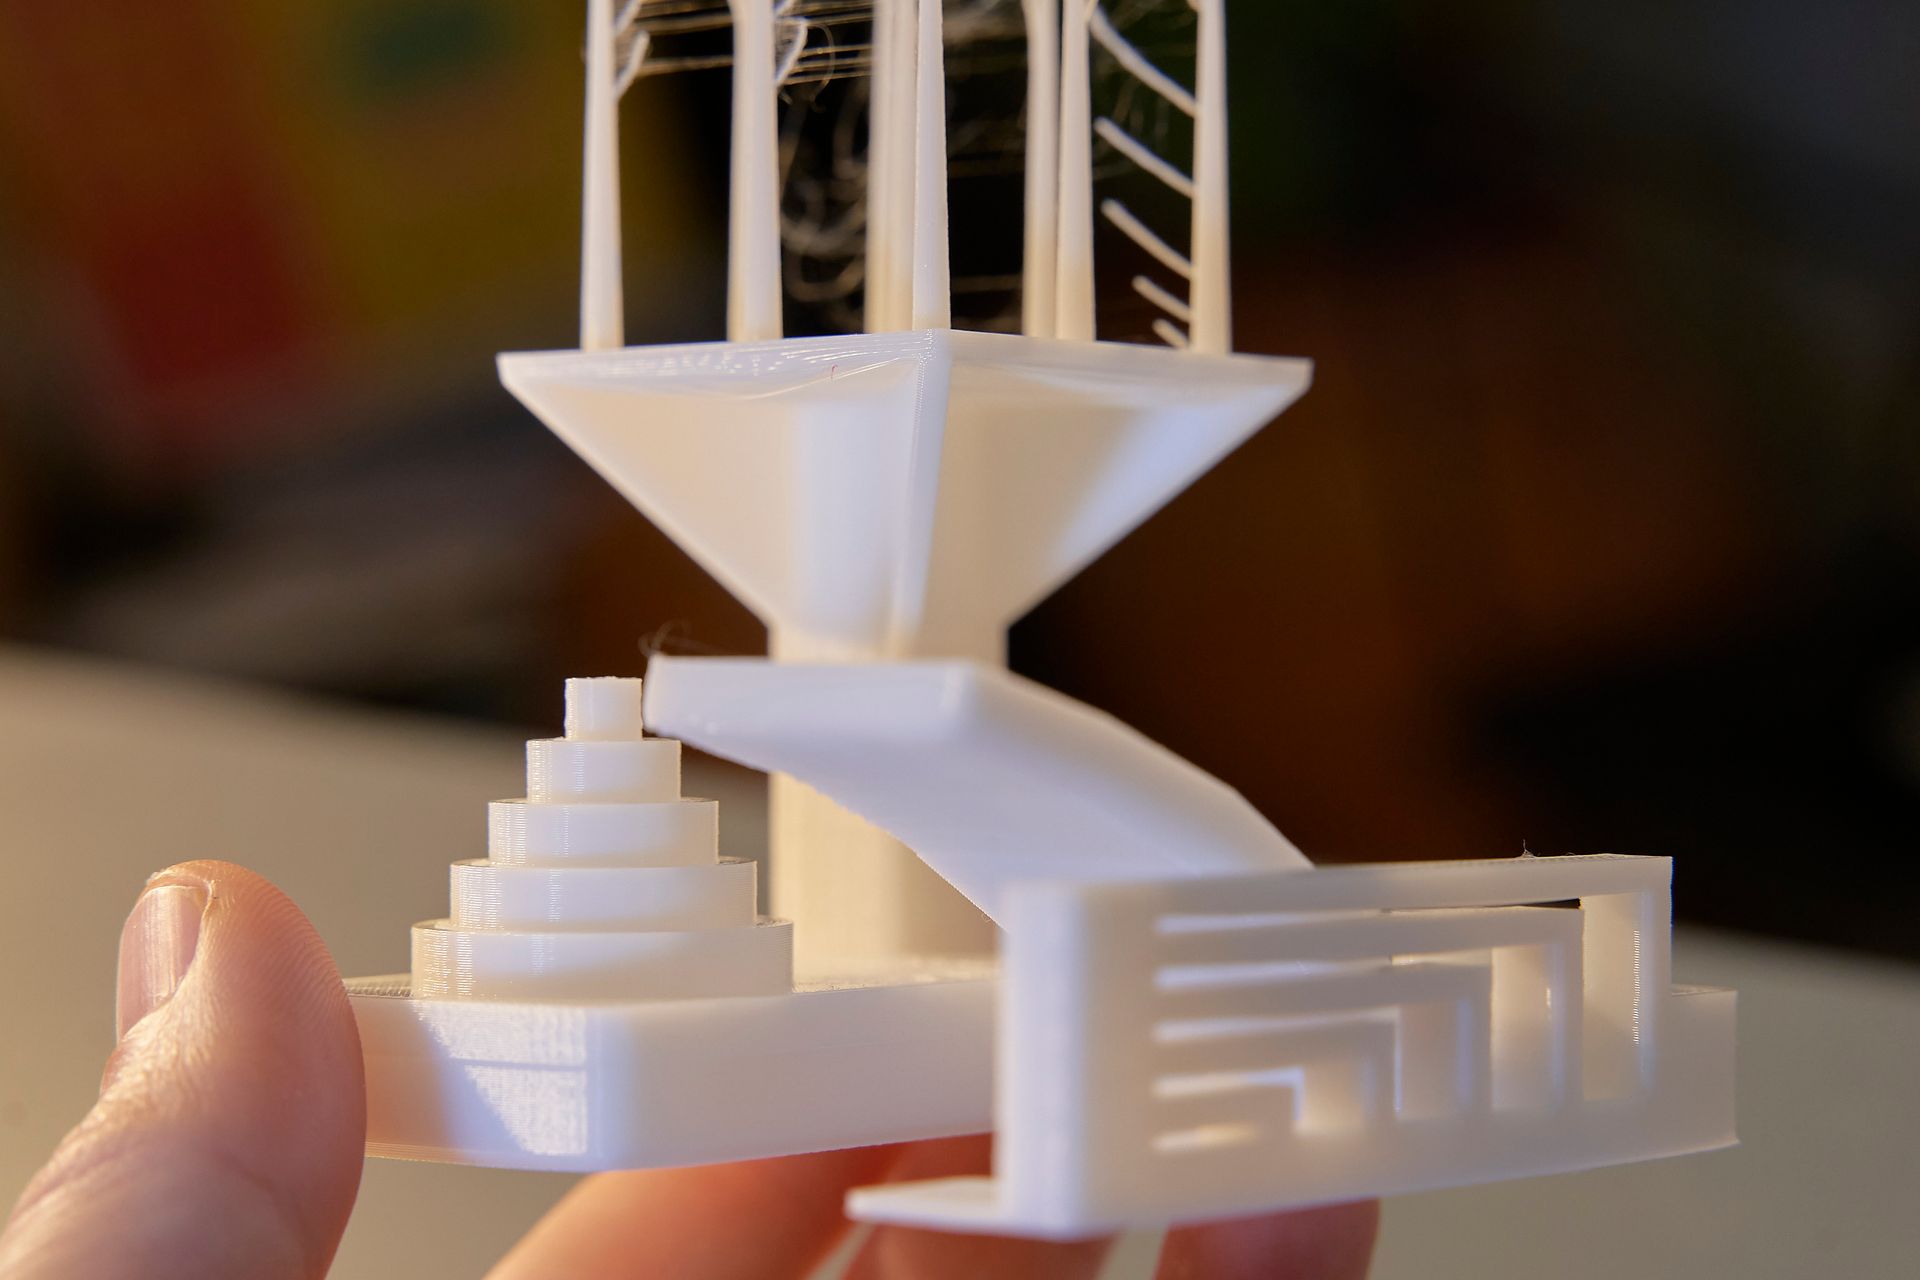

I can say there are both good and bad surprising results. The elephant in the room is the amount of stringing on the top spires. The rest of the test does not exhibit stringing issues and neither have any of the numerous real-world prints I've been doing on this machine. Perhaps this specific testing scenario shows the machine in an unrealistic scenario?
The other tests performed well with features such as bridging excelling which is helped of course by the printer ability to move quickly whilst bridging and the powerful cooling.
All of the cylinders printed for the negative object tolerances were removable, except for the 0.2mm and 0.3mm ones which appeared to have connected too well to the main body to count as a success.
Software
Snapmaker Luban (Version 4.10 at time of writing) is a software application designed specifically for Snapmaker devices by Snapmaker. It's an integrated platform that supports tasks related to 3D printing, laser engraving, and CNC carving, which are the main functionalities offered by Snapmaker machines.
When you set your machine to the Snapmaker J1S only the 3D printing related features will show which simplifies the workflow.
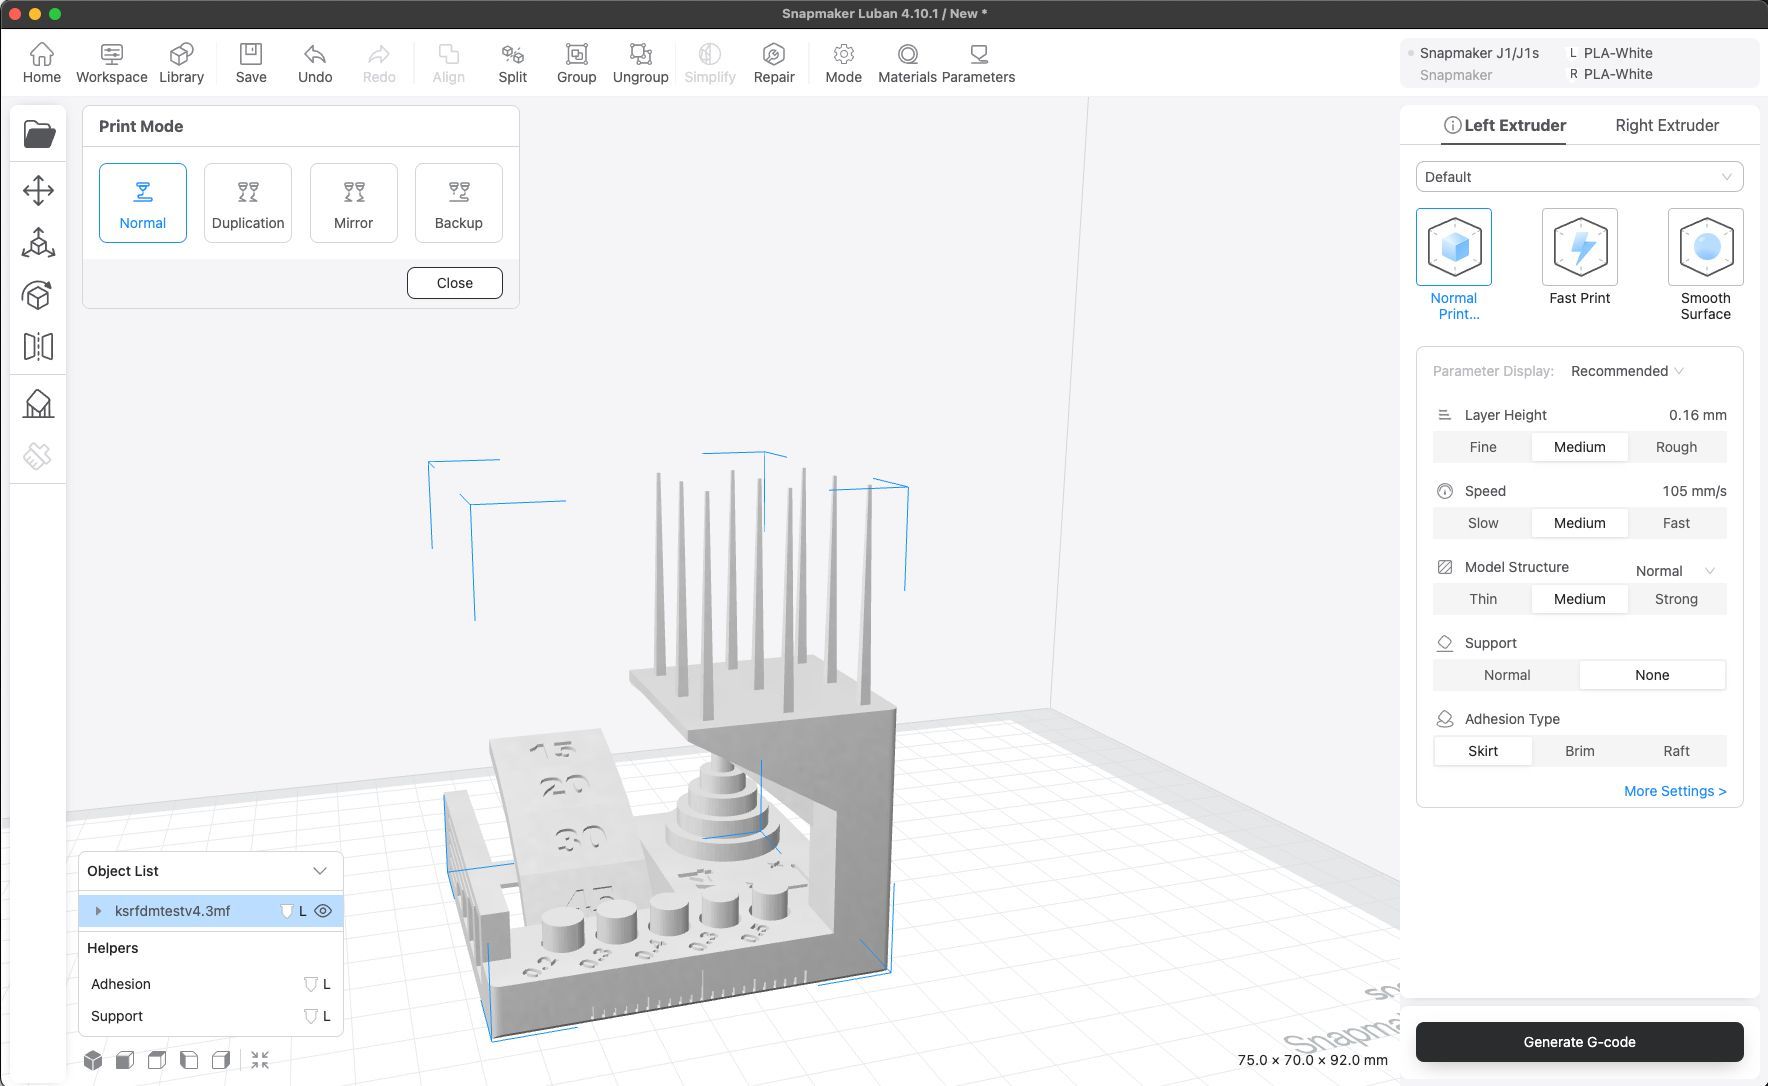
In the realm of 3D printing software, Snapmaker Luban stands out as one of the remarkably user-friendly and efficient option, particularly for those using Snapmaker machines of course. Designed with an intuitive interface reminiscent of the popular Cura platform, Luban makes the transition into 3D printing smooth and approachable, even for beginners. It simplifies the otherwise complex process of generating G-code and adjusting intricate print settings, making the experience less daunting and more accessible.
One of Luban's key strengths lies in its versatility and depth of control. The software adeptly handles a variety of file formats like STL, 3MF, and OBJ, catering to a broad spectrum of 3D printing projects. This flexibility is enhanced by its comprehensive customization options, allowing users to fine-tune every aspect of their print job. From adjusting print speed and layer height to infill density, Luban provides a granular level of control, ensuring that users can achieve the desired quality and precision in their prints.
What really elevates Snapmaker Luban in the 3D printing community is its perfect blend of simplicity and advanced functionality. It boasts quick slicing capabilities and efficient workflow, enabling users to resize, edit, and prepare models for printing with remarkable ease. The software also facilitates smooth WiFi connectivity for effortless file transfer to Snapmaker 3D printers. Regular updates ensure that Luban stays ahead of the curve, continuously enhancing its features and compatibility. Free and specifically tailored for Snapmaker hardware, Luban isn't just a software tool; it's an integral component for 3D printing enthusiasts and professionals looking to bring their creative visions to life with minimal fuss and maximum efficiency.
Final Thoughts
In summary, the Snapmaker J1 stands out as a robust and versatile 3D printer, particularly notable for its Independent Dual Extruder (IDEX) system. It excels in printing with a variety of materials, offering impressive speed and precision. The user-friendly features like its touch screen, auto bed-leveling, and filament runout sensor make it accessible to both beginners and seasoned hobbyists.
While it lacks the multifunctional capabilities of some other Snapmaker models, its specialized focus on 3D printing with advanced features like mirror printing and backup mode makes it a strong contender in its category. The J1 is an excellent choice for those seeking a high-quality, reliable 3D printer for complex, multi-material projects.