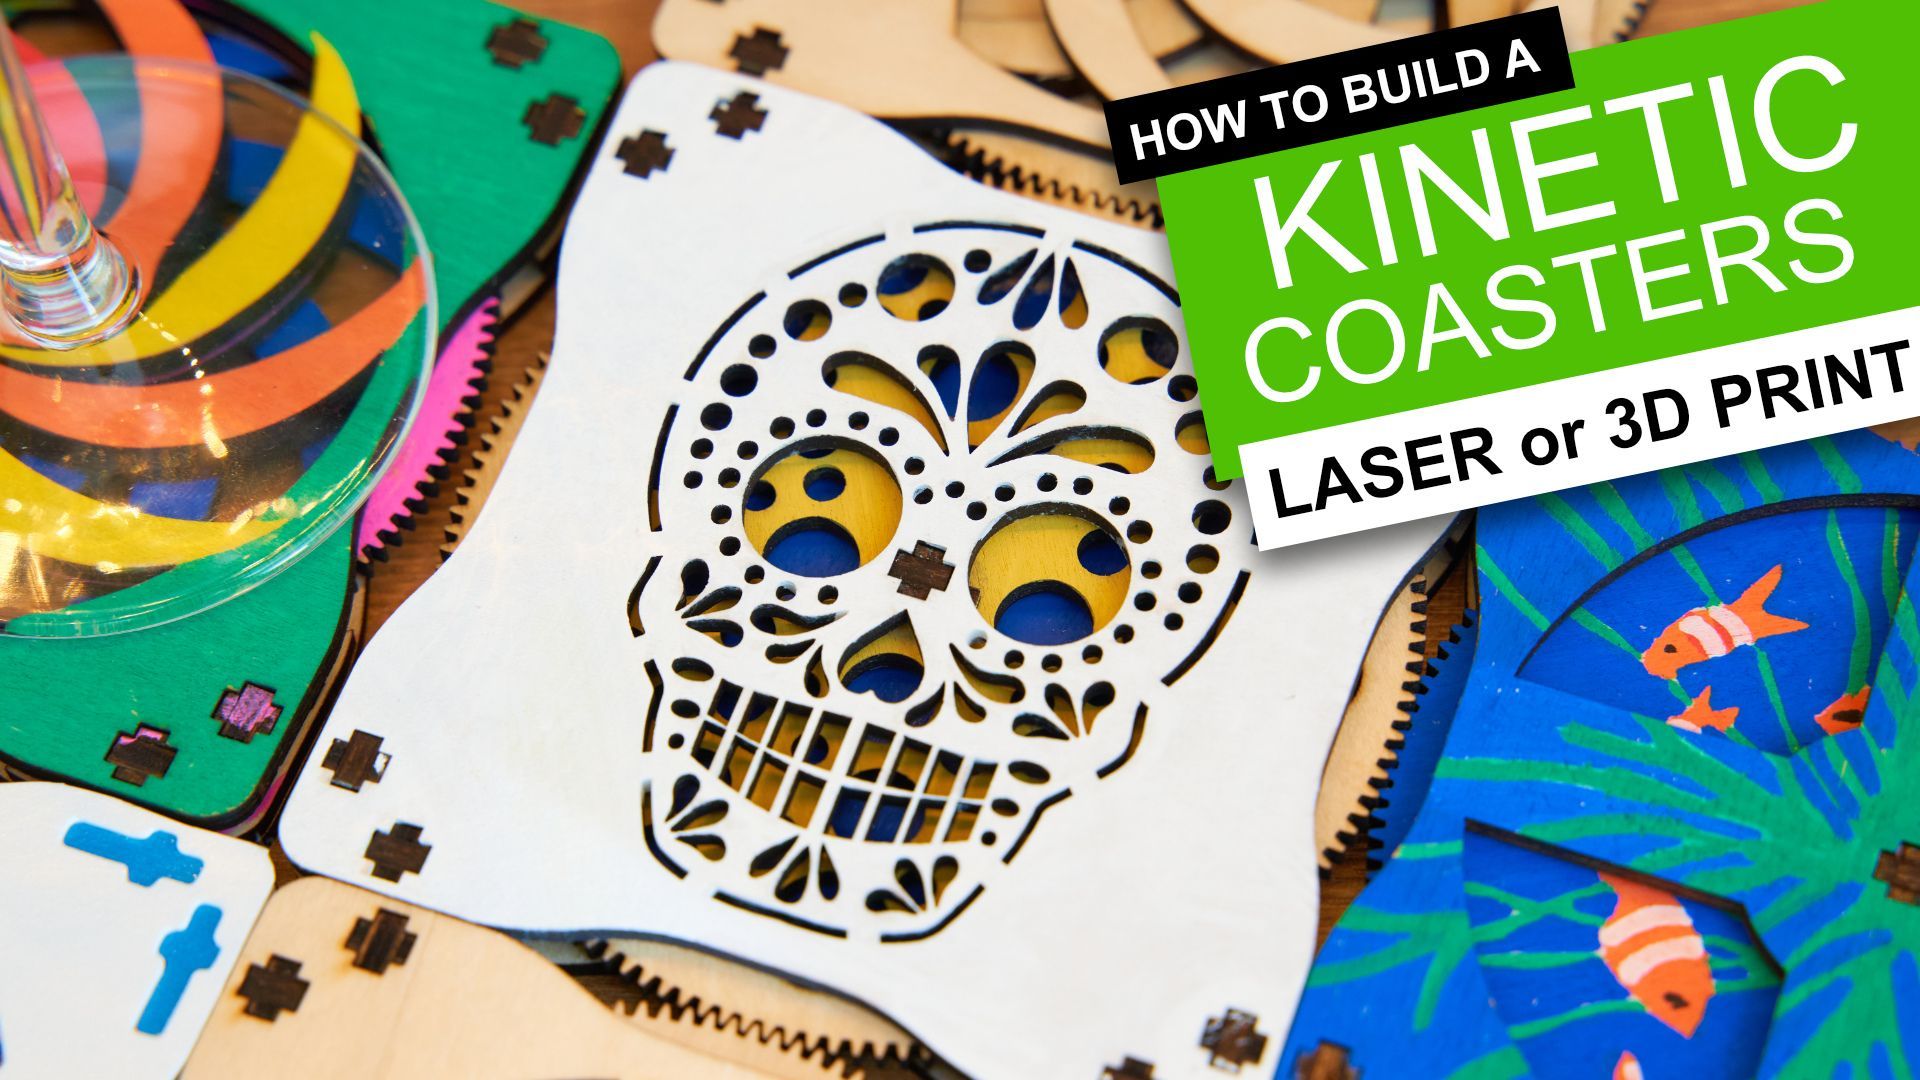
Elegoo Neptune 4 and 4 Pro Review
Elegoo Neptune 4 & 4 Pro
We put to test the speediest and most precise Elegoo's, yet!
New for 2023, Elegoo has brought out the Neptune 4 range of FDM 3D printers. Both the Neptune 4 and Neptune 4 Pro are most definitely fast, whilst still being able to maintain the Elegoo print-integrity all predecessors have.
Pros:
- Still easy to assemble (includes video tutorial)
- Multiple integrated fans for optimal cooling
- Klipper Integration for very impressive print speeds
- Revised and upgraded levelling springs
Cons:
- No printed instructions (though this is better environmentally)
- Fans are quite noisy
- Reasonably long time for the hot bed and nozzle to pre-heat (due to the increased nozzle temperatures).
Where to buy:
- Elegoo: Elegoo Neptune 4 -or- Elegoo Neptune 4 Pro
- 3D Jake (they usually have stock): Elegoo Neptune 4 -or- Neptune 4 Pro
- Amazon: Elegoo Neptune 4 Printers
What is it?
Introducing the latest addition to the world of 3D printing - the Elegoo Neptune 4. This masterpiece utilizes Fused Deposition Modeling (FDM) technology to create intricate 3D parts. By methodically depositing one layer of hot plastic at a time and fusing it seamlessly with the previous layer, the Neptune 4 produces high-quality results with ease. This printer is a formidable contender in the current race for speed and excellence in printing. Available in two versions - the Neptune 4 and Neptune 4 Pro - this printer is the perfect choice for those seeking top-notch quality and performance.

FDM (Fused Deposition Modelling) printers have been found in domestic homes far longer than other 3D printing technologies such as resin based MSLA (Masked StereoLithogrAphy). As such their price continues to become more affordable and the technology is proven, refined and easy to work with. I cut my teeth on 3D printing with an FDM printer and mostly use them to this day.
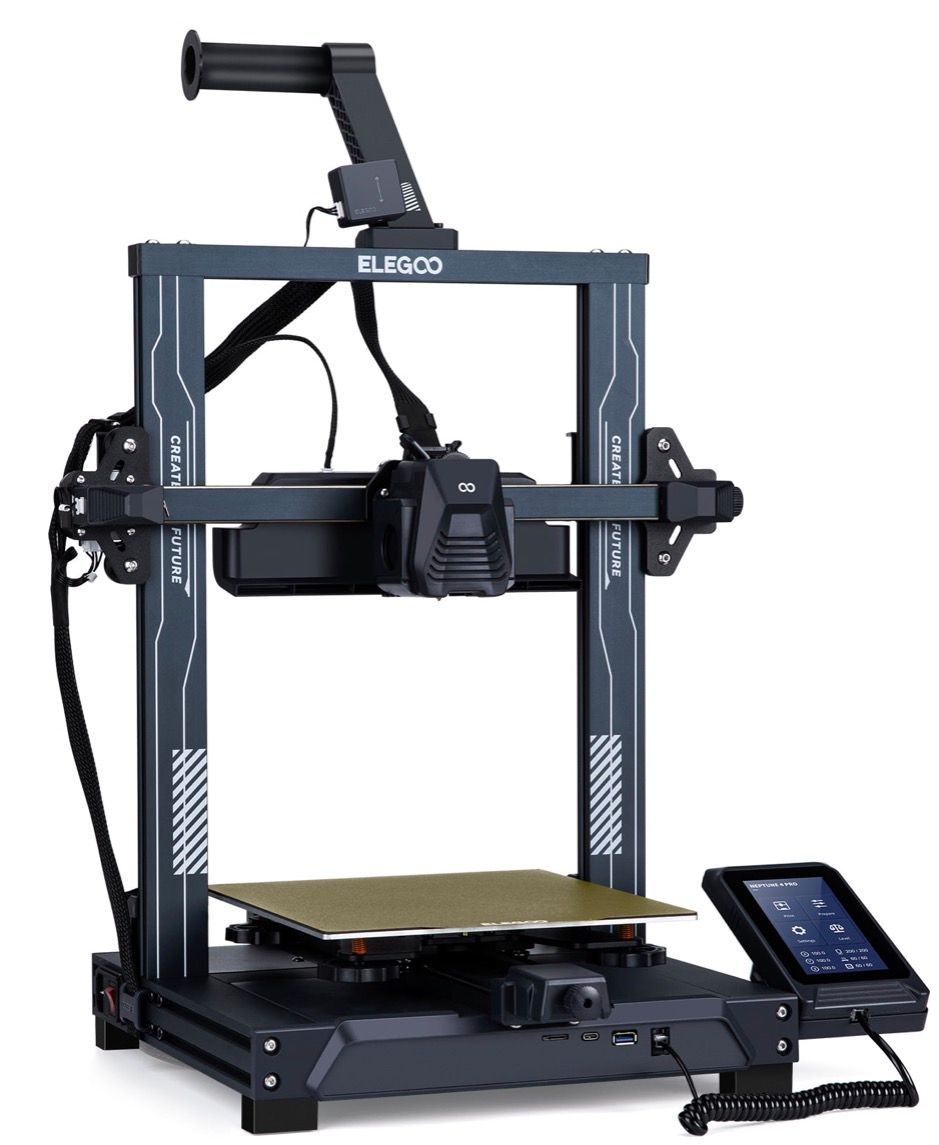
The Technical Overview
| Printing Technology | FDM | |
|---|---|---|
| Print Volume | 225 x 225 x 265mm | |
| Layer height | 0.1 to 0.4mm | |
| Max. nozzle temperature | 300℃ | |
| Max. bed temperature | 110℃ | |
| Printable Filaments | PLA, ABS, PETG, TPU, TPE and infused (i.e wood, marble etc.) | |
| Extrusion Type | Dual-geared Direct Extrusion System |
For a more detailed technical table please see the end of this review.
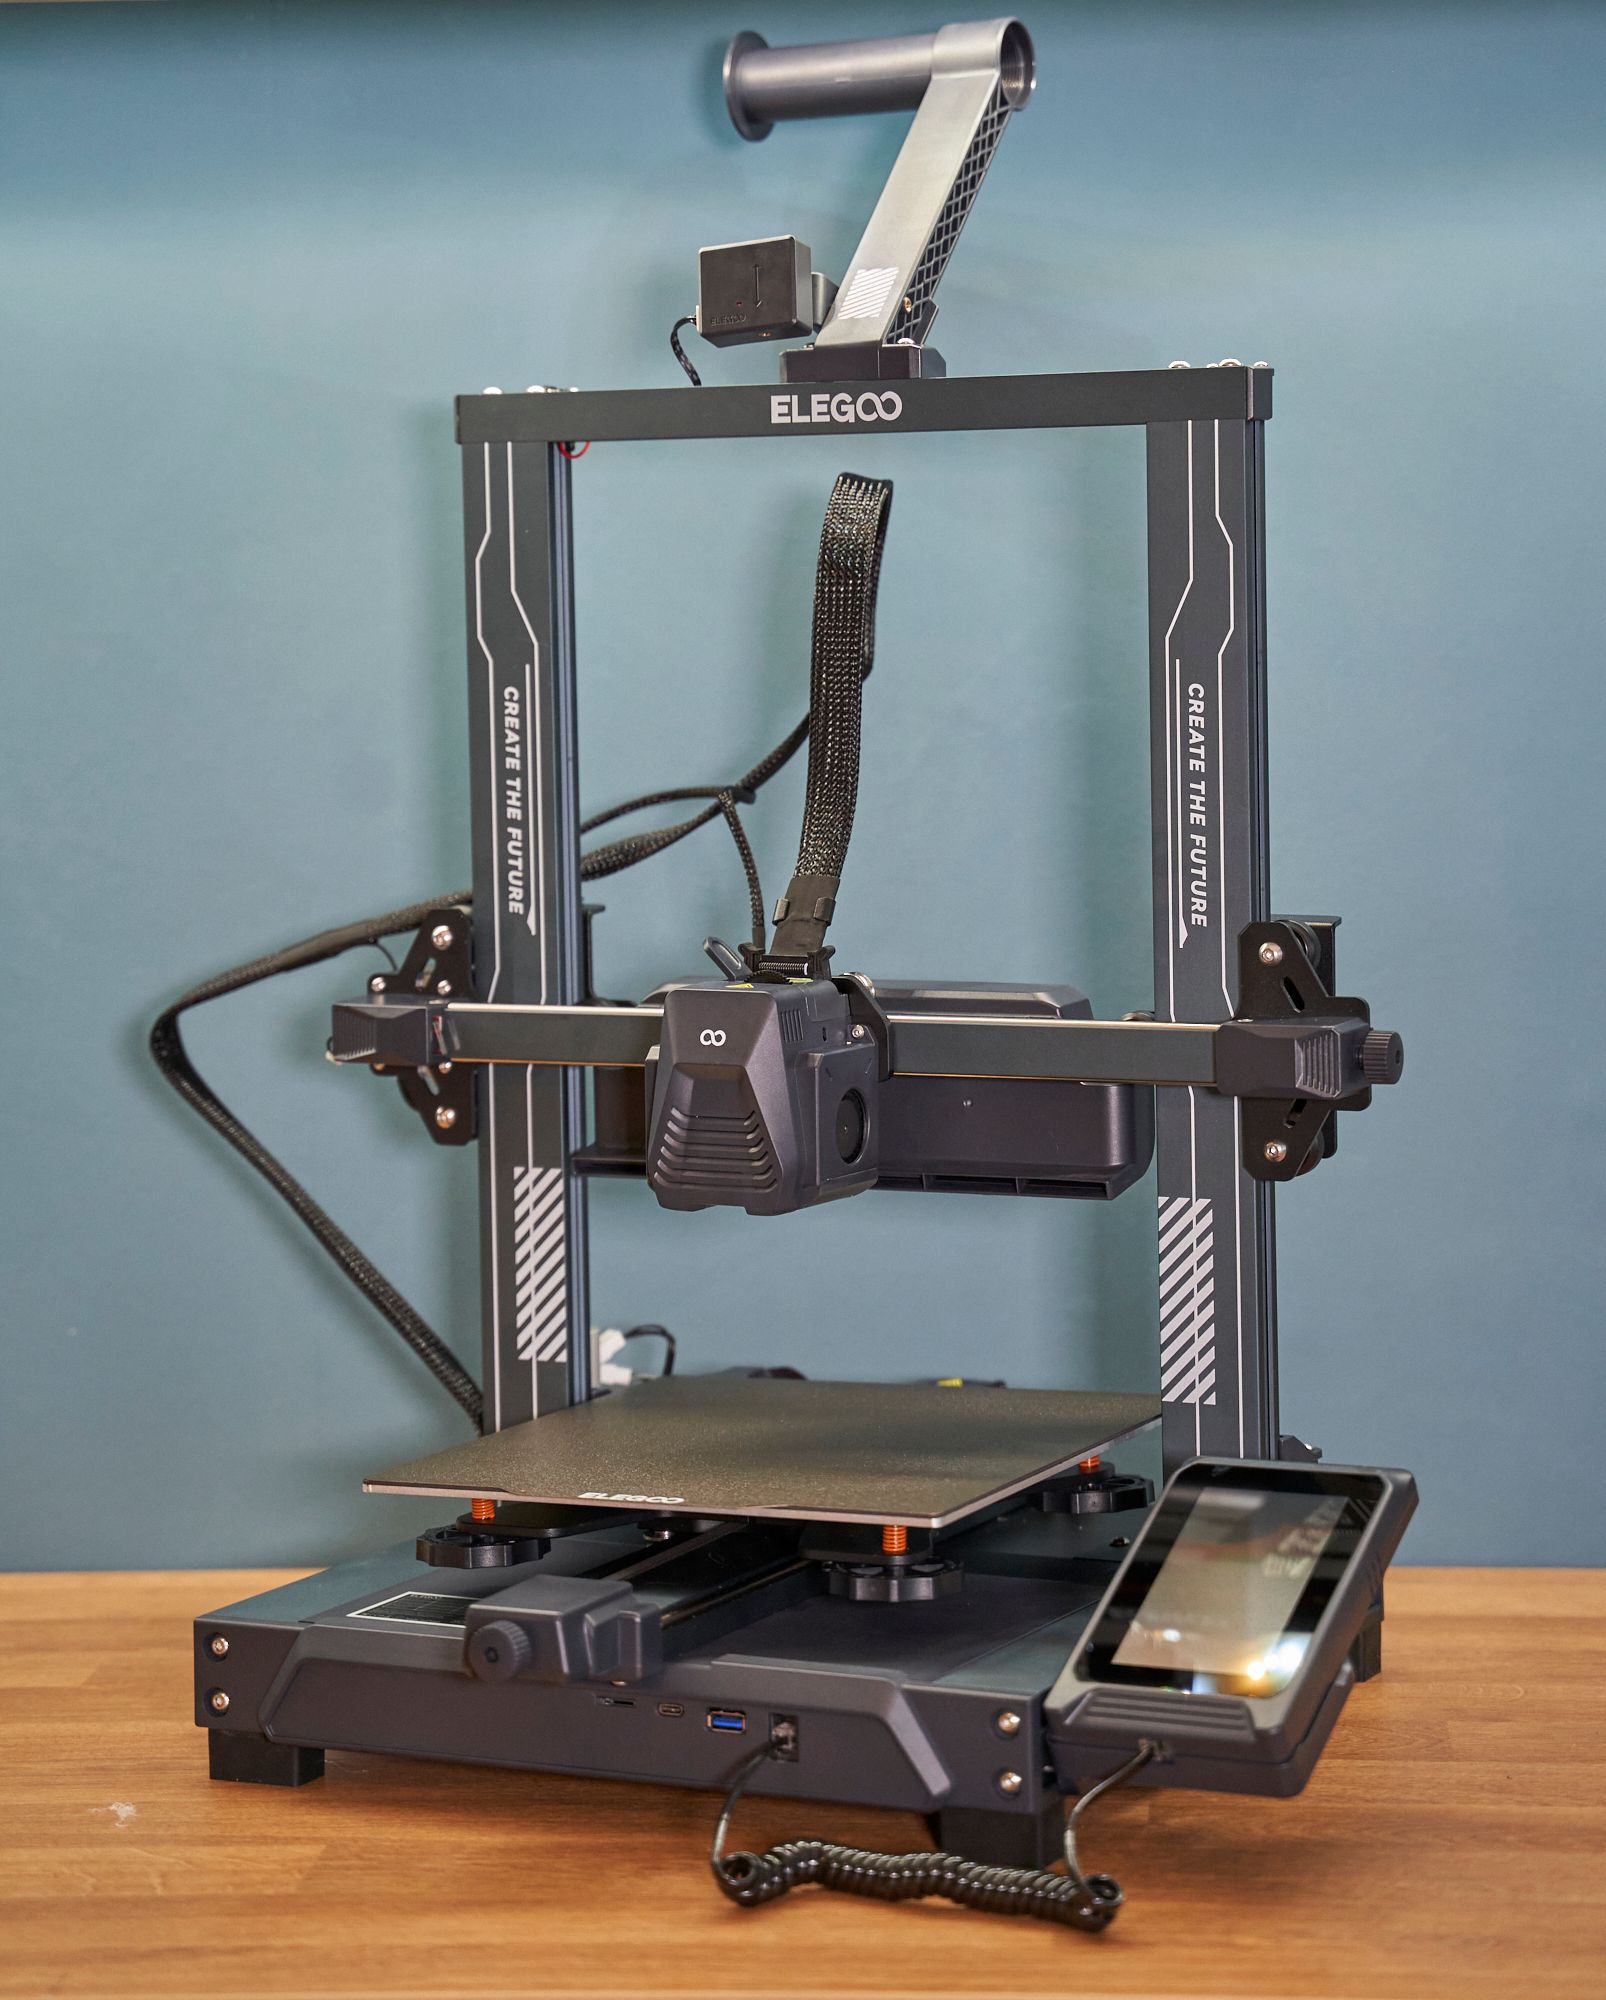
The printer’s main features are without doubt, the incredible speed in which it prints. Thanks to the most up-to-date, pre-installed, firmware (Klipper) both new printers can print at a ridiculously fast 500mm/s (bear in mind the previous standard Neptune print speed is 60 mm/s). The slimming down of the Neptune's extruder assembly to just 75% of the previous generations weight adds to its nippiness and precision too.
It prints from both data stored on the free USB they generously give you or from LAN (or WiFi with a suitable USB dongle).
The Elegoo Neptune 4 boasts both auxiliary and automatic (11x11) bed levelling controls which means the mesh is far more accurate. The bed is a slightly textured, magnetic 235x235mm, for ease of print release as you can gently bend it (once cooled) to retrieve your latest creation.
What makes the 'Pro', well Pro?
Very quickly, let's clear up the difference between the Neptune 4 and Neptune 4 Pro. It boils down to the following two differences:
- Neptune 4 Pro has an 'all metal dual-axis guide rails' and 'double-row ball U-shaped bearing' on the X and Y axis'. The non-pro has POM V-guide rails.
- The Neptune Pro has a segmented heated zones (one section at 100w and the other at 150w). This allows for smarter and quicker heating of the print surface in some scenarios. The non-pro has a single 250w heating element below the build plate.
That's it. Well, of course the price is a little different for these upgrades. On Elegoo's own site at the moment it's a $40USD premium for the Pro version. Do you need it? If you'll be running it around the clock or just want the best then go for it - otherwise for the light user it's not a deal breaker in my opinion.
Everything else is the same between the two machines so let's go over some more of the common features...
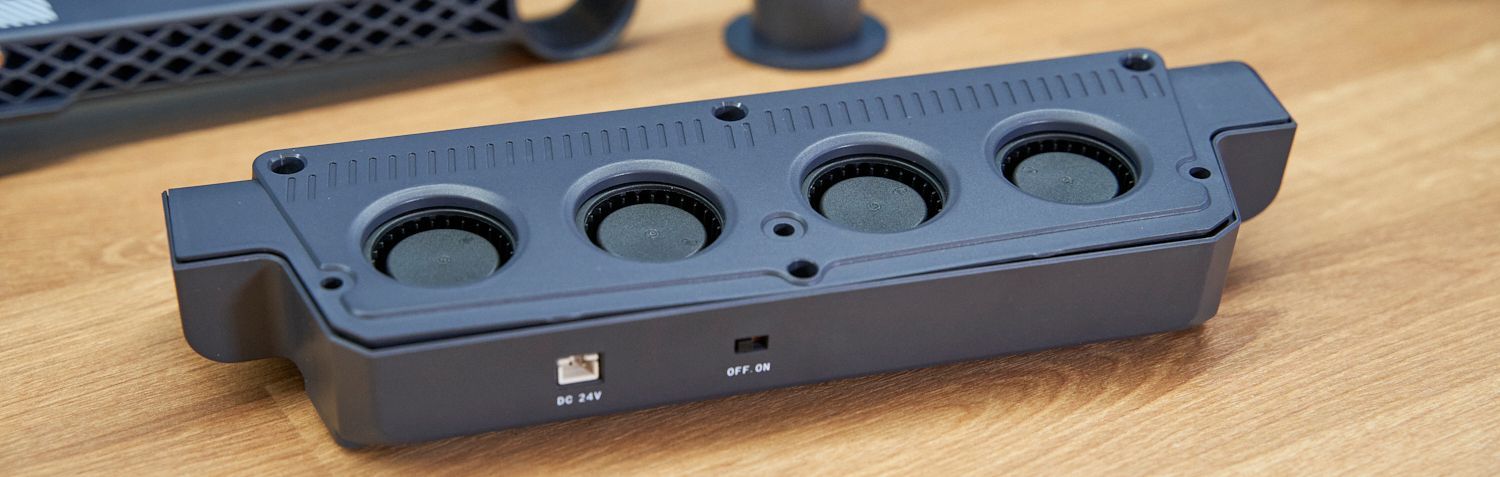
The abundance of cooling fans, at first, seem to be a little over-kill but as soon as this printer is seen in action these x gantry fans comeinto their own. This Neptune 4 has four additional blowers embedded that create an effective cooling-system that flows across the print, this is alongside the more traditional fans you would expect to find in the extruder head. All very much play an integral role in supporting the speed in which this 3D printer works.
The nozzle reaches a ferocious 300ºC, around 40ºC hotter than previous Neptune models such as the 3, 3 Pro, 3 Plus and the 3 Max meaning that a wider range of additional filaments can be used. The nozzle sits in an extruder head that utilises a tried-and tested dual-geared direct-drive system.
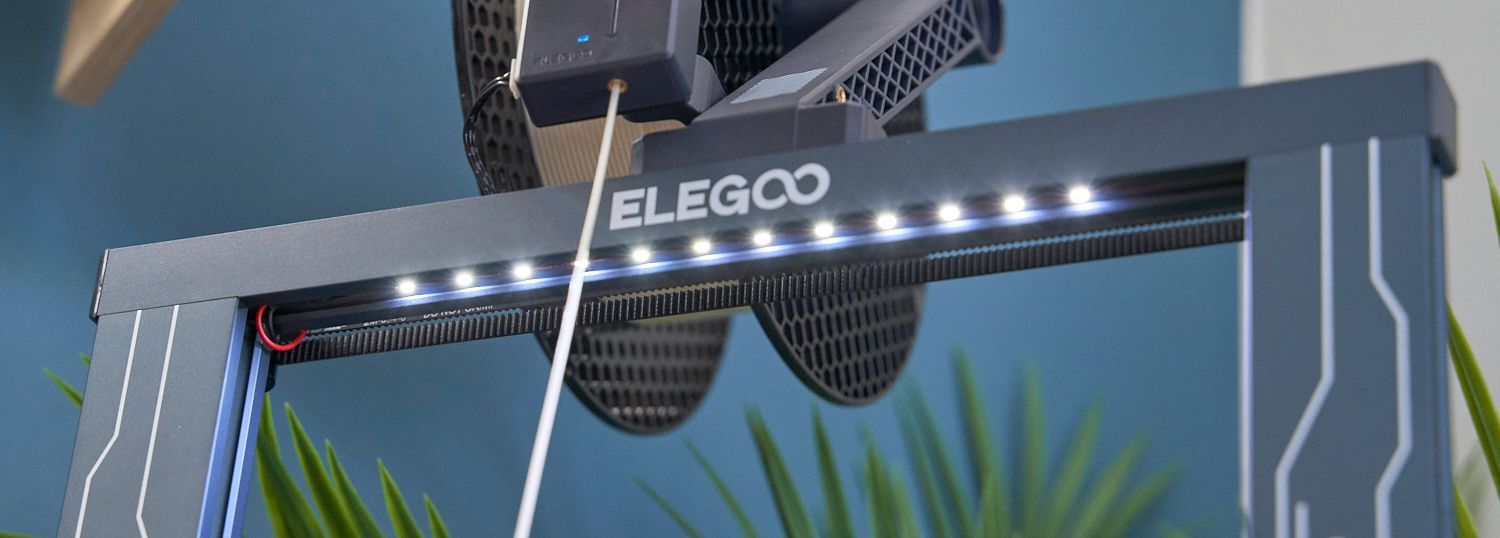
There are LED lights everywhere…well, as a strip on the cross-bar of the frame and as part of the extruder head itself. Both arrangement of lights are a useful addition to help you see the print work, immediately and effortlessly, from the moment it touches the bed.
As with the earlier Elegoo Neptune 3 range the power supply is integrated inside of the base so there is a sleek and pleasing aesthetic without the additional of a lumpy power 'brick'.
In addition to the aforementioned features, there are also those that have become so commonplace that we tend to overlook them. However, for the sake of completeness, I shall enumerate them here:
- Power recovery (above 10mm printed height)
- Filament run out detection
- Automatic bed levelling
- Auto 'cool down' when left preheated and idle
- Magnetic, removable PEI print sheet
- Touchscreen control interface
Let's go into some of these features in more detail:
Print Speed
The printing speed of this remarkable printer is simply astounding, with the ability to produce output at rates ranging from 30mm/s to 500mm/s, although Elegoo recommends a speed of 250mm/s. In practical terms, when I conducted a torture test using the Neptune 4 Pro, it took just half the time it did with the previous Neptune 3 Max to produce the same high-quality print.
It's safe to say that this printer is a real game changer in the industry. To get a more detailed look at the results of the torture test, be sure to check out the latter part of this review.
More LED Lighting
An excellent enhancement to the 2022 Neptune 3 collection was the integration of LED lights. Fortunately, this incredible feature was carried over to the Neptune 4 series.
In addition to the top gantry/frame crossbar's LED light strip, the Neptune 4 now includes lights in the extruder casing alongside the printing nozzle.
This feature is incredibly beneficial, especially when you find yourself working late into the night or simply want to illuminate every move your printer makes.
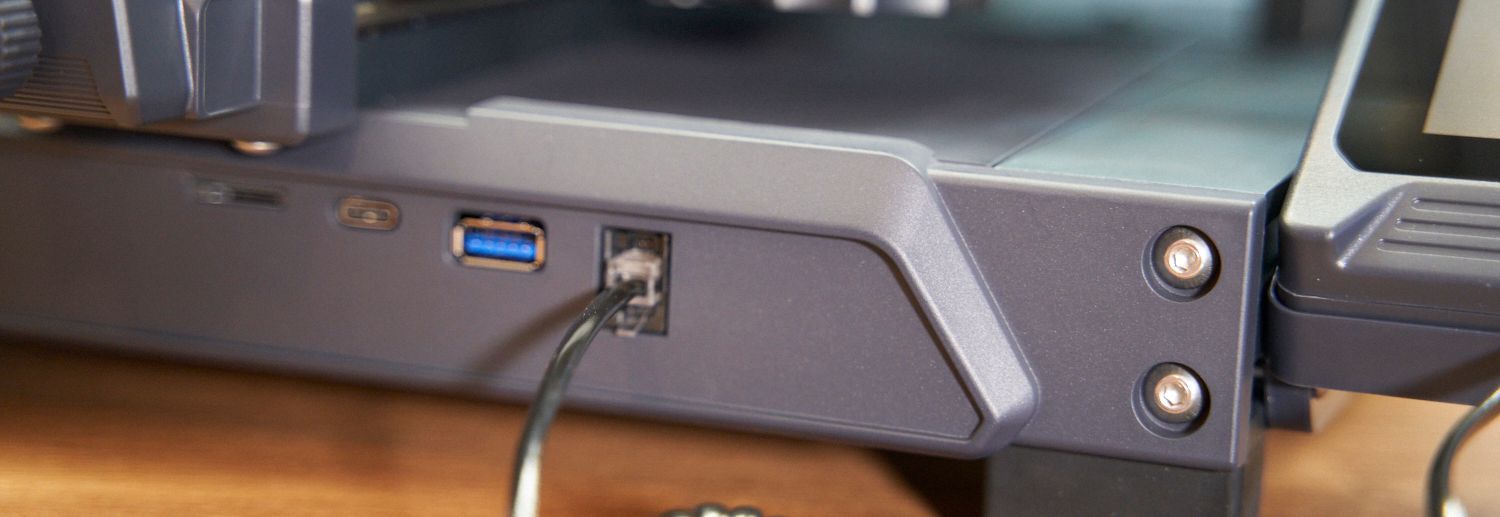
Connectivity
The main unit features the power switch and kettle lead connections on its left-hand side, while the base unit's front panel hosts the USB-C, USB, and micro-SD card slots. In addition, the Ethernet/LAN port is positioned behind the screen, to the right of the printer.
Although the setup is impressive, a minor drawback is the placement of the Mini SD card slot. It is situated underneath the tensioning dial of the Y axis belt tensioner, which may impede your ability to insert the card accurately without having to look underneath the machine.
For the first time in Elegoo's Neptune range of FDM 3D printers, the machine boasts network connectivity. By virtue of its onboard web server, you can effortlessly link up with it via your local network connection, thereby gaining full control and monitoring capabilities. Additionally, you can remotely access a USB webcam via the web-interface, an exceptional tool for overseeing multiple printers.
Further enhancing its networking prowess, the machine is reportedly compatible with some Linux USB WiFi dongles, which when installed in the USB port, enables seamless connectivity to a WiFi network.
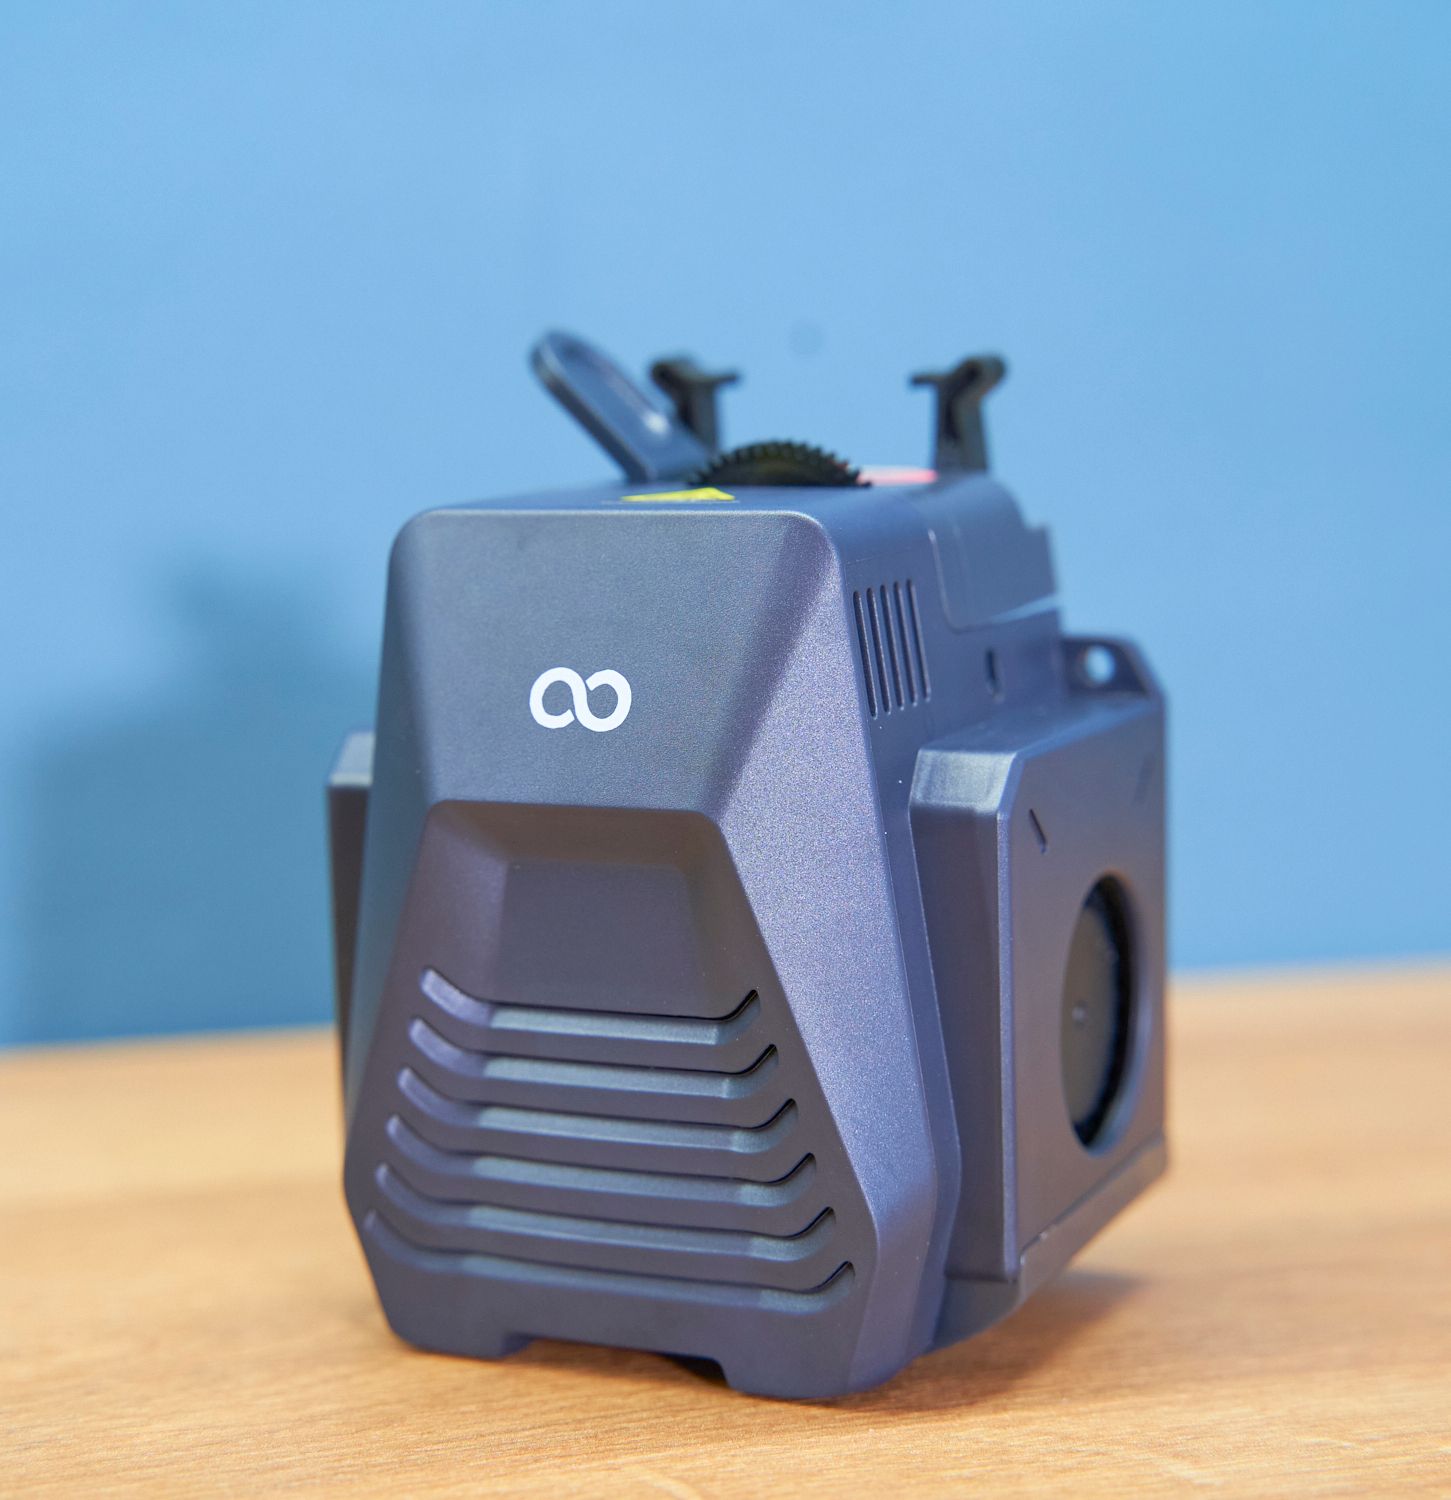
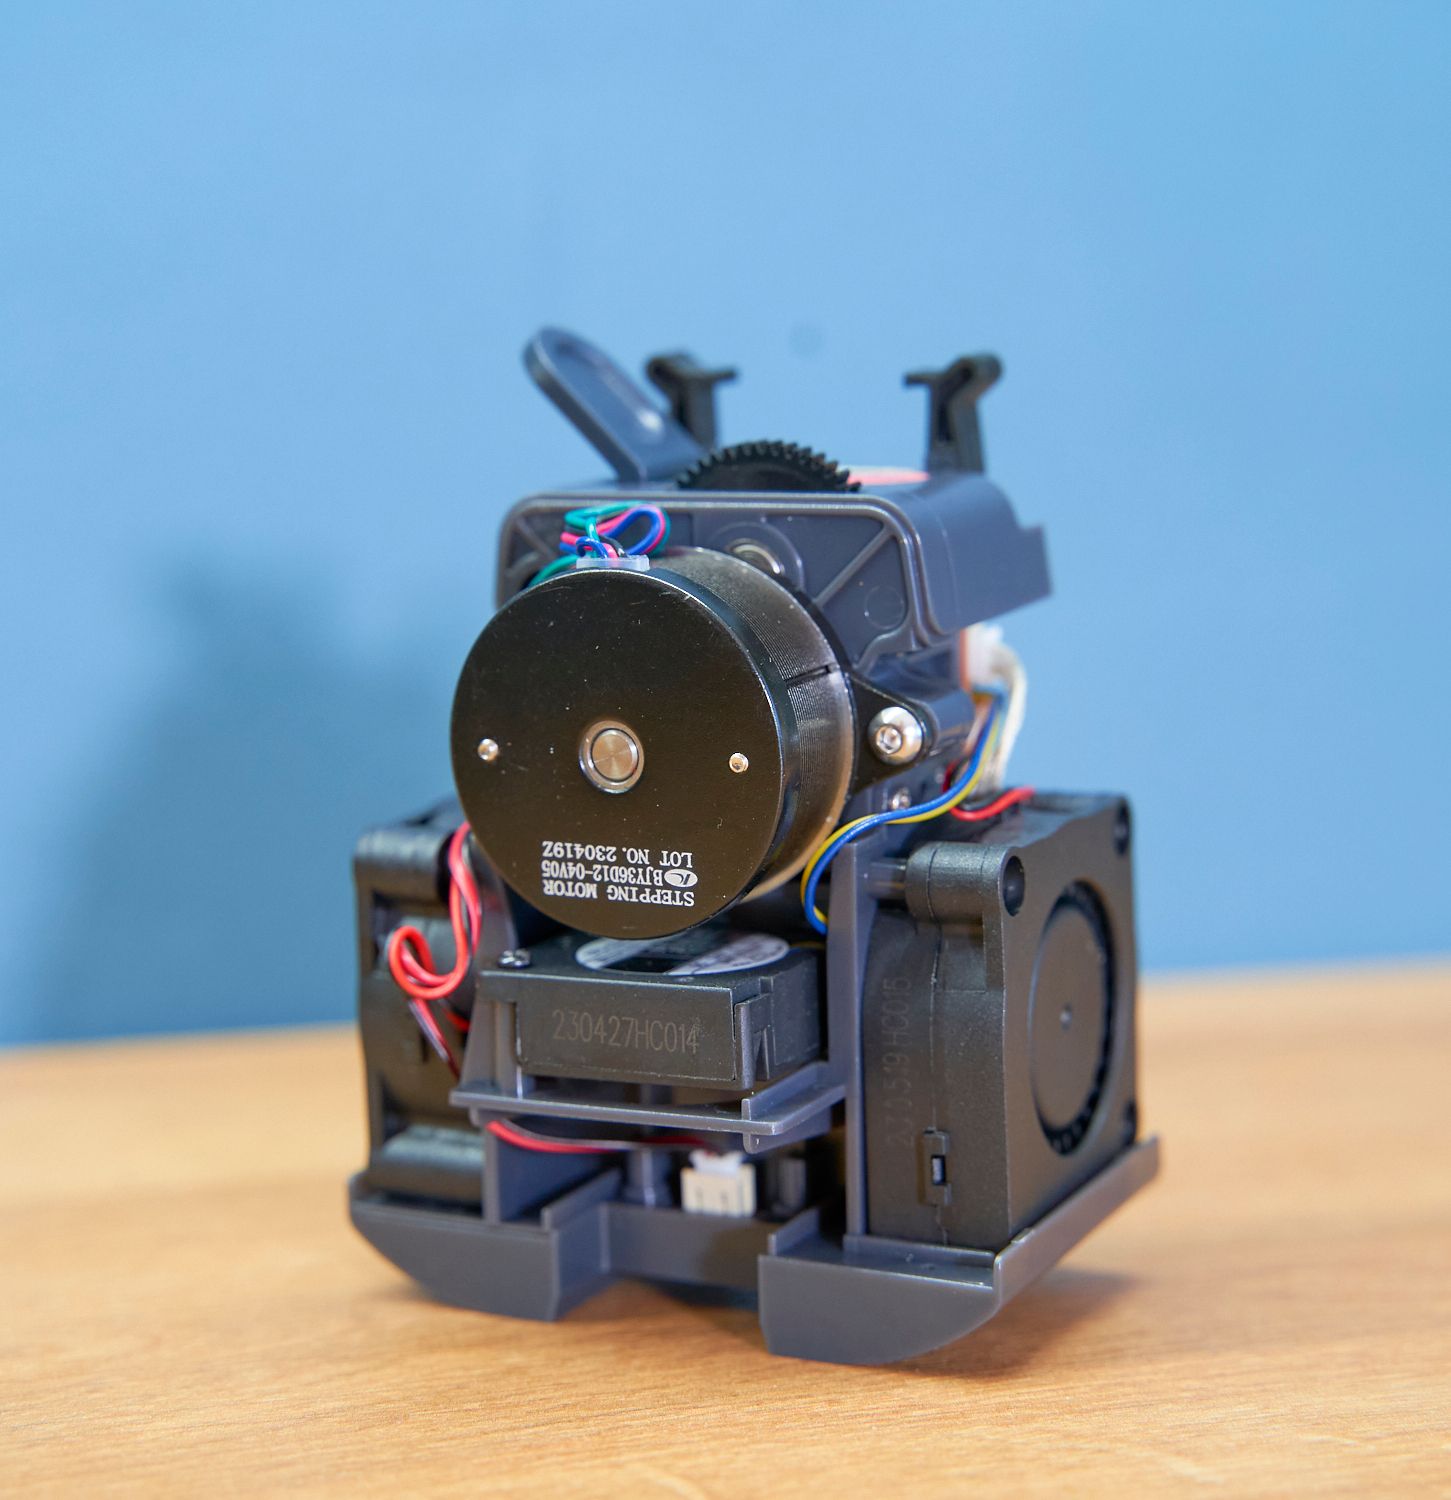
Extruder
Elegoo has ingeniously crafted a dual-geared direct drive extruder system, boasting a 5.2:1 reduction ratio for precise extrusion alongside seamless filament feeding.
The copper-titanium all-metal throat pipe, coupled with a bespoke air duct design, ensures optimal heat dissipation and significantly reduces the chances of nozzle blockages (heat creep).
This groundbreaking system offers a plethora of benefits including the ability to print with various filament types, superior print quality through consistent extrusion control, minimal retraction, and a streamlined extrusion path.
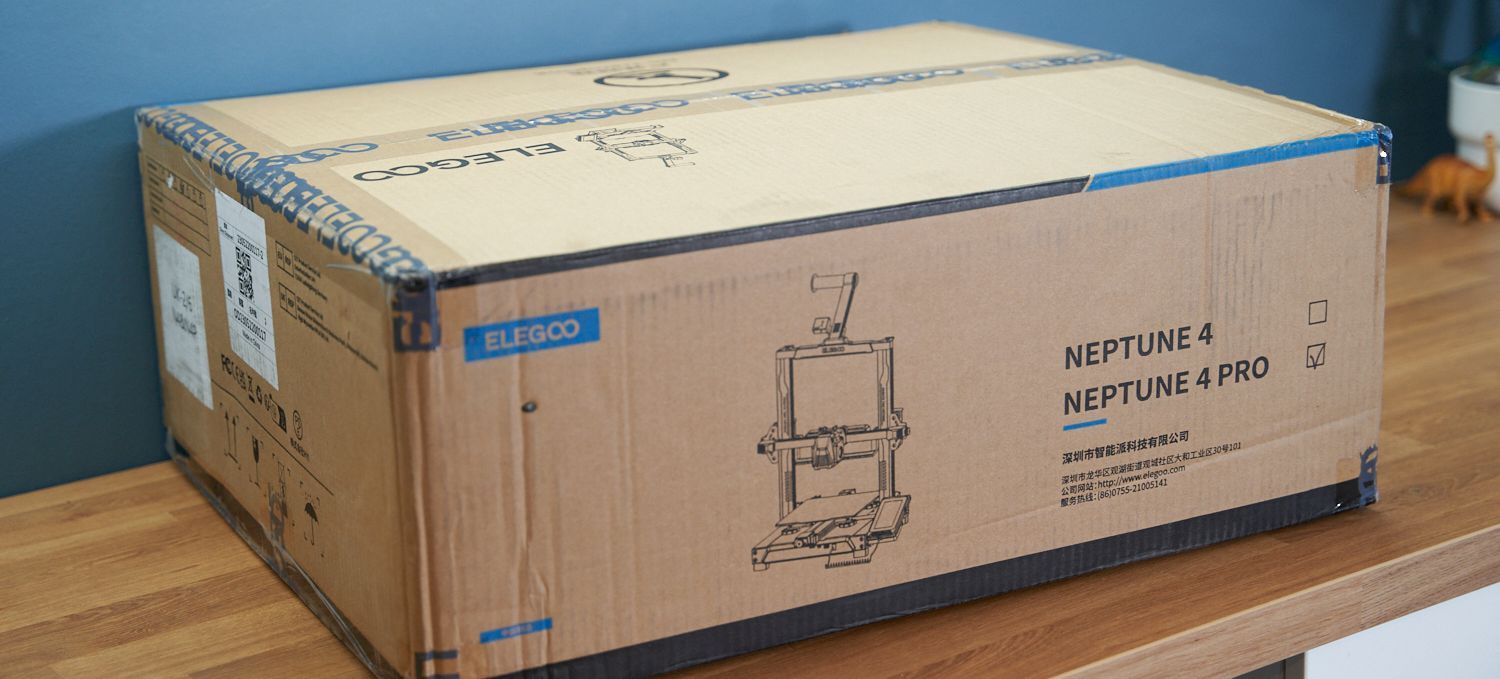
Shipping and Packing
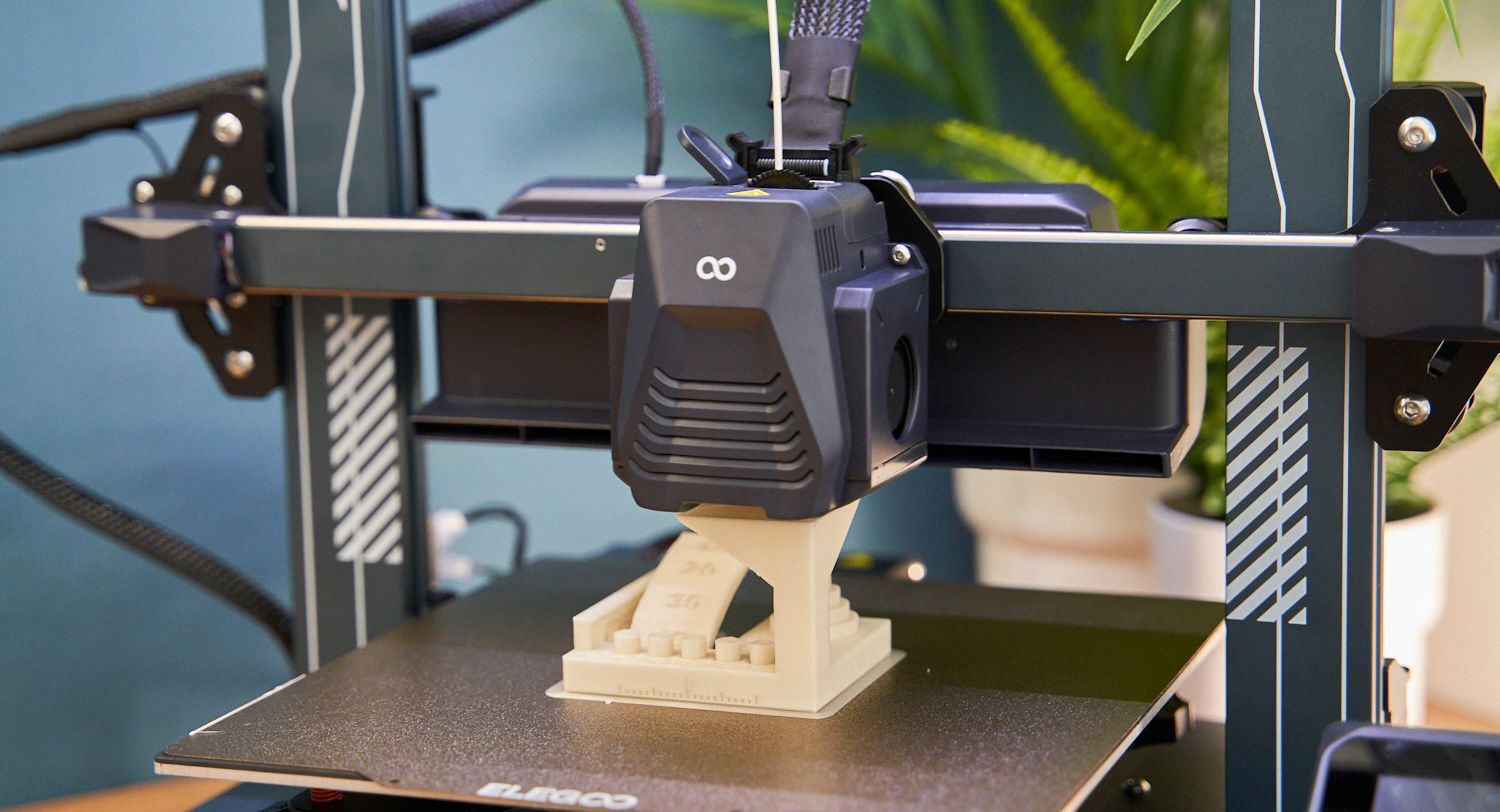
The printer arrived in perfect condition, thanks to the excellent packaging. The printer bed and frame were securely protected by custom cut, high-density foam, ensuring their safety during shipping. Unpacking the contents was hassle-free due to the well-organized layout of the items. Overall, I am extremely satisfied with my purchase. Additionally, Elegoo pleasantly surprised me with an array of tools and accessories, as shown in the accompanying photographs.
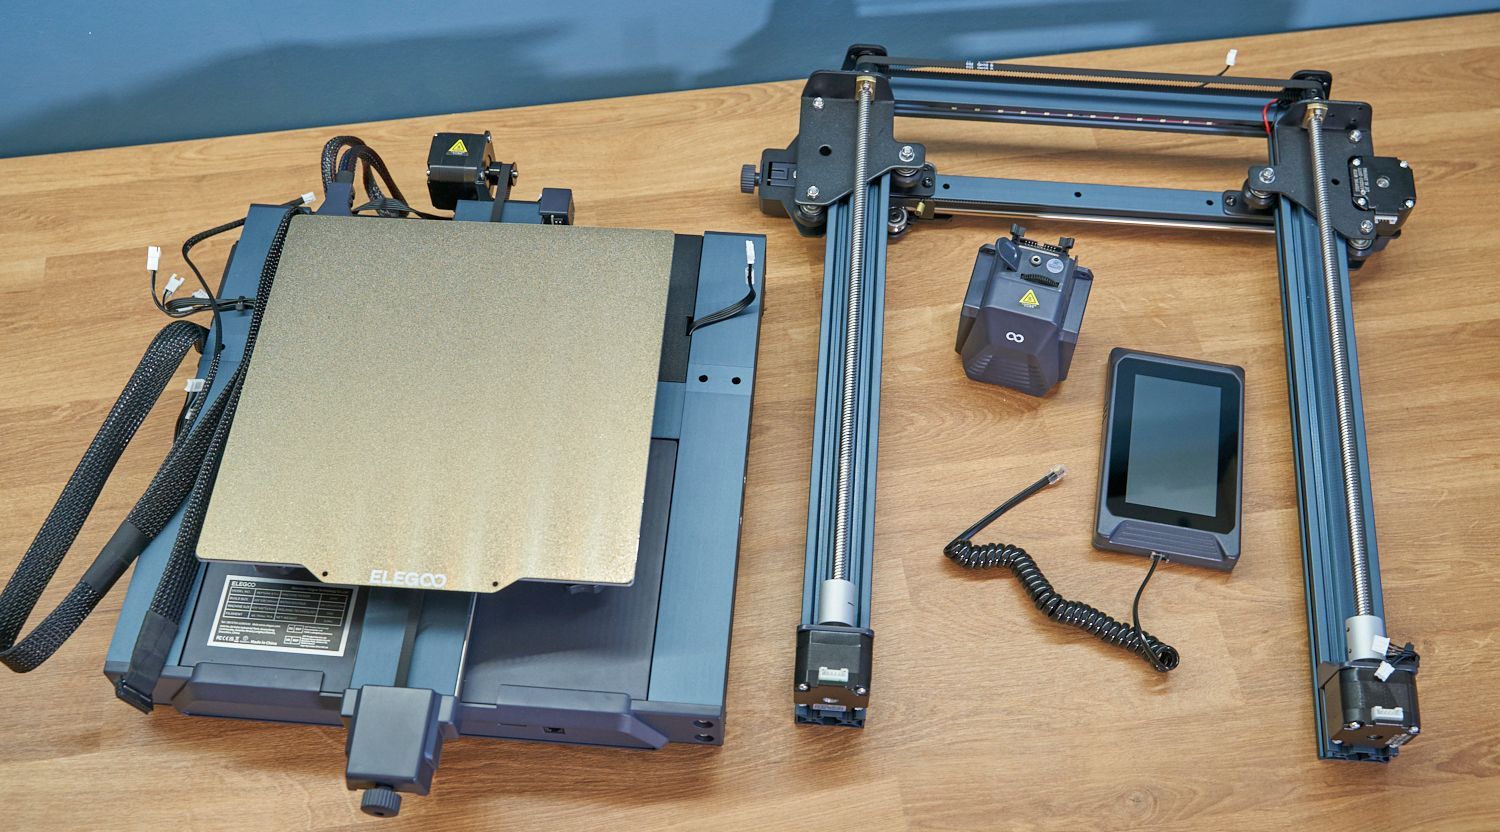
This is the main parts of the unpacked components (further down you can see the accessories and other items included)). Although some assembly is required, the contents offer up a pleasing peek at how quick assembly is going to be. (Spoiler Alert: it is extremely simple 🙂 ).
What else is included?
This FDM 3D printer comes fully equipped with a range of accessories to ensure that you have everything you need to get started. It's an ideal choice for first-time users as it includes ample spare parts and all the necessary tools to repair and maintain your new machine. You won't have to worry about purchasing any additional accessories or tools separately, as this printer comes with everything you need to get started right away.
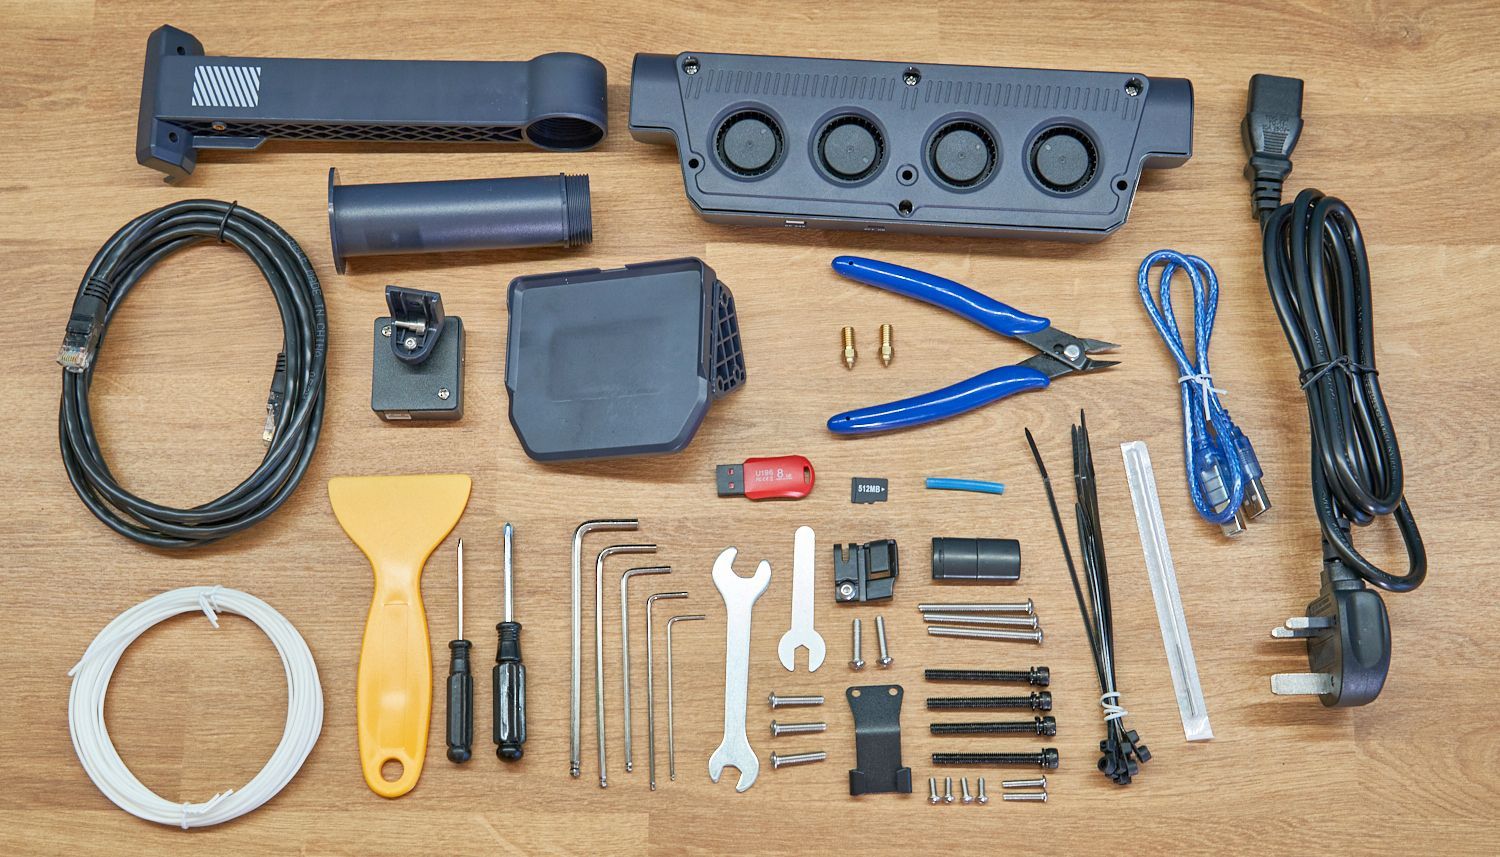
- Print removal spatular
- Spanners for changing nozzle
- Two spare brass nozzles
- Acupuncture Needle (to clear blockages)
- USB Memory Stick
- Screwdrivers (Philips and flat head)
- Selection of Allen Keys
- Micro SD / TF Card
- USB Memory Card Reader
- PTFE Tube (Spare)
- Printbed fan array
- Snips
- USB Cable
- Sample of PLA Filament
- Cable Ties
- Bolts for assembly
- Network Cable
Assembly
Assembling this printer was a breeze. Elegoo has streamlined the process to make it as effortless as possible. The build plate is already magnetized to the hot bed, while the pre-assembled x gantry is securely attached to the frame, requiring only proper positioning to complete the setup. The hand-held display is merely one connector away from seamlessly integrating with the printer's main assembly.


In essence, the assembly process can be broken down into the following steps:
- Attaching the vertical axis to the base, requiring just four bolts.
- Connecting the four print bed fans to the rear of the x gantry using three bolts.
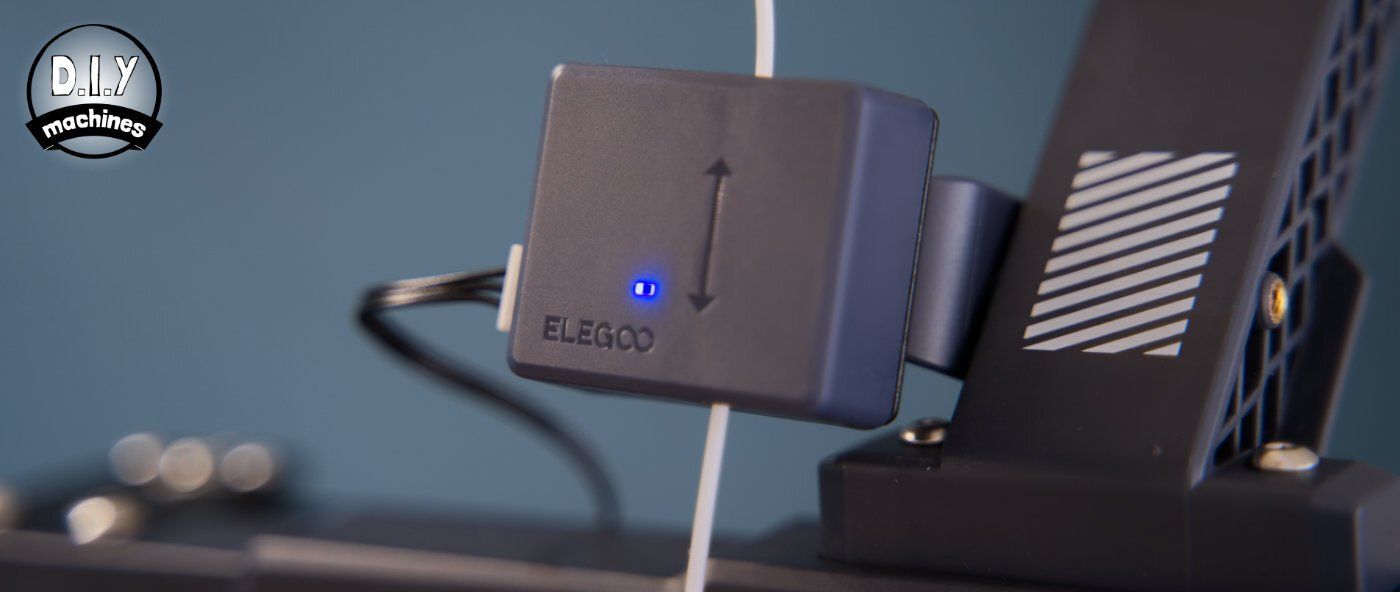
- Attaching the spool holder and filament run-out sensor at the top.
- Affixing the screen bracket and positioning the removable and magnetic screen in its holder.
- Making all necessary electrical connections between the base unit and motors, limit switches, fans, and filament sensors.
- Connecting the power supply.
Rest assured that these steps are straightforward and easily manageable.
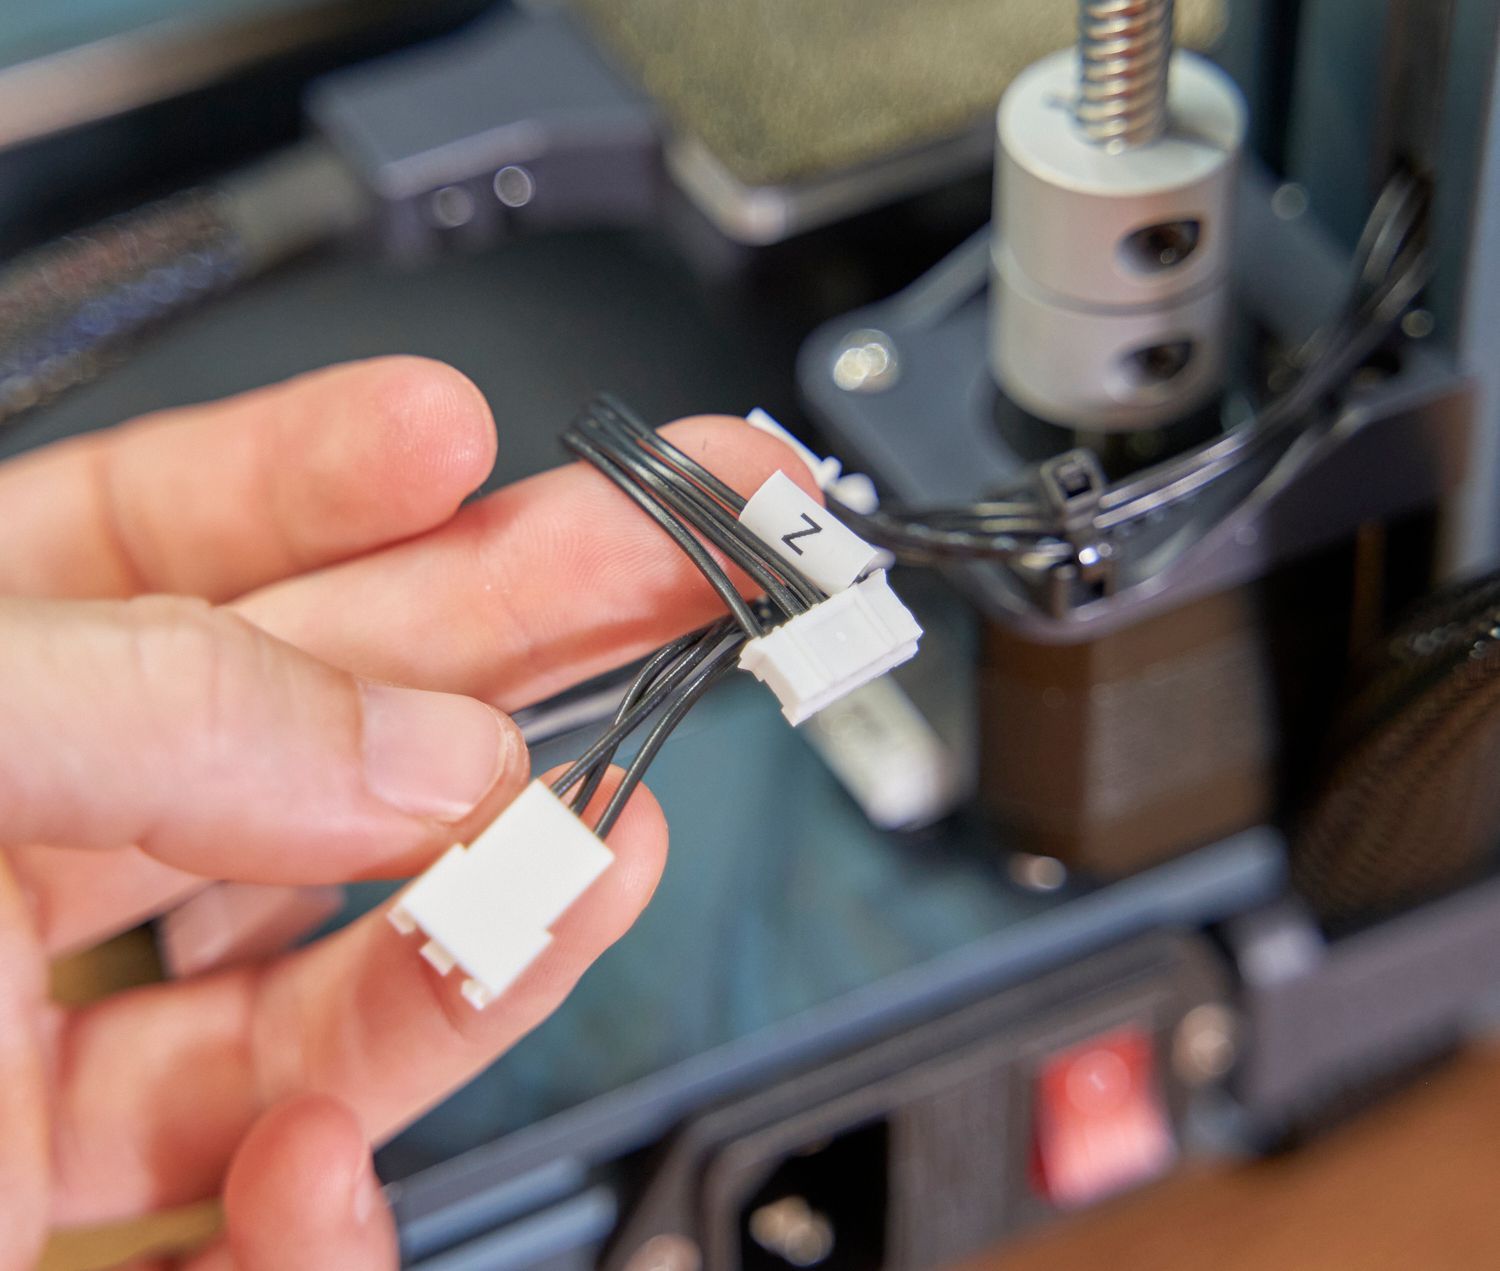
Electronics
On the subject of electronics, each wire for the various motors and sensors has been meticulously placed around the machine, awaiting connection right beside the appropriate component.
To prevent any confusion in the process, each cable is distinctly labelled and features a unique connector size. The instructions were hardly necessary, as the setup was so intuitive that I only needed to double-check for any missed connections.
Instruction manual
The instructions are concise and mostly in a pictorial form, they also are now only supplied digitally on the USB drive. I had no problem consulting them. Elegoo have improved the section on levelling your printer since the Neptune 3 which is great to see. Take a look at the manual yourself if you would like - I have linked to it for your personal perusal.
Elegoo has gone the extra mile by providing a useful video tutorial for the assembly process, conveniently included on the memory stick that comes with your new printer. Much appreciated, Elegoo! 😊
First Print
Levelling the Printer Bed
The printer seamlessly measures the height of the print surface across a vast grid of 121 separate points. It then uses this information to calculate a precise mathematical model of the surface which is used while printing to offset any warping of the print bed.
After the automatic routine is complete, you only need to set the layer height of the first layer. Achieving this is a breeze as it only requires you to slide a regular piece of paper back and forth under the nozzle. As you lower it using the touchscreen, you will feel a slight resistance.
The entire process is not only incredibly easy but also precise. No further adjustments were required when making the subsequent test prints.
Loading the Filament
The Elegoo Neptune 4 printers both carry over the Neptune 3's improved filament loading process. It's a case of passing the filament effortlessly though the detector at the top of the gantry, pressing the comfortable lever on the top of the print head before inserting the filament a few cm's and then releasing.
All that is left to do is to heat the nozzle using the touchscreen (Elegoo provides a handy set of presets for common materials) and pressing load.
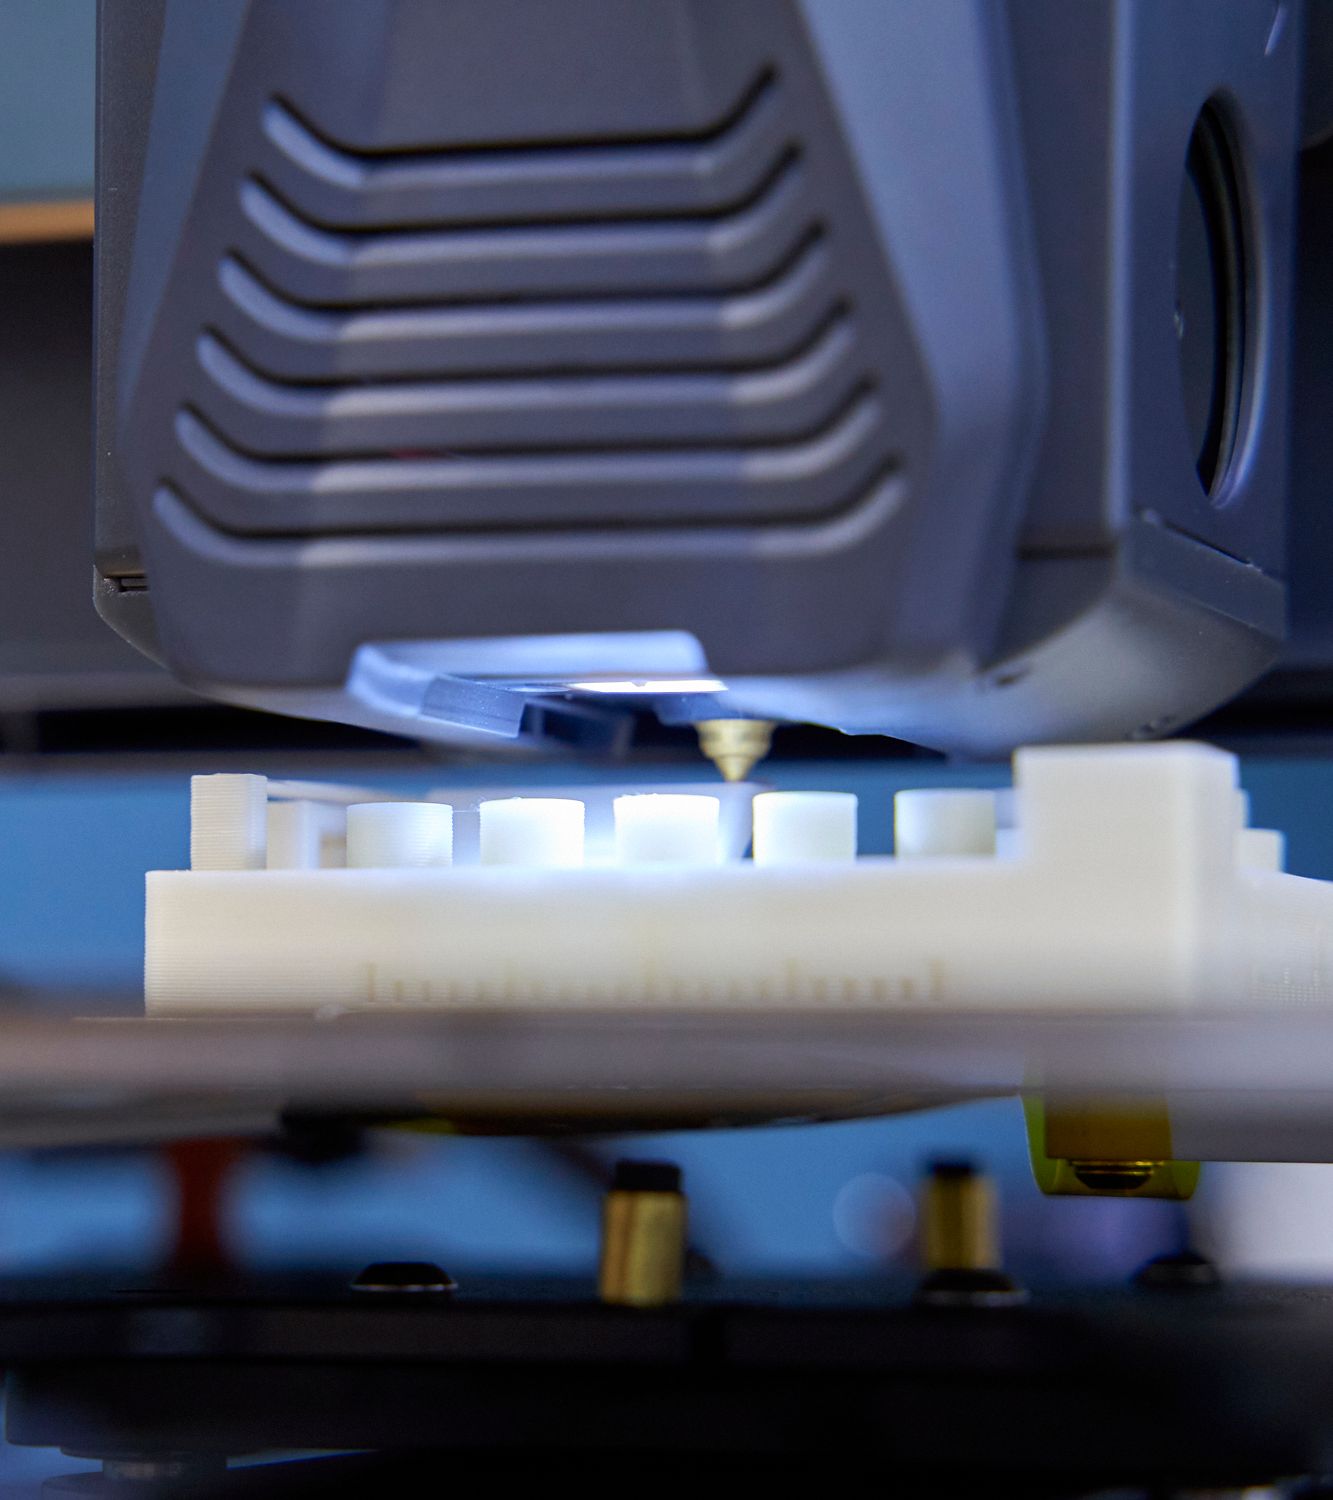
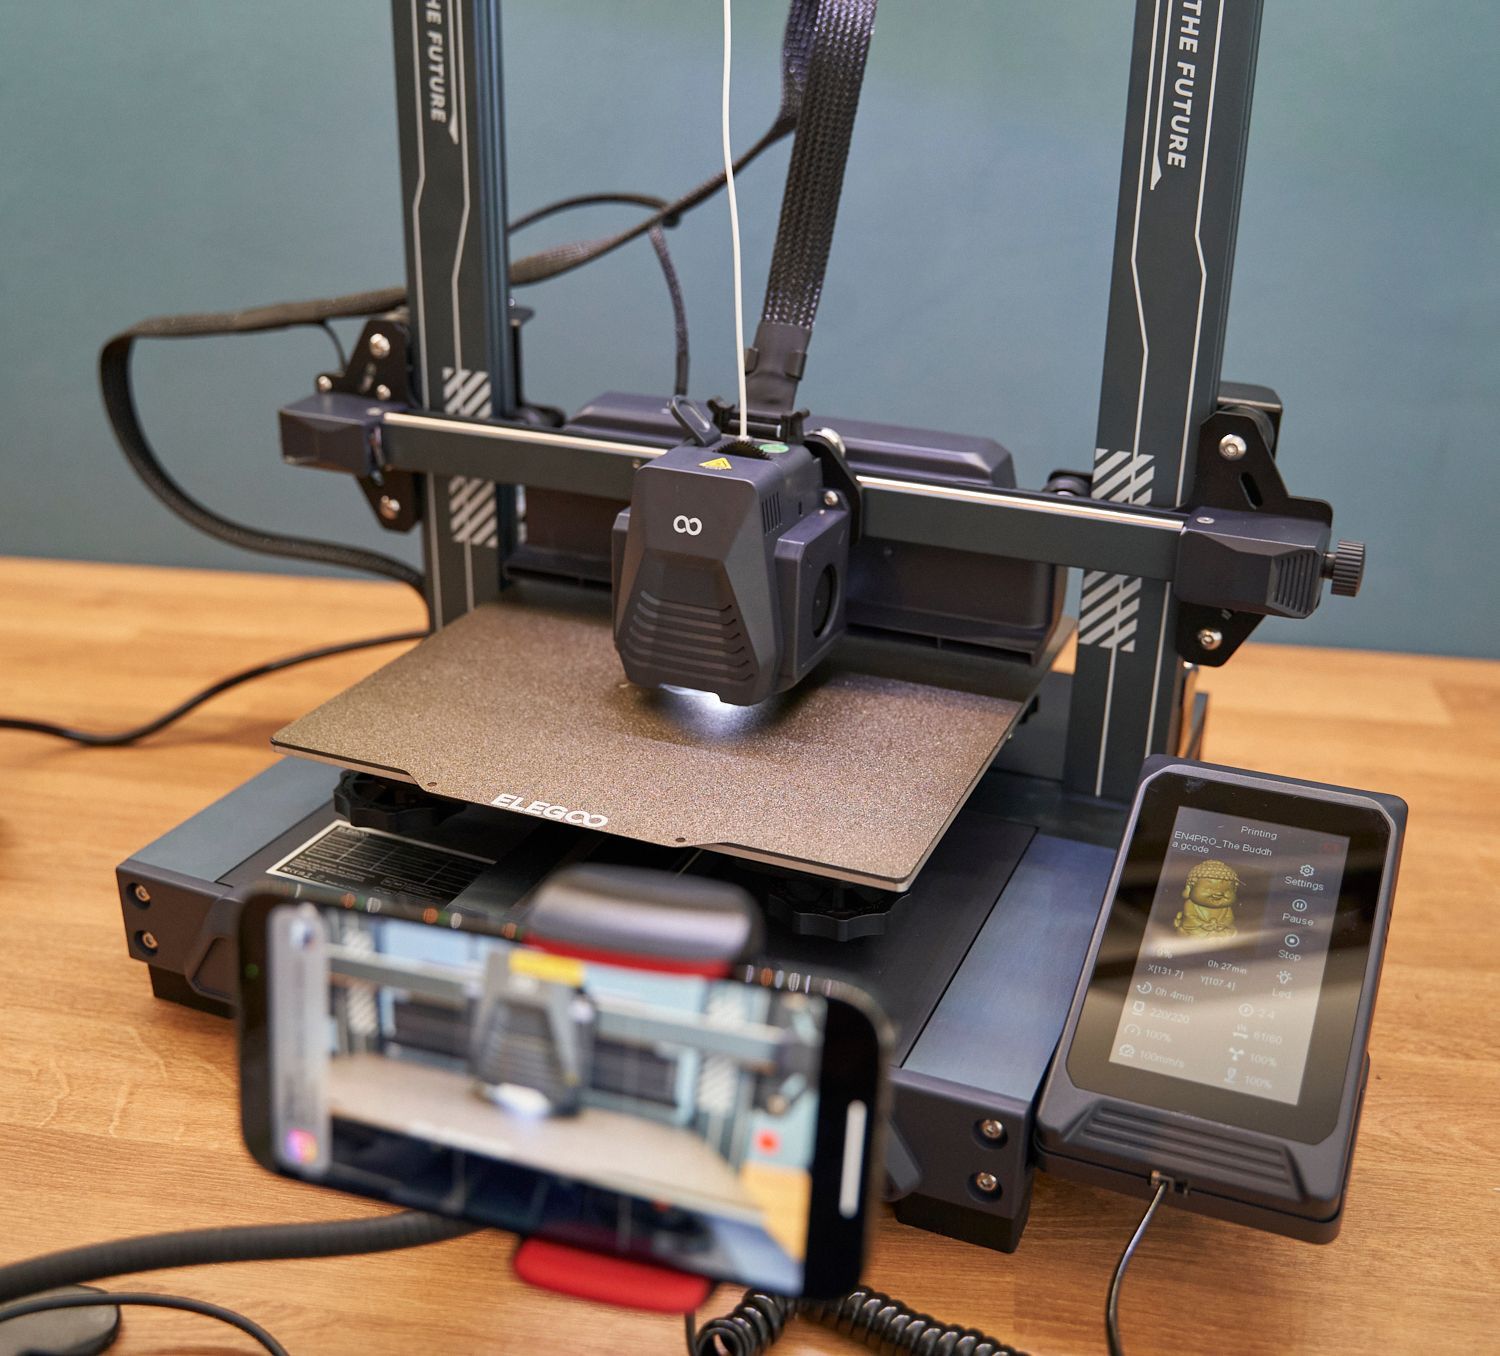
Printing the included Sample Model
As a part of the package, it is recommended to start with the sample model file included in the memory card along with the PLA filament sample. To begin, select the file from the touchscreen and the printer will start the heating process for the print bed and nozzle. During the print, the display will show useful information such as the remaining print time, an image of the finished print (generated by the slicing software), and the option to make adjustments if necessary during the print process.


Click on either of the photos of the sample print to view a larger size and judge the quality for yourself. I am very impressed. It was printed at a 0.15mm layer height. No lifting or warping of the base occurred and extrusion appears to be consistent. Nothing unexpected here.
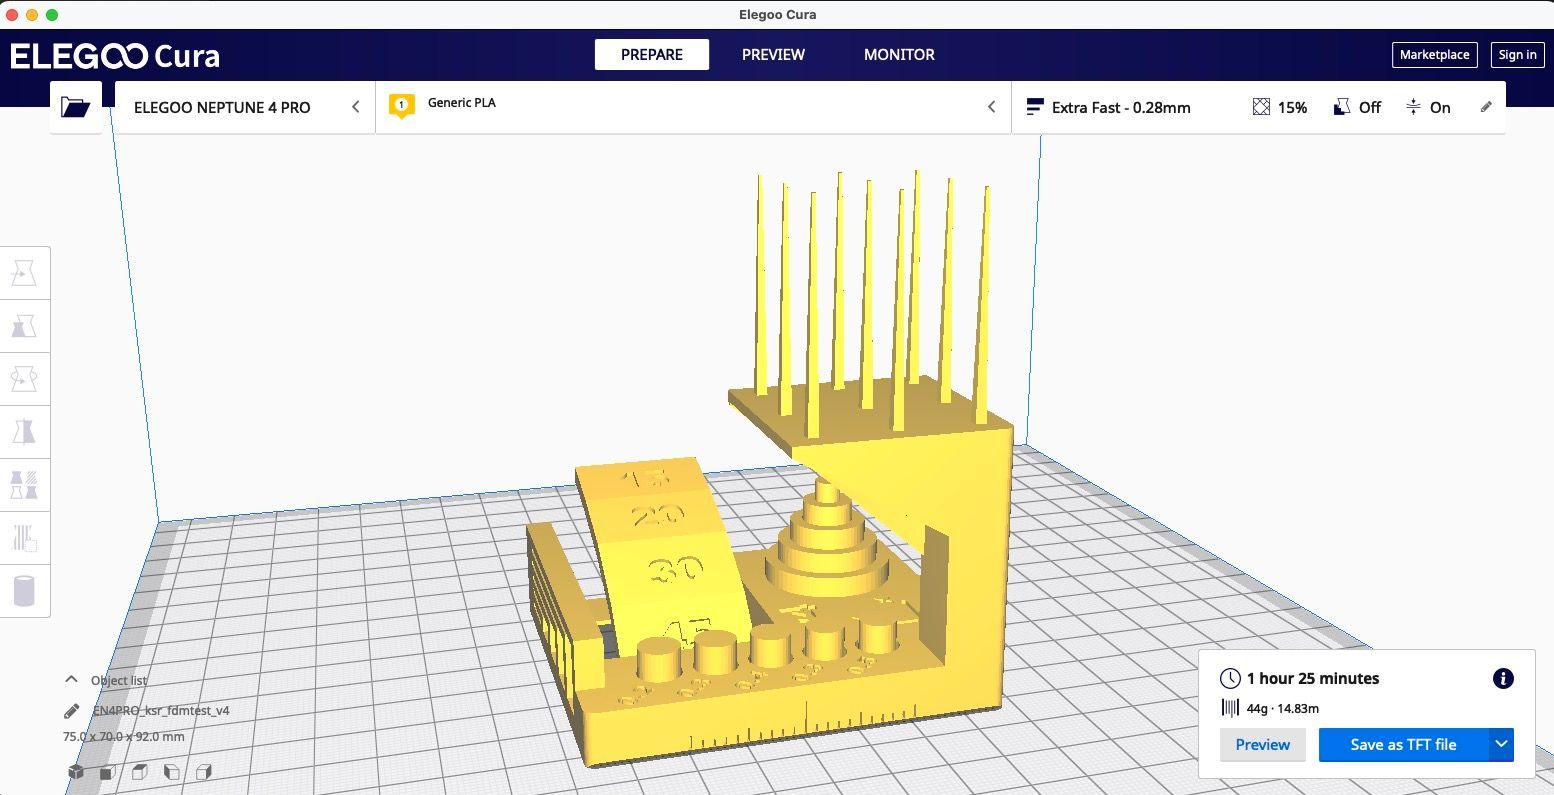
Torture Test
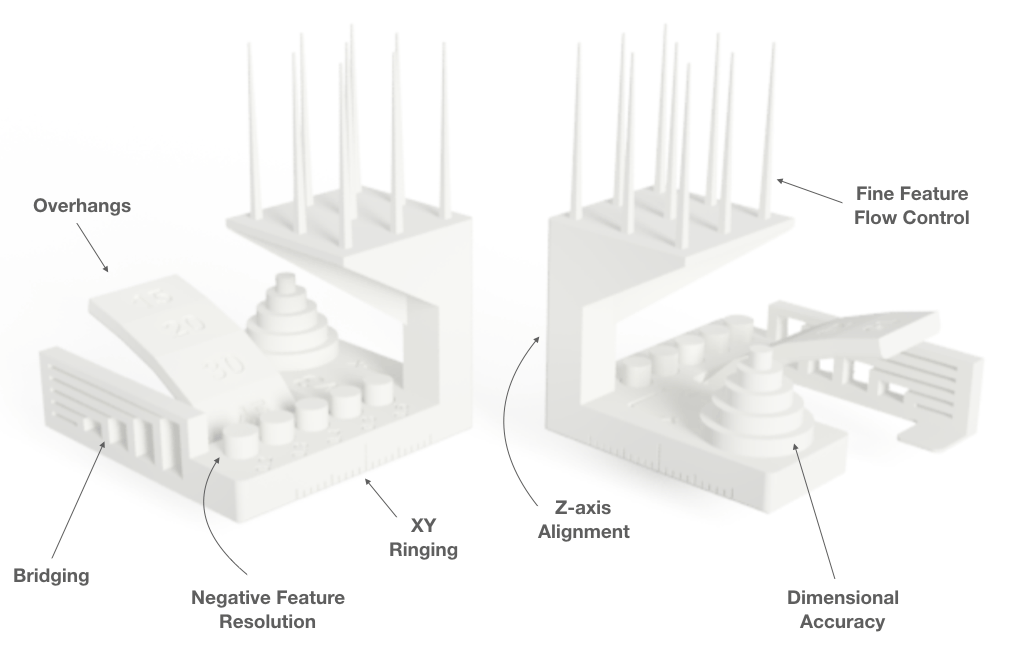
A mere print of Elegoo's preselected model would not suffice for a comprehensive review. Naturally, they would have selected a model that falls within the machine's capabilities.
Therefore, I have opted to print a torture test instead. The torture test, created by AutoDesk and Kickstarter, is my go-to for all FDM printer reviews as it enables me to thoroughly test the machine's limits in overhang, bridging, and retraction abilities. Moreover, it provides a fair and convenient basis for comparison.
Don't forget to click on any image to open a higher resolution copy to inspect for yourself.

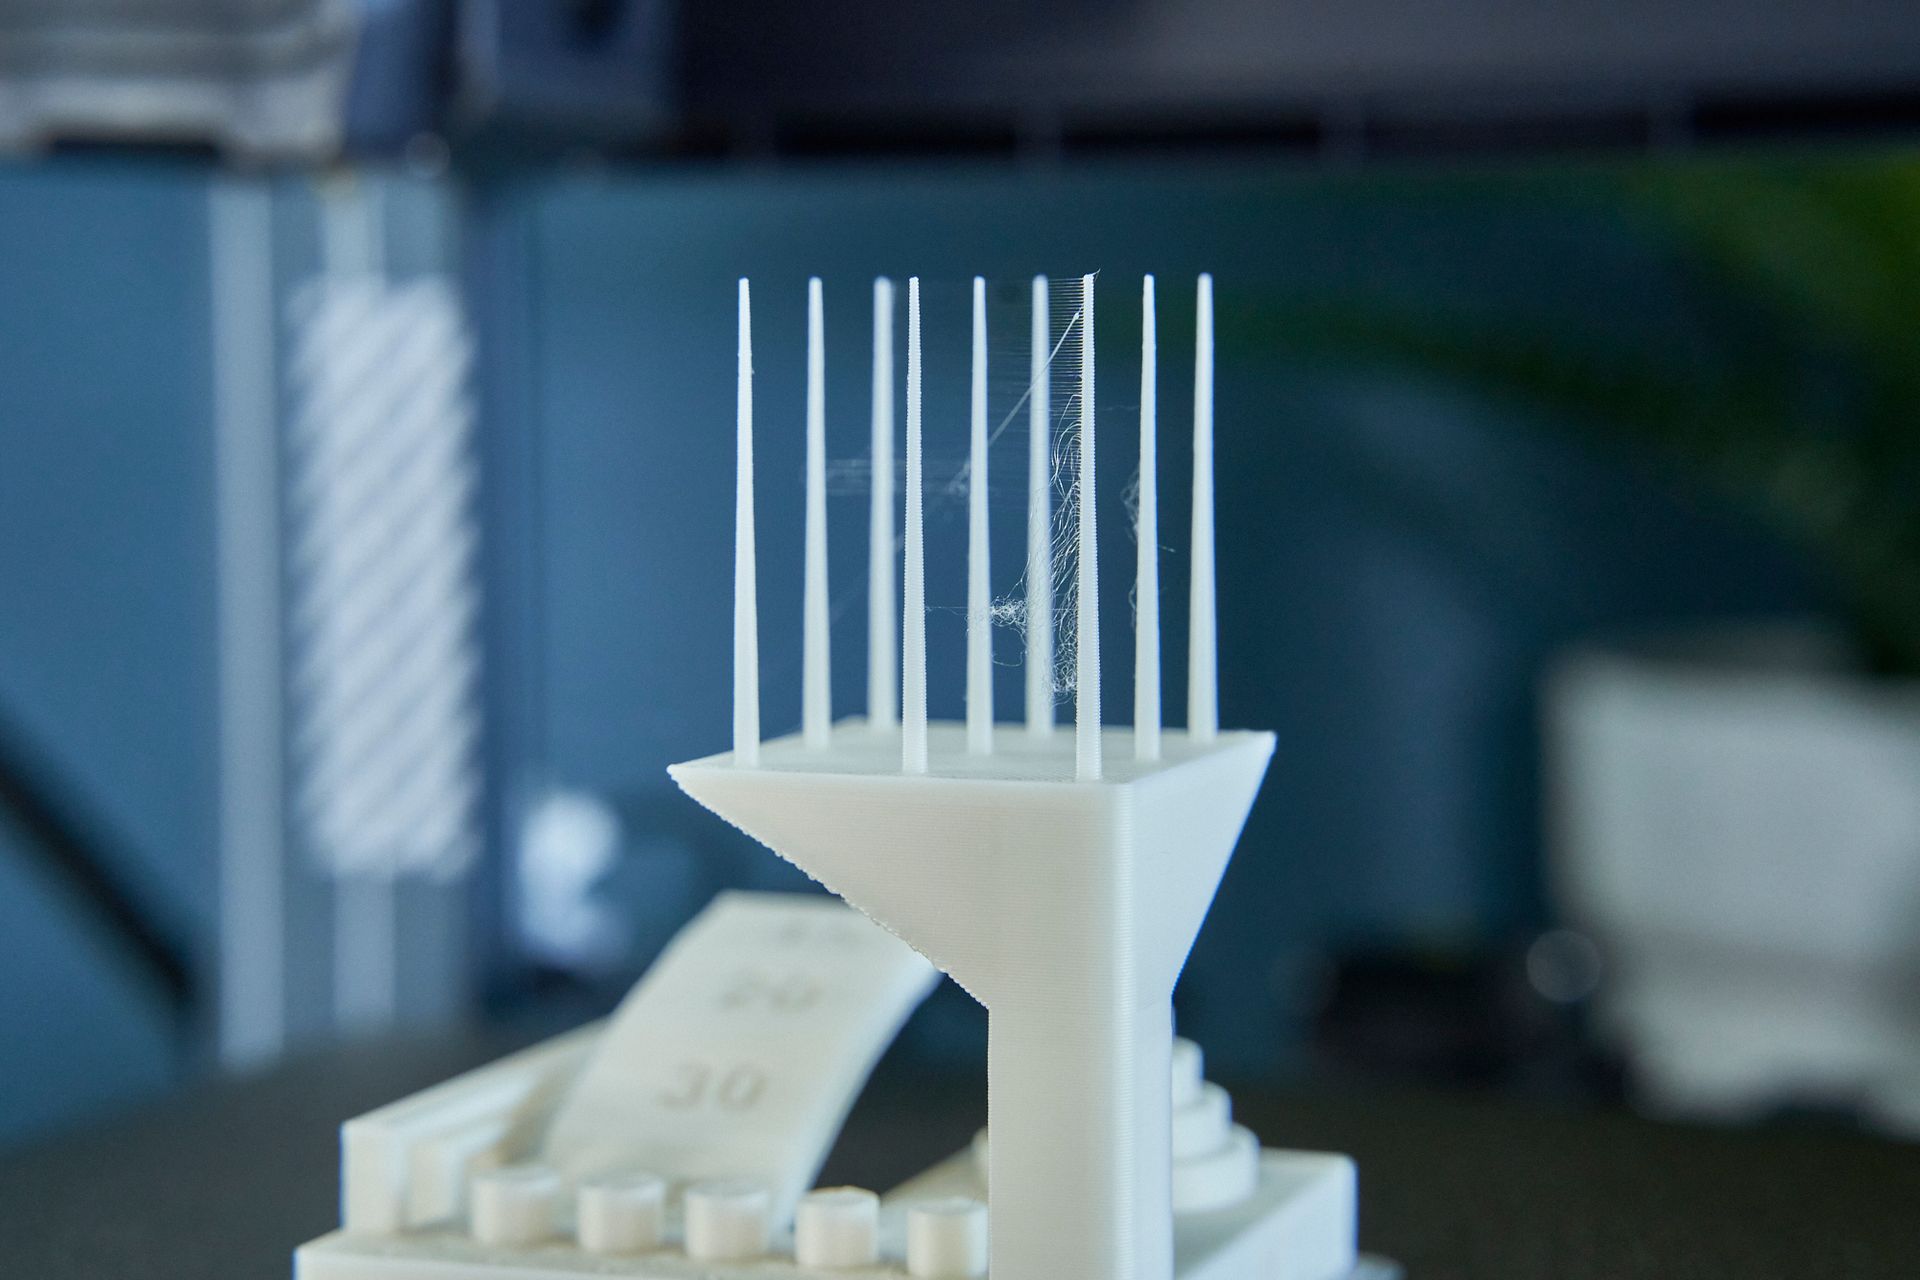


I must say, I am thoroughly impressed with the outcome of the print, especially considering it only took 1 hour and 25 minutes! The print was executed at a 0.28mm layer height with optimal speed, resulting in minimal stringing and superior performance compared to previous Elegoo machines.
I accredit this success to the exceptional airflow provided by the four additional gantry mounted fans, which efficiently cooled the filament. Additionally, all of the cylinders printed for the negative object tolerances were removable, except for the 0.3mm one which required a little wiggle to extract. The bridges remained separate and the overhangs were remarkably clean, even at 45º angles and still fully functional at greater angles tested.
Software
Elegoo have customised a copy of Cura to be used as a Slicer for preparing your prints to be printed. If you're not familiar with Slicing Software then it's the middle stage which takes your computerised 3D models and 'Slices' it into individual layers, usually 0.15mm or 0.2mm in height. Each one of these layers is then prepared as a series of paths for the printer to follow before it raises its print head for the next layer.
The software can have as much an impact on print quality as the hardware itself. They go hand in hand. For example it's the Slicers responsibility to calculate support structures if required and deal with the acceleration and deceleration of the print head in order to balance the need for a desirable print speed without introducing print artefacts into the finished model.
The version of customised Cura included on the memory card of my test machine was 4.8. Cura is currently on version 5.3.1 and as such it prompted me to update. I obliged only to realise that the latest version of Cura did not contain the printer profiles for many of Elegoos latest printers including the Neptune 4 or Neptune 4 Pro.
Perhaps they will include it in the future? This means that, for now, we cannot benefit from the latest slicing software beyond version 4.8, which is a limitation for those looking to maximise their print quality. The importance of having up-to-date software cannot be overstated, particularly in the ever-evolving world of 3D printing. It is crucial to stay on top of the latest software updates and printer profiles to ensure that you are getting the most out of your hardware.
Final Thoughts
I would recommend this printer as it is affordable, high-quality and fast.
After BambuLabs released their speed behemoth onto the 3D printing world, companies have been aching to catch up. As a reasonably priced 3D printer for hobbyist to 3D Print farm enthusiast, Elegoo Neptune 4 puts its stamp on the market.
So what do I think of the new Elegoo Neptune 4 and Neptune 4 Pro? They look sleek, just as good if not better than the Neptune 3 Pro. And like the Neptune 3 Pro, they've ditched the Bowden tube and added an extra stepper motor to the frame, plus the power supply is built right into the base.
But it's not just about looks, these printers have some serious power. With four new additional fans, printing is significantly faster and the quality is better than ever. Just be warned, they can be a bit loud! In my testing, they averaged 63dB from about 50cm (59.6dB with the new fans disabled).
The best part? These printers are super user-friendly. Changing the filament, clearing the print bed, and starting a new print are all a breeze. And with the continued ability to change nozzles and a large touchscreen interface, you have complete control.
And let's talk about Elegoo's integration of Klipper. It's seriously impressive! Plus, with the new networking abilities and remote monitoring, managing your printer(s) has never been easier.
Where to buy:
- Amazon: Elegoo Neptune 4 Printers
- 3D Jake (they usually have stock): Elegoo Neptune 4 -or- Neptune 4 Pro